Installing the PrinterLogic client
**These instructions will NOT work in Edge must use Chrome and/or Firefox**
UCA computers should have the PrinterLogic client already installed, indicated by the PrinterLogic icon in the system tray ( ). If your computer does not have the client, follow these steps to install it.
-
- In your Chrome or Firefox browser, go to printers.campus.uca.edu. If you are using Google Chrome and it asks you to install a Chrome extension proceed to these instructions.
- If the client is not installed, a message will appear asking you to install the client. Click Install.

-
- Save and run the installation file. If a message appears asking to run the executable file, click Run.
- Complete the wizard to install the client.
- When the installation is complete, the PrinterLogic page will refresh. If a message appears asking whether or not to allow the PrinterLogic page to run the client, click Allow.

Installing the PrinterLogic Chrome extension
If you use the Google Chrome browser, you will need to install the PrinterLogic Chrome extension in order to install printers.
-
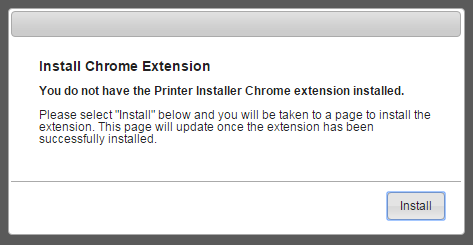
- In Google Chrome, go to printers.campus.uca.edu. A message will appear if the extension is not installed. Click Install.
-
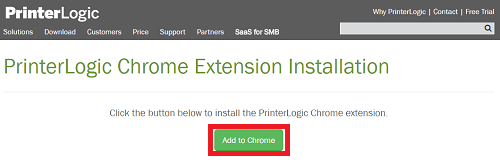
- Once redirected to the PrinterLogic website, click Add to Chrome.
Installing a printer
-
- Make sure the client or Chrome extension is installed (see steps above). In the lower-right corner of the screen (in the system tray), click the PrinterLogic icon () to open the list of available printers. -OR- In your browser, go to printers.campus.uca.edu.
- Click the folder UCA, and then click the folder FS (for faculty/staff printers) or Student (for students). You may only see one of these options, depending on your classification at UCA.
- Click the folder for the desired building from the alphabetical list.
- Each building folder has printers and copiers associated with it. Click the printer or copier from the list you wish to install on your computer.
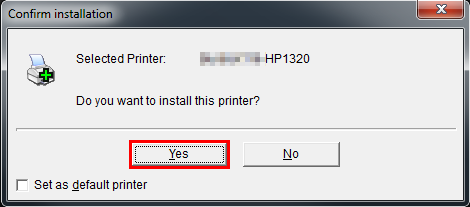
- A message will appear asking if you would like to install the printer. If you want the printer to become your default printer going forward, select the checkbox Set as default printer. To confirm the installation, click Yes.
-
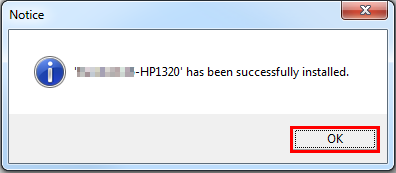
- When the printer is installed, a message will appear saying so. To finish the process, click OK.
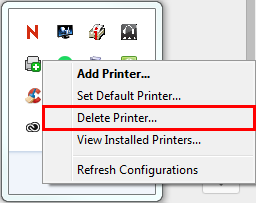
Uninstalling a printer
-
- In the lower-right corner of the screen (in the system tray), right-click the PrinterLogic icon (), and then click Delete Printer.
-
- In the list that appears, click to select the printer you wish to delete. With the printer select, click Delete Printer.
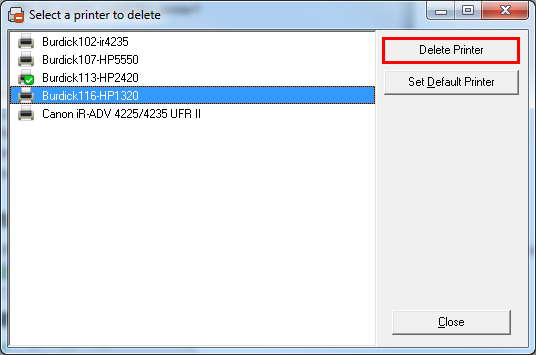
- When the message appears asking if you would like to delete the printer, click Yes.