Learn how to create a Top Hat student account, join a course using a 6-digit Join Code, redeem an access key, or sign in with Single Sign-On (SSO). This guide walks you through every step of the enrollment process, from creating your account at tophat.com to joining a course via invitation, Learning Management System (LMS) link, or redemption code.
Whether you're using SSO, an emailed course invite, or a bookstore access key, you'll find everything you need here to access your Top Hat course, interactive textbooks, and classroom content.
Table of Contents
- Creating a Student Account
- Single Sign-On (SSO)
- What's Next
- Redeeming an Access Key
- Accepting a Course Invitation
Creating a Student Account
Step 1: Visit tophat.com (opens in new window) and select "Create Your Account" either from the upper right corner or under the Student menu.
 Image: Top Hat Home Page with "Create an Account" menus indicated
Step 2: Search for your school or choose "My University is not listed." (If you already have an account, click "Log In Here.")
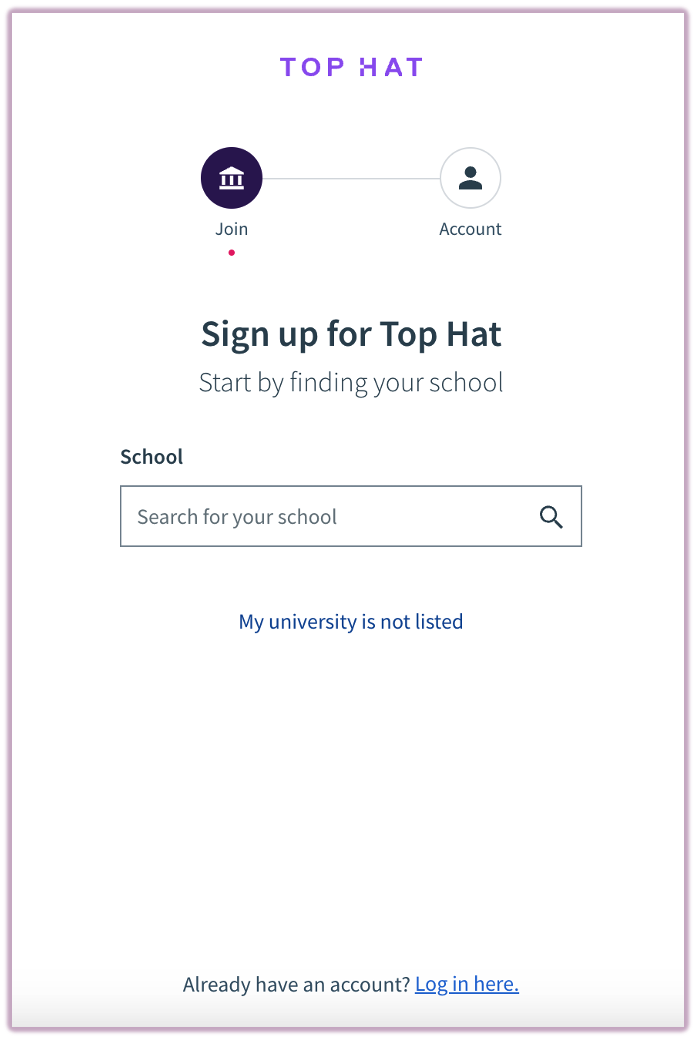 Image: Menu directing users to select their school from the search menu
Note: If your school uses Single Sign-On (SSO), follow the SSO instructions below. Enter your email address, agree to the terms and conditions, and proceed. You will receive a verification email.
Tip: Check your spam/junk folder if you don’t see it. Troubleshoot Missing Emails
Step 3: Enter your First and Last Name. Create a password and agree to the Terms of Service and Privacy Policy to finalize the account creation process.
 Image: Sign up menu indicating the First and Last Name, Email and Terms of service fields.
Single Sign-On (SSO)
If your school uses SSO:
Step 1: After selecting your school, click "Sign-up as a student" under "I’d like to create a new account."
Step 2: Follow the same steps to enter your personal information and create your account.
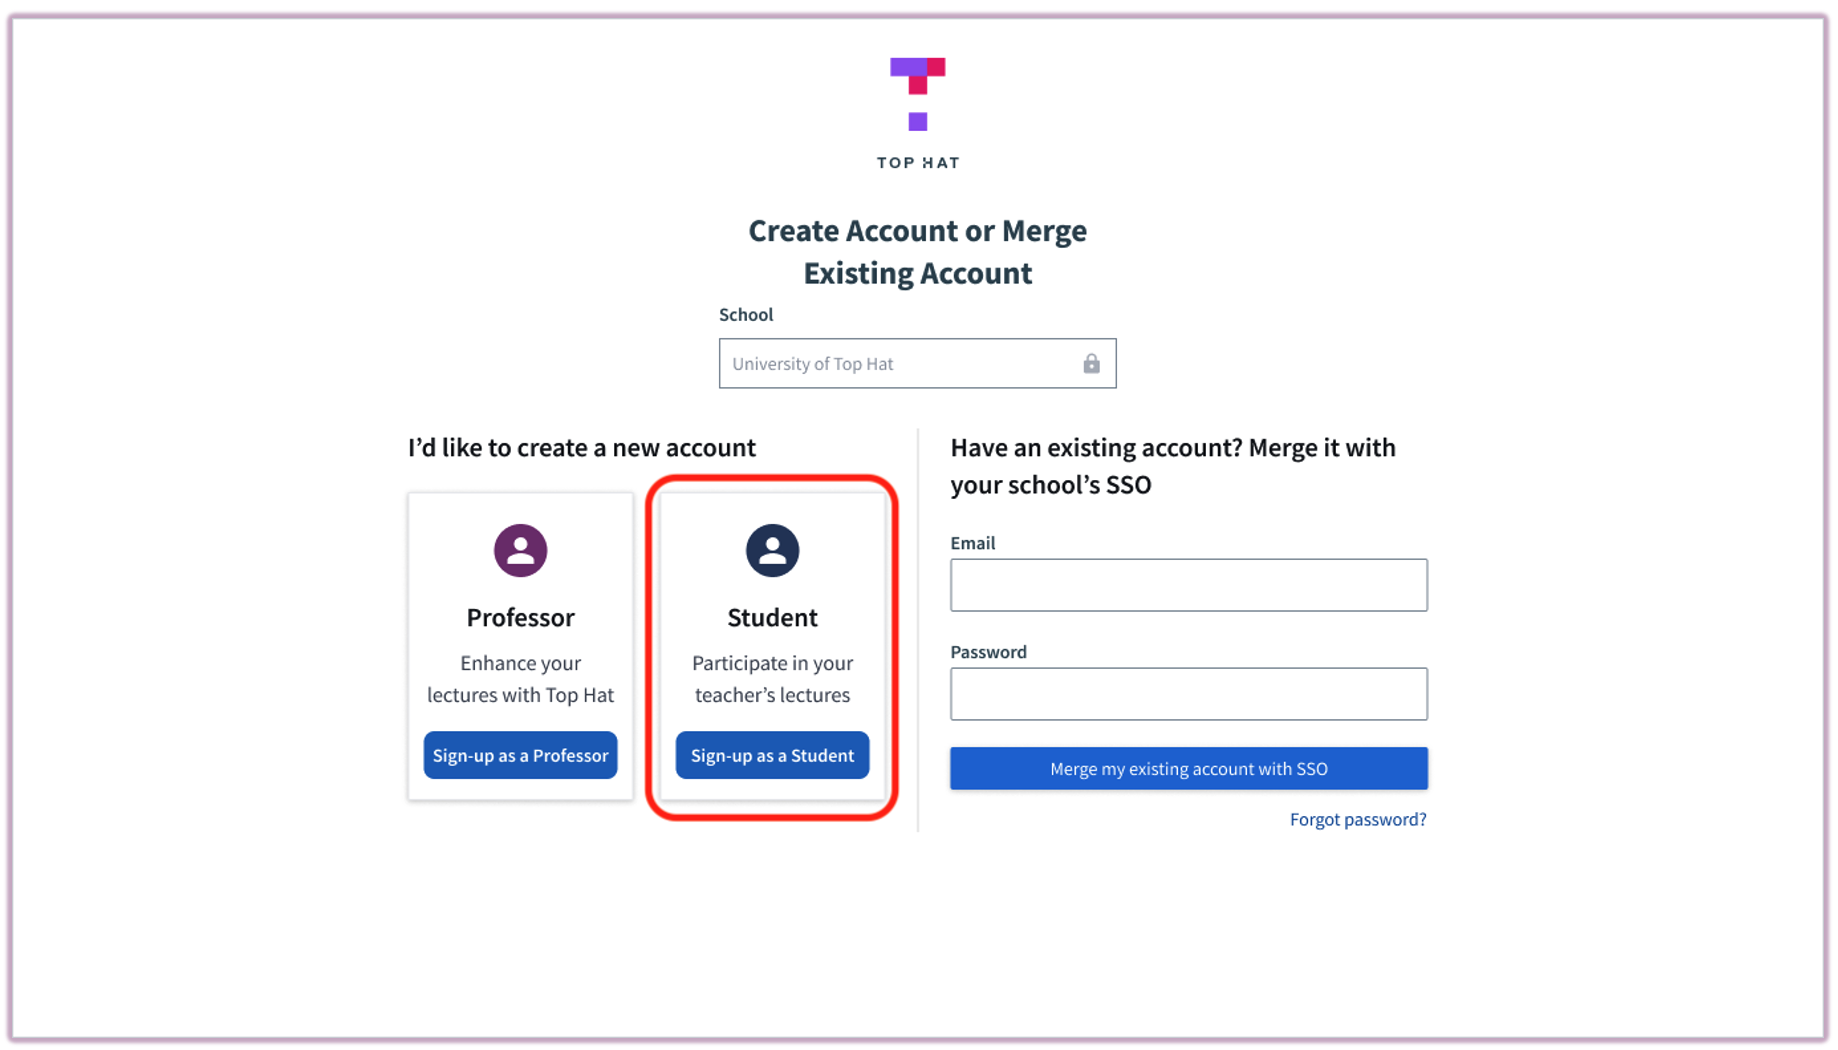 Image: Create Account or merge Existing Account menu in Top Hat
What's Next
Join a Course:
- Enter your instructor’s Six-digit Course Join Code.
- Ensure you’re enrolling in the correct course section (especially if multiple sections exist).
- Learn more about LMS Integration
 Image: Join a Course menu - Search by name or Join Code
Redeem an Access Key:
- Enter the access key provided by your instructor.
- Confirm the details and click "Continue".
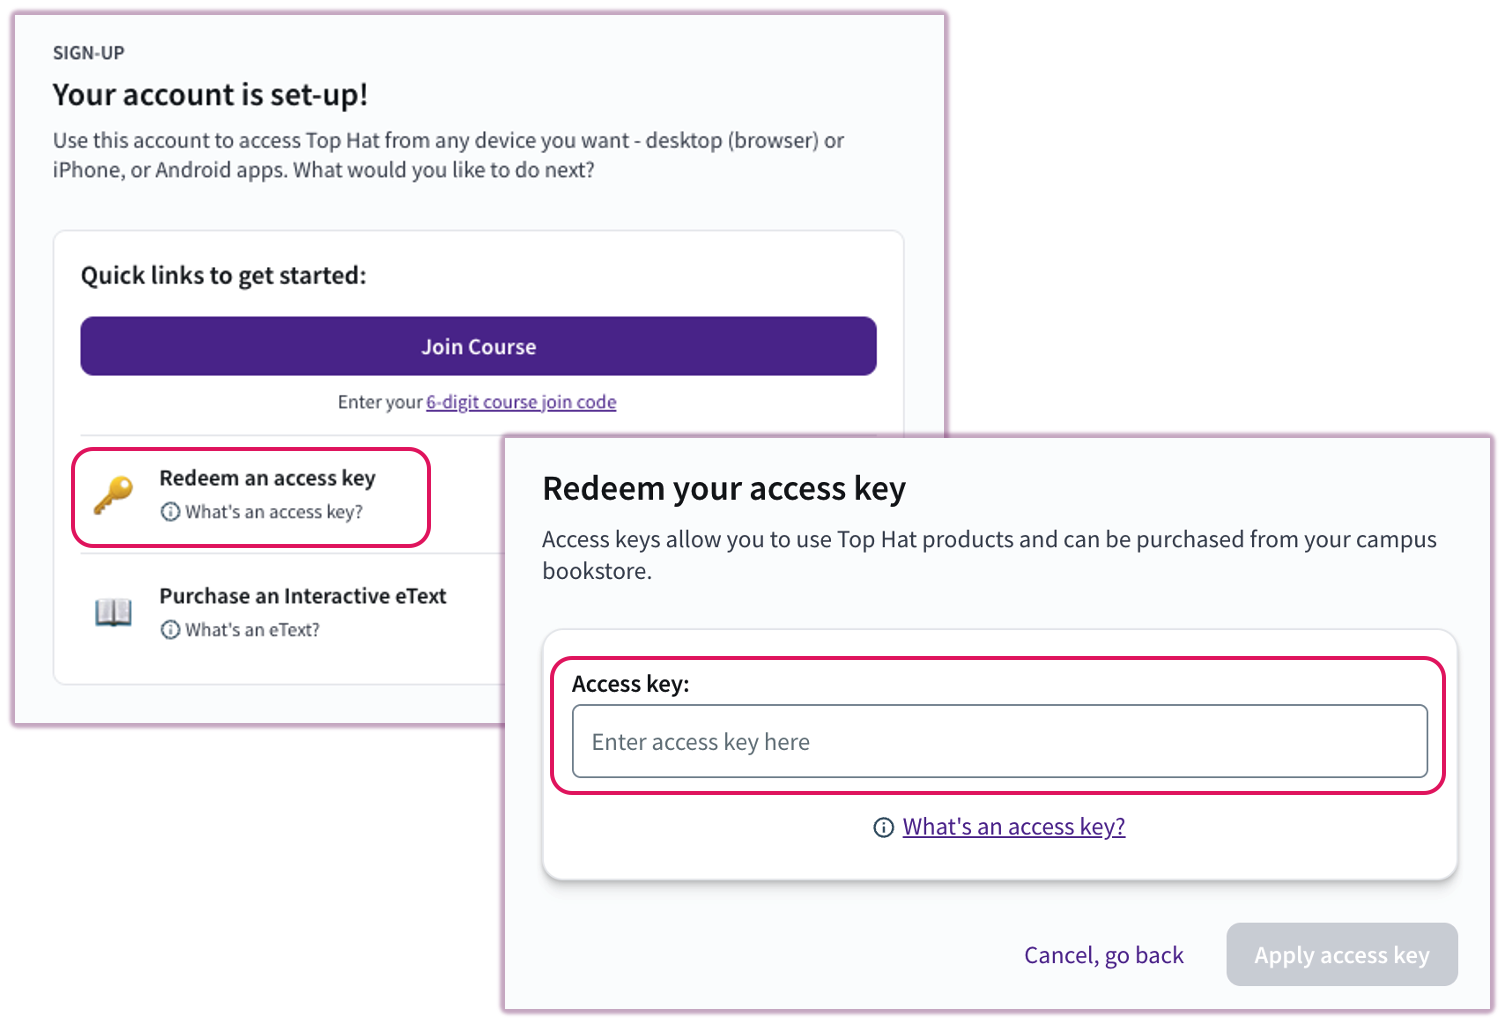 Image: Redeem an Access Key menu
 Image: Join a Course menu after redeeming an Access Key for a product
Purchase an Interactive eTextbook:
Redeeming an Access Key
Step 1: Select "Redeem an Access Key" on the account dashboard.
Step 2: If you have a Redemption Code (from your campus bookstore), redeem it using the instructions provided by the bookstore.
Step 3: If the key is tied to a specific course:
- Enter the Course Join Code or search for the course.
- Ensure you’re selecting the correct semester/section.
Accepting a Course Invitation
Step 1: Open the email titled "Your professor has invited you to Top Hat."
Tip: Check your junk/spam folder if you don’t see it.
Step 2: Click "Join Course" in the email.
 Image: Course invitation email from Top Hat
Step 3: Choose:
- Create Account if you don’t have one yet.
- Log In if you already have an account.
- Follow the steps to finalize your account. No additional verification email will be sent when accepting a course invite.
Once your account is set up, you’ll be directed to your Course Lobby, where you can access all your courses and materials.
 Image: Enrollment landing page from email invitation
Follow the instructions as outlined above to complete the Account Creation Process.