You can locate and post replies to discussion threads by either using the Discussions tool or the Content tool.
Video: Create a Discussion Post
View a discussion topic
The Discussions tool allows you to view all your discussion topics related to course materials.
To view all discussion topics
- On the navbar, click Discussions.
-
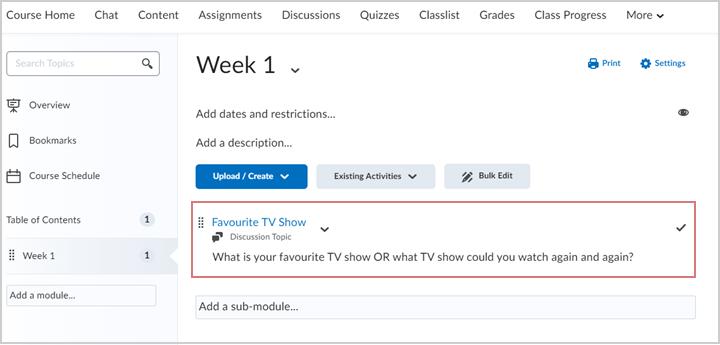
Click on the forum and the topic in which you want to subscribe to a discussion thread. In the example below, the discussion forum is "Astronomy," and the topics are "Week 1 Discussion" and "Class Discussion about the Big Bang Theory."
-
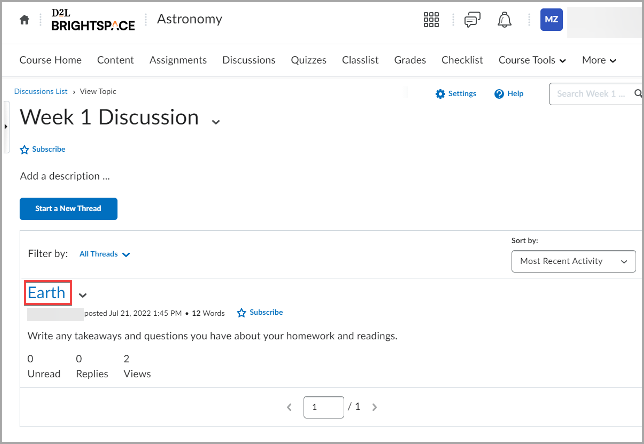
Click on a discussion you want to view. All the discussion threads are listed under a particular discussion topic. Click on a thread to view it.
 |
Note: In New Content Experiences, Overdue and Late indicators appear when deadlines are missed for due dates. Classic content will continue to show the due date on the content topic. |
View and post to a discussion from the New Content Experience
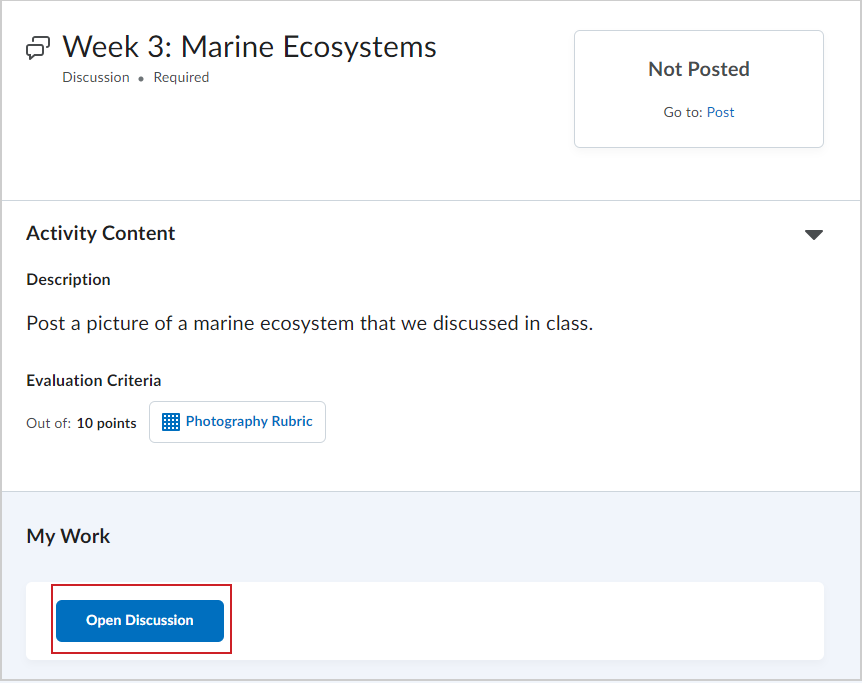
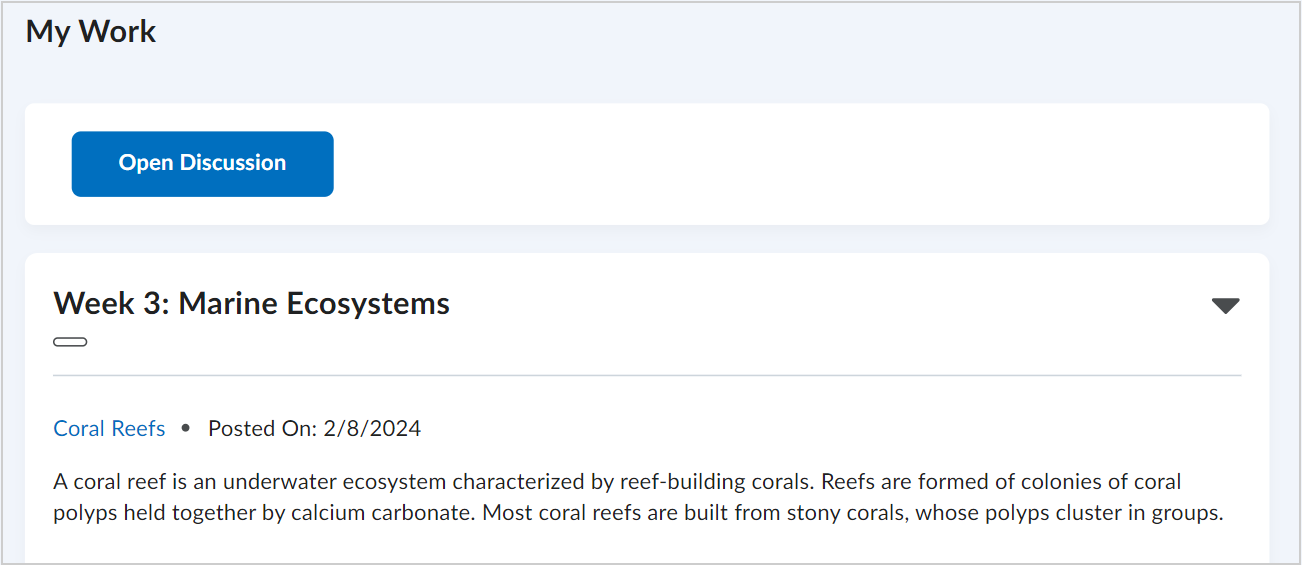
You can access discussions and create posts directly from the Content tool. You can view your discussion activities in the My Work section.
To view and post to a discussion from the New Content Experience
- Navigate to Content.
- Click the module where your discussion lives and click on the discussion.
- In the My Work section, click Open Discussion.
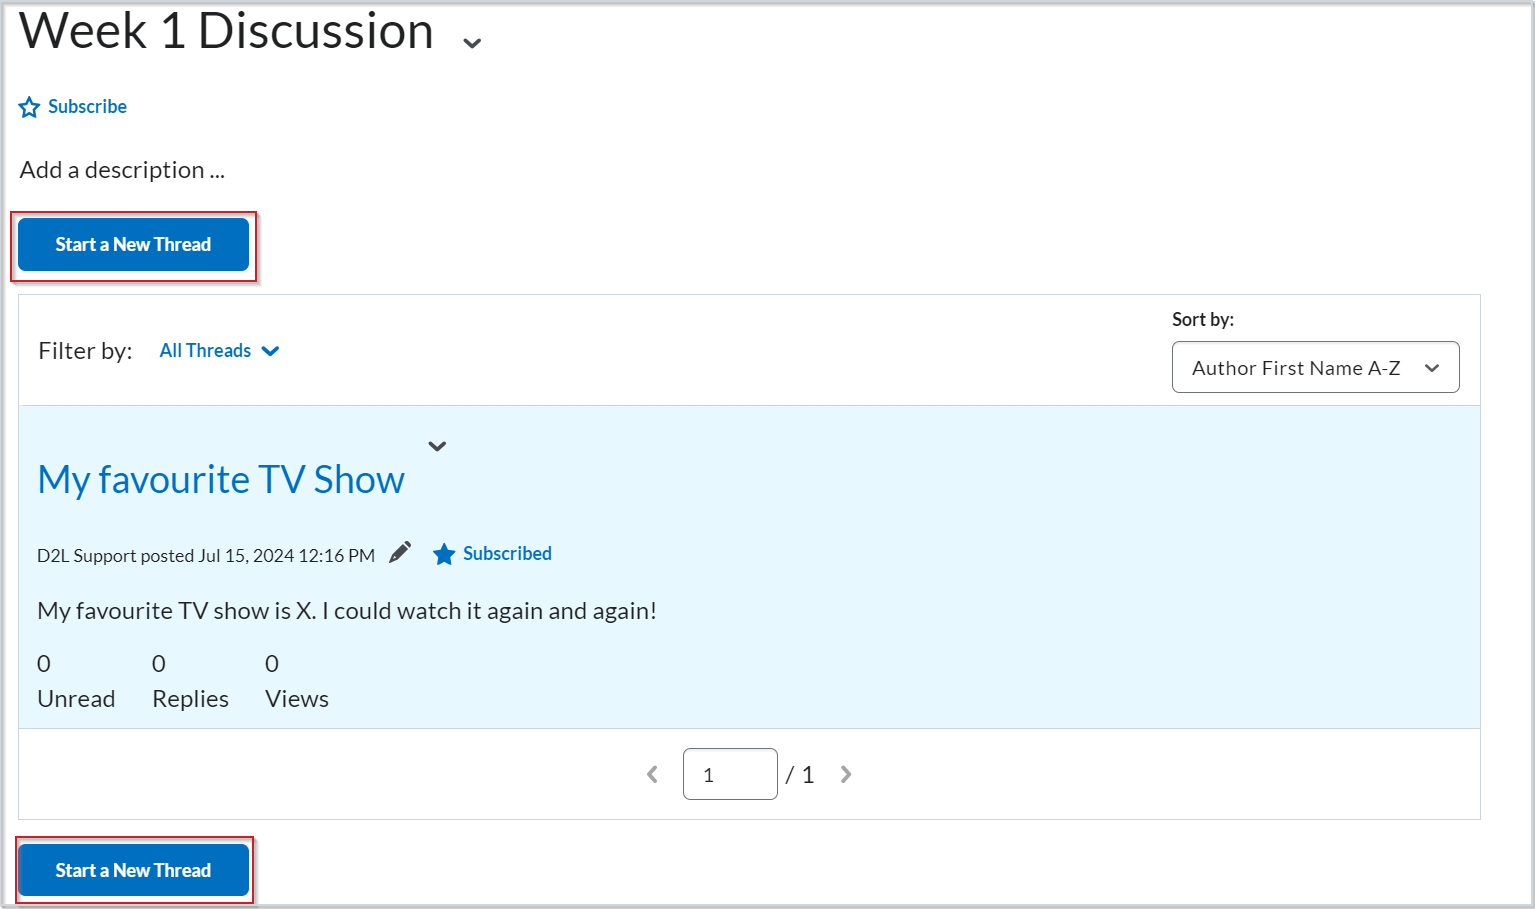
- On the topic page, click Start a New Thread.
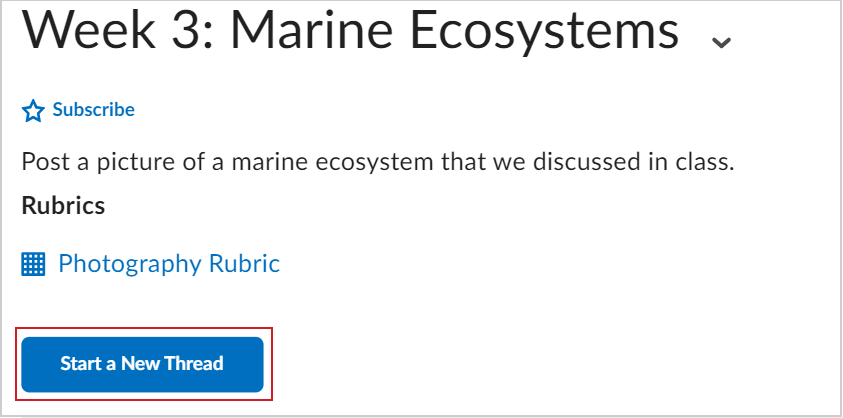
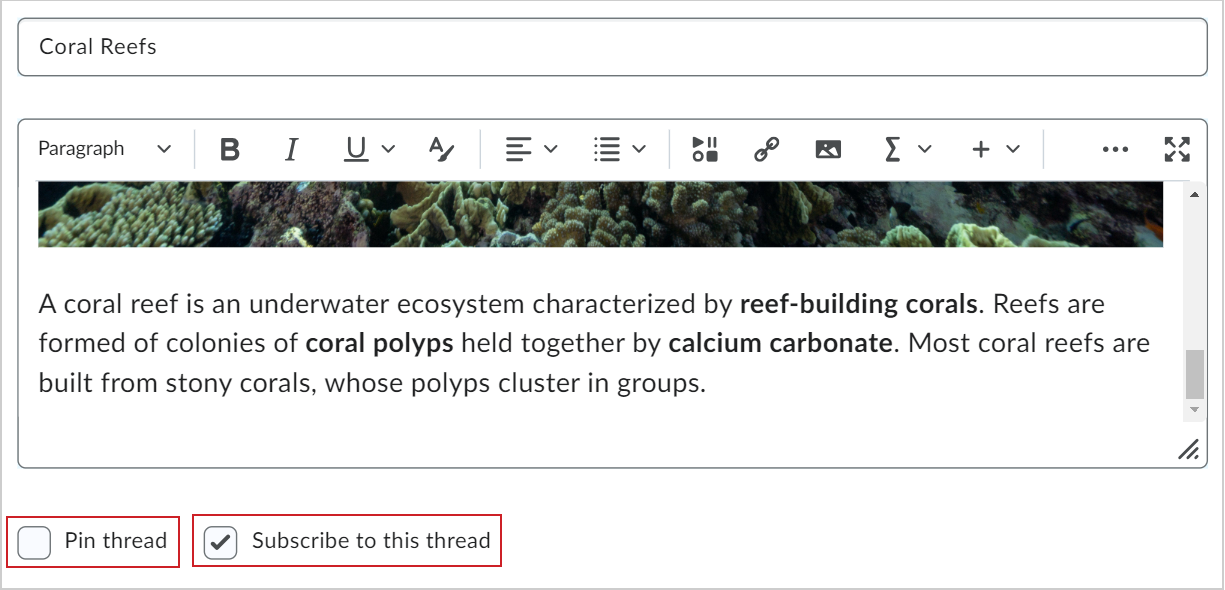
- Enter a title for your discussion post.
- Write your post using Brightspace Editor.
- Before posting, you can select or unselect the following check boxes:
- Pin thread: Your post appears at the top of discussion threads for you only.
- Subscribe to this thread: You receive notifications when another user interacts with your post.
- Click Post.
You have created a discussion post using the New Content Experience. In Content, your discussion post appears in your My Work section.
|
Note: In New Content Experiences, Overdue and Late indicators appear when deadlines are missed for due dates. |
Subscribe to a discussion
The Discussions tool allows you to subscribe to discussion threads and helps you stay updated on the latest course discussions and changes.
To subscribe to a discussion thread
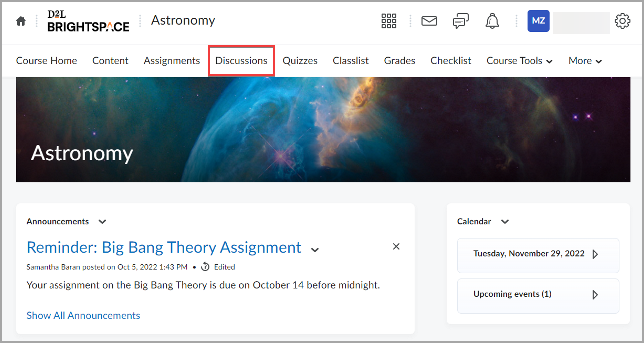
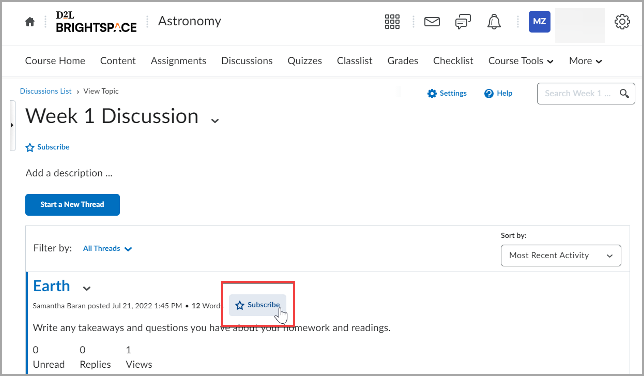
- On the navbar, click Discussions.
Figure: Click Discussions on the Course Homepage.
-
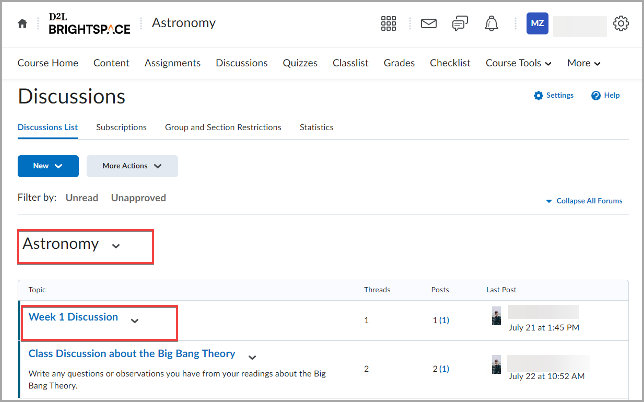
Click on the forum and the topic in which you want to subscribe to a discussion thread. In the example below, the discussion forum is "Astronomy," and the topics are "Week 1 Discussion" and "Class Discussion about the Big Bang Theory".
Figure: Select the discussion forum and topic to view.
-
Click Subscribe below the topic name.
-
Customize notifications for that topic by selecting one of the following:
- Show notifications in minibar only
- Send me an instant notification
- Include in my summary of activity
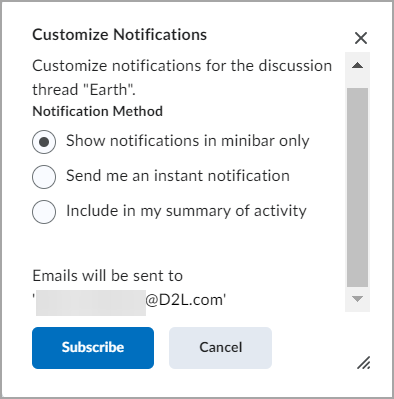
- Click Subscribe.
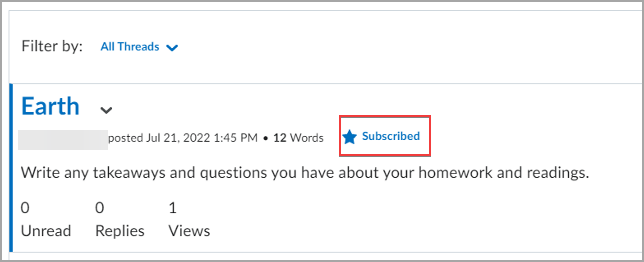
When you are subscribed to notifications of all threads, the topic becomes highlighted with the Subscribed label.
Unsubscribe from a discussion topic
The Discussions tool allows you to unsubscribe to discussion threads to no longer receive notifications about new posts in course topics.
To unsubscribe to a discussion thread
- On the navbar, click Discussions.
-
Click on the forum and the topic to which you are subscribed.
-
Click a particular topic to check the subscription status. The Subscribed status (the blue star icon) below the topic name indicates that you currently receive notifications of a discussion topic.
-
Click Subscribe below the topic name, and then click Yes in the opened window to confirm you are unsubscribing.

The topic status changes to Subscribe and you receive a "Topic unsubscribed successfully." message. You are unsubscribed to notifications of all threads inside this topic.
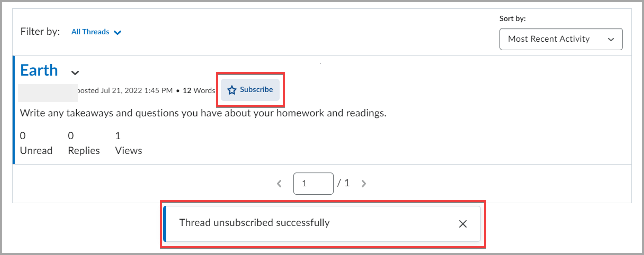
Figure: The "Thread unsubscribed successfully" or "Topic unsubscribed successfully" message appears once you unsubscribe. Click X to close this message.
Create a discussion thread
The Discussions tool allows you to post, read and reply to discussion threads on different course topics, share thoughts about course materials, ask questions, share files, or work with your peers on assignments and homework.
|
Note: A discussion post can have a word limit set by your instructor. Also, the formatting of the content is not preserved when the content is copied and pasted. It is recommended to submit content as attachments in the tool, which preserves document formatting. |
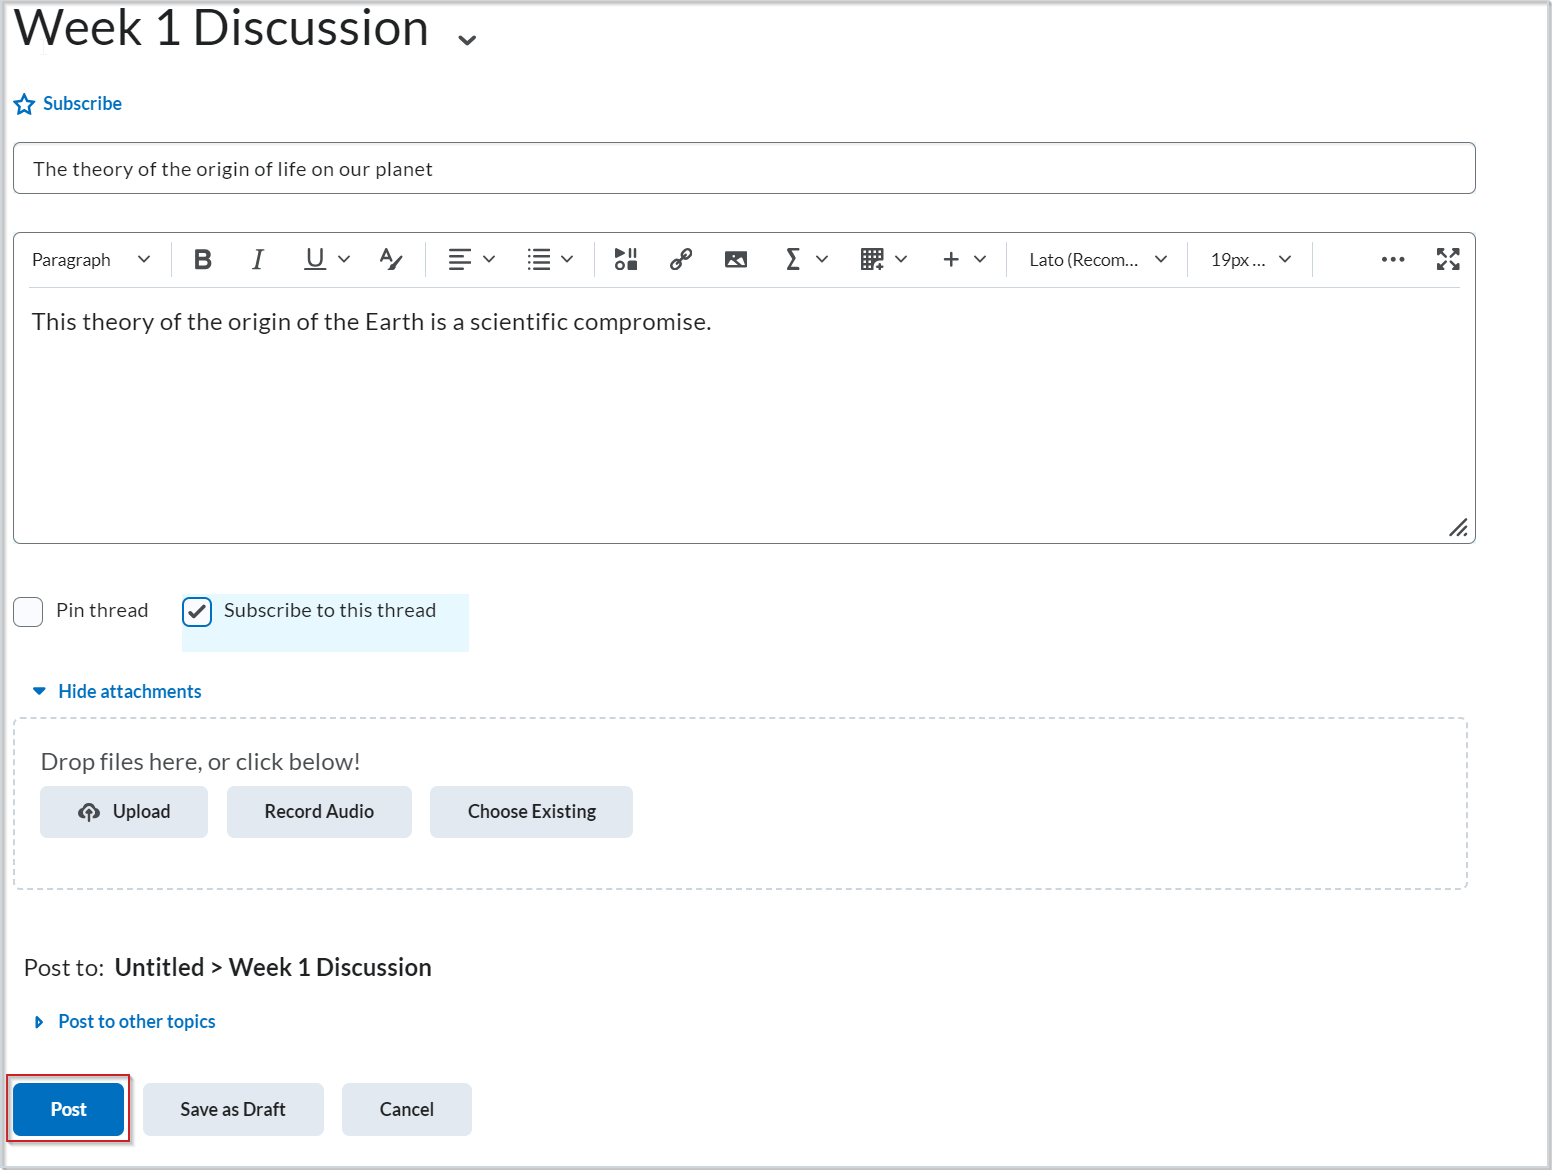
To create a discussion thread
-
On the navbar, click Discussions.
-
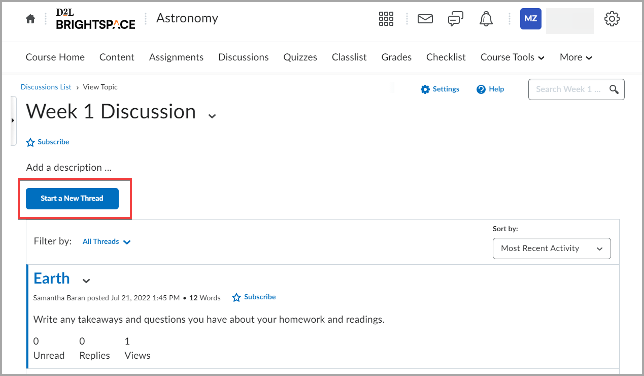
Click on the forum and the topic in which you want to create a discussion post.
-
Click Start a New Thread.
-
Enter a subject and your post information. You can set any of the following posting options:
- To keep the thread at the top of the list, select Pin Thread.
- To receive updates on the thread using your selected notification method, select Subscribe to this thread.
- To attach a file, in the Attachments area, click Browse to locate the file that you want to attach.
- To attach an audio recording, in the Attachments area, click Record Audio > Record. To adjust your microphone selection and volume, click Flash Settings. To listen to your recording, click Play. To erase your recording, click Clear. If you have prerecorded audio and are using a supported browser, you can drag audio files onto the attachments upload target.
- To attach a video recording, in the Attachments area, click Record Video > Allow > Record. When you finish recording, click Stop. To erase your recording, click Clear. To add the recording, click Add. If you have pre-recorded video and are using a supported browser, you can drag video files onto the attachments upload target.
- To post your thread to more than one topic, click Post to other topics. Click Add Topics. Select the topics that you want your thread to appear in. To post in every topic simultaneously, click Select All and then click Add Topics.
-
Click Post to publish, or click Save as Draft.
|
Note: If the topic is moderated, your post does not appear until a moderator approves it. |
Your post is visible pending moderation.
Add audio or video to a discussion thread
You can also add audio-video content to a discussion thread.
To add audio-video content to a discussion thread from Content
- On your course homepage, navigate to Content.
- In the module with your discussion topic, click the topic where you want to create a thread.
- Click Start a New Thread.
- Enter a title in Enter a subject.
- To attach an audio recording, in the Attachments area, click Record Audio > Record.
- To adjust your microphone selection and volume, click Flash Settings.
- To listen to your recording, click Play.
- To erase your recording, click Clear.
- If you have prerecorded audio and are using a supported browser, you can drag and drop audio files onto the attachments upload target or click Choose Existing.
- To attach a video recording, in the Attachments area, click Record Video > Allow > Record.
- When you finish recording, click Stop.
- To erase your recording, click Clear.
- To add the recording, click Add.
- If you have a prerecorded video and are using a supported browser, you can drag and drop video files into the attachments upload target or click Choose Existing.
- Click Post.
- Note: If the topic is moderated, your post does not appear until a moderator approves it.
Attach a file to a discussion thread
You can attach files (such as a text or image file) from your personal device to a discussion thread.
To attach a file to a discussion thread
- On your course homepage, navigate to Content.
- In the module with your discussion topic, click the topic where you want to create a thread.
- Click Start a New Thread.
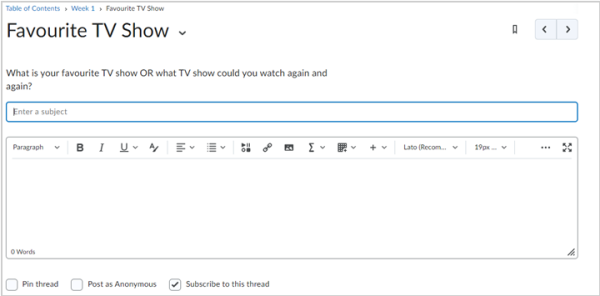
- Enter a title in the Enter a subject.
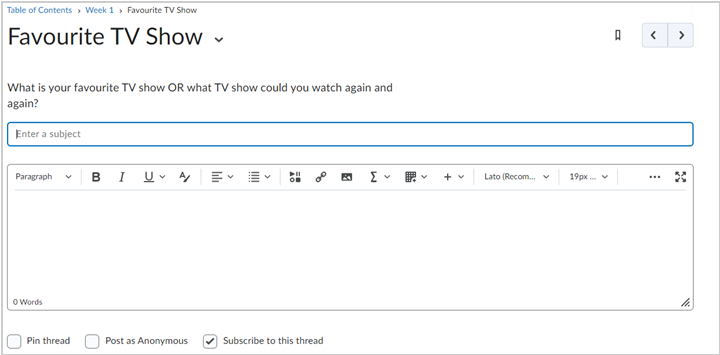
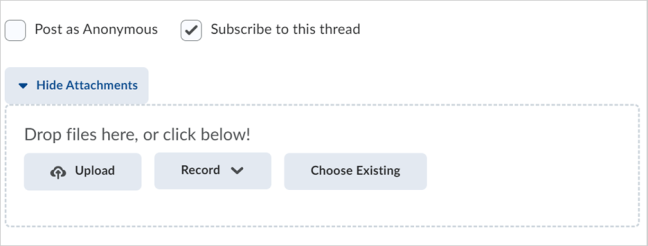
Figure: Enter a subject and body text for your discussion post into the corresponding fields. You can also select Pin thread, Post as Anonymous, and Subscribe to this thread.
- To attach a file, click the Insert Stuff button in the body field of Brightspace Editor.
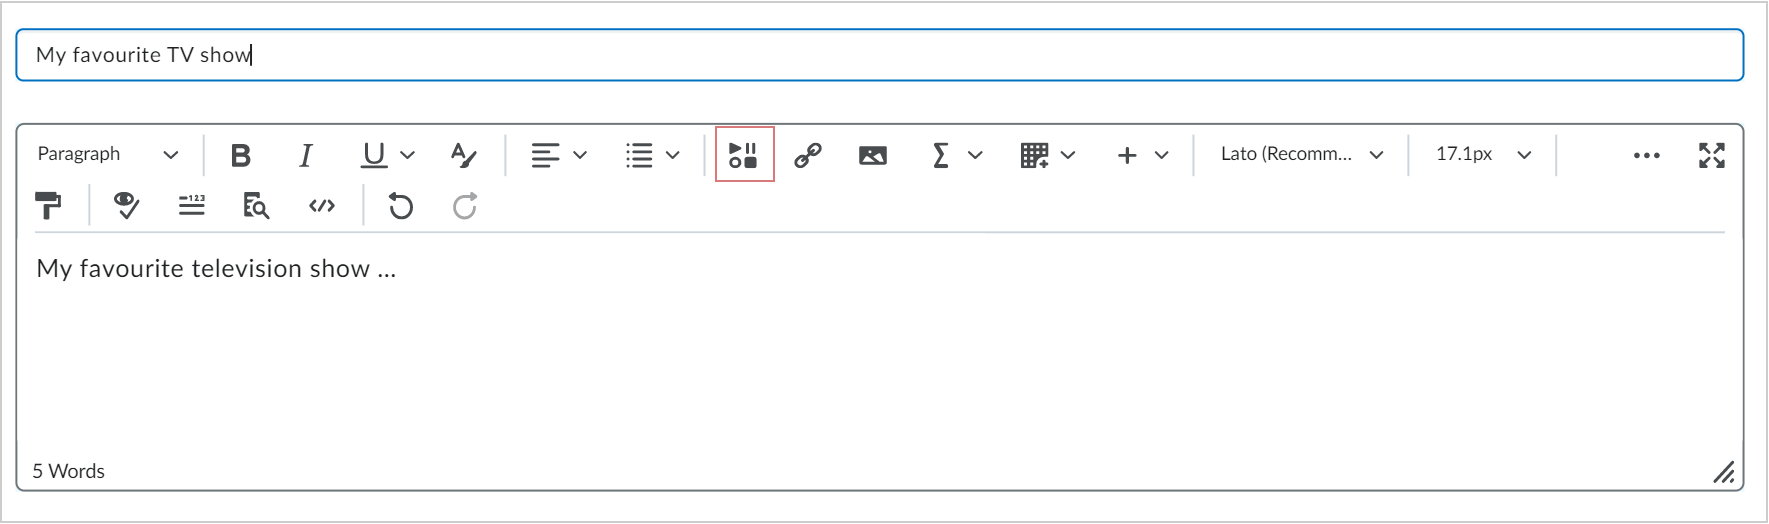
Figure: Click Insert Stuff in Brightspace Editor.
-
In the Insert Stuff dialog, click My Computer.
-
Either click Upload and select your file from your computer or drag and drop the file into the upload box.
-
Click Upload.
Edit an existing discussion thread
The Discussions tool allows you to edit your posted discussion threads on different courses.
To edit an existing discussion thread
-
On the navbar, click Discussions.
-
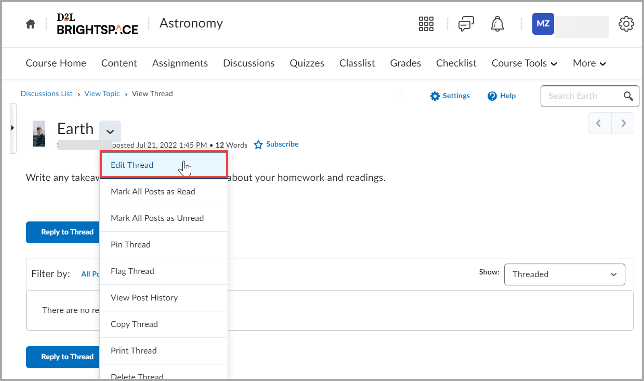
Click on the forum and the topic in which you want to edit an existing discussion post.
-
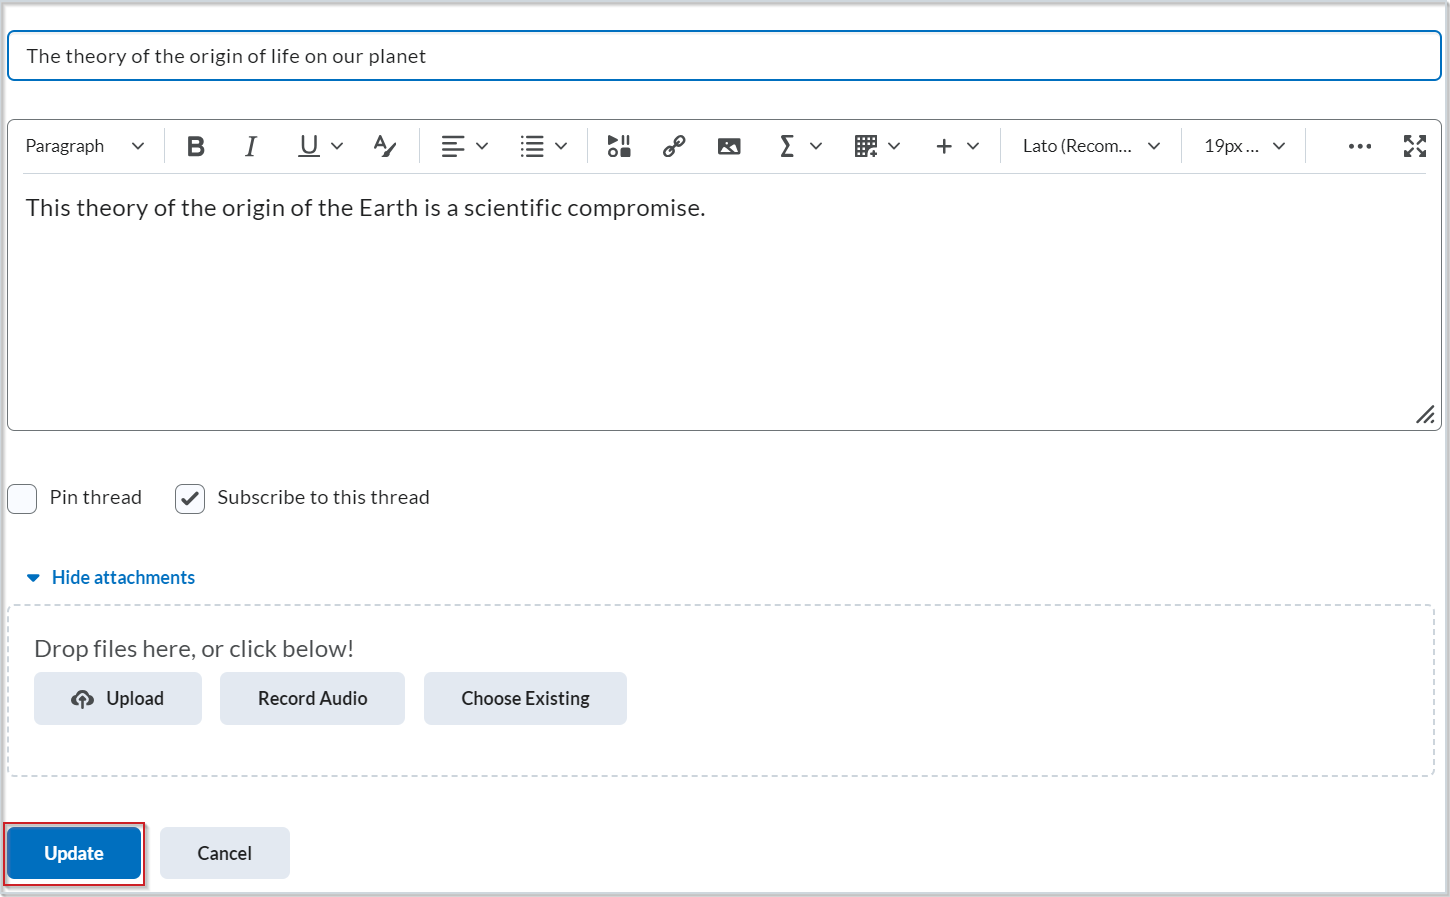
Click the drop-down arrow for a particular post and select Edit Thread.
-
Make changes and click Update.
The Discussion thread is updated.
Edit an existing discussion post
The Discussions tool allows you to edit your discussion posts on different courses.
 |
Important: After the submission deadline, you can no longer edit your discussion threads or posts.
|
To edit an existing discussion post
-
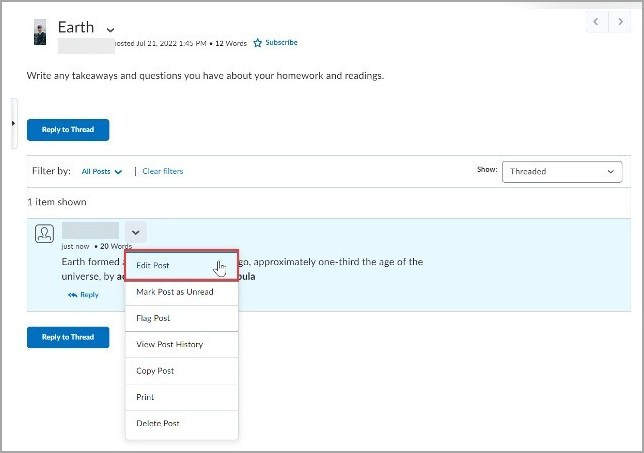
Click on a particular discussion thread to edit a post. Clicking on a particular thread reveals all the discussion posts.
-
Click the drop-down arrow button for a particular post and select Edit Post.
-
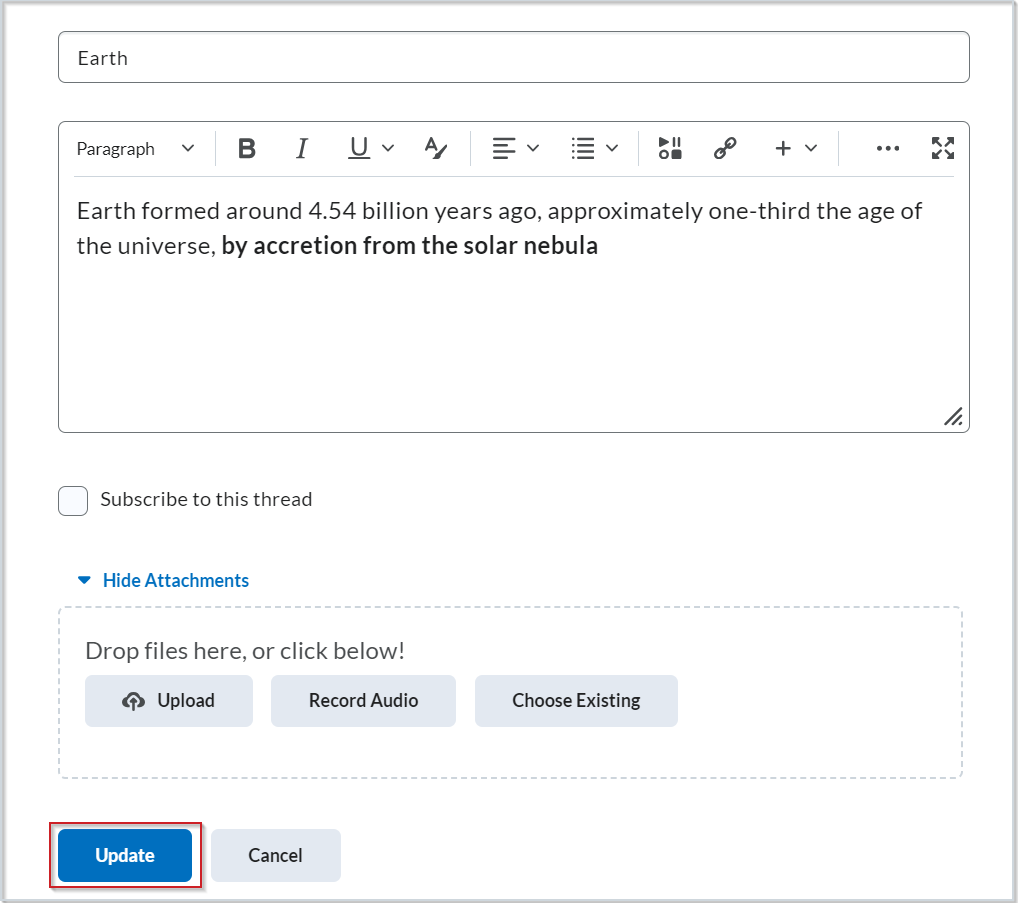
Make your edits and click Update.
|
Note: Your instructor may or may not have enabled the editing feature. Reach out to your instructor if you are unable to complete this workflow. |
Delete a discussion thread
You can delete a discussion thread using the Discussions tool.
To delete a discussion thread from Discussions
- On the navbar, click Discussions.
- On the Discussions List page, click the context menu of the thread you want to delete and click Delete Thread.
- To confirm the deletion, click Yes.
The discussion thread and all associated posts are deleted.
Reply to a discussion thread or post
The Discussions tool allows you to reply to created discussion threads and posts on different course topics, share thoughts about course materials, ask questions, share files, or work with your peers on assignments and homework.
To reply to a discussion thread or post
-
On the navbar, click Discussions.
-
Click on the forum and the topic in which you want to reply to a thread or post.
-
Click on a particular discussion thread to reply to a post.
Clicking on a particular thread reveals all the discussion posts.
- Do either of the following:
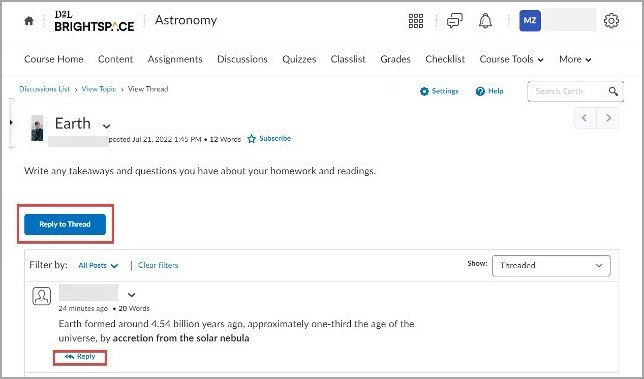
- To reply to the main thread post, click Reply to Thread.
- To reply to a particular post inside the thread, click Reply.
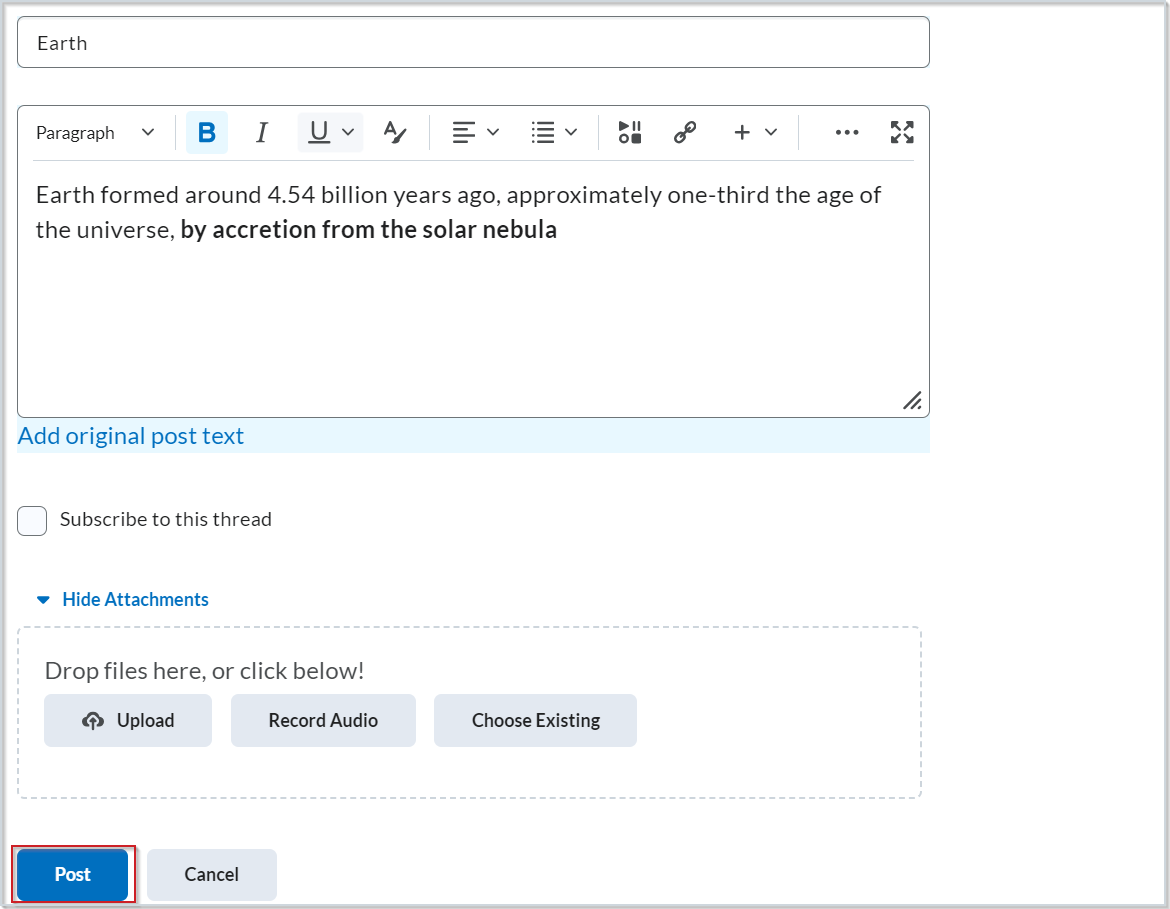
- Enter your reply in the Brightspace Editor. To include the original post’s text in your reply, click the Add original post text link.
|
Note: If this option is already enabled by your course administrator, this message will not display. |
- Set any of the following options:
- To post anonymously, select Post as Anonymous.
- To receive updates on the thread using your selected notification method, select Subscribe to this thread.
- To attach a file, in the Attachments area, click Browse to locate the file you want to attach.
- To attach an audio recording, in the Attachments area, click Record Audio > Record. To adjust your microphone selection and volume, click Flash Settings. To listen to your recording, click Play. To erase your recording, click Clear. If you have pre-recorded audio and are using a supported browser, you can drag audio files onto the attachments upload target.
- To attach a video recording, in the Attachments area, click Record Video > Allow > Record. When you finish recording, click Stop. Click Clear to erase your recording or Add to add the recording. If you have pre-recorded video and are using a supported browser, you can drag video files onto the attachments upload target.
- Click Post.
Change Discussions tool settings
You can customize Discussions tool settings such as where and how a topic or thread is displayed.
To change Discussions tool settings
- On the navbar, click Discussions.
- On the Discussions List page, click Settings.
- Do any of the following:
- To show topics in the View Topic and View Thread pages, select Always show the Discussions List pane.
- To hide topics in the View Topic and View Thread pages, clear Always show the Discussions List pane.
- To automatically include the original post when replying, select Reply Settings.
- Click Save.
Discussion settings are saved.