You can keep your personal settings up to date by changing your Profile, Notifications, Account Settings and preferred language setting in Brightspace.
To change personal settings in Brightspace
Watch this video to learn how to manage your account notifications in Brightspace. Review the written steps below.
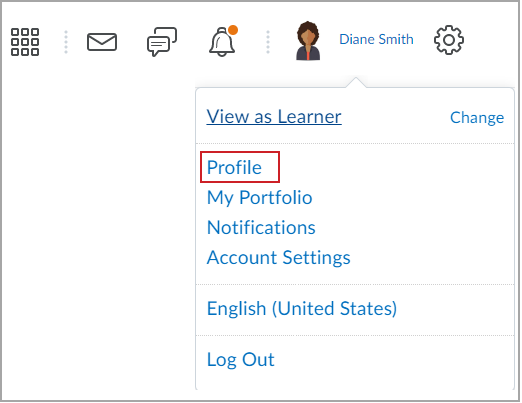
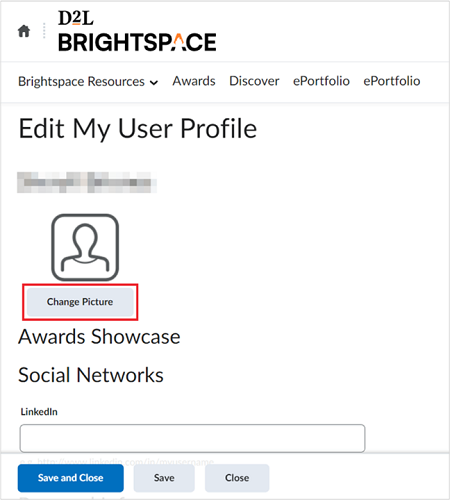
- Select your username and then select Profile.
- You can change the following settings:
- Picture:
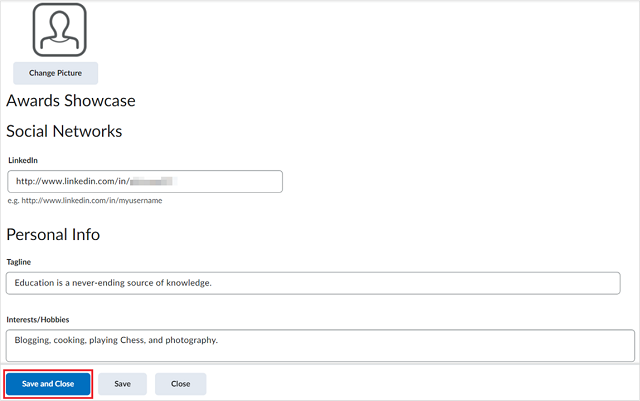
- Under your profile icon, click Change Picture.
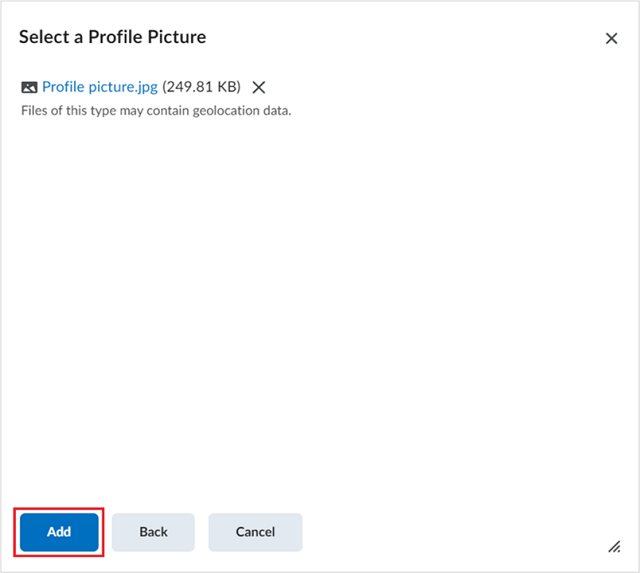
- Navigate to the location of the image you want to upload and select your profile picture.
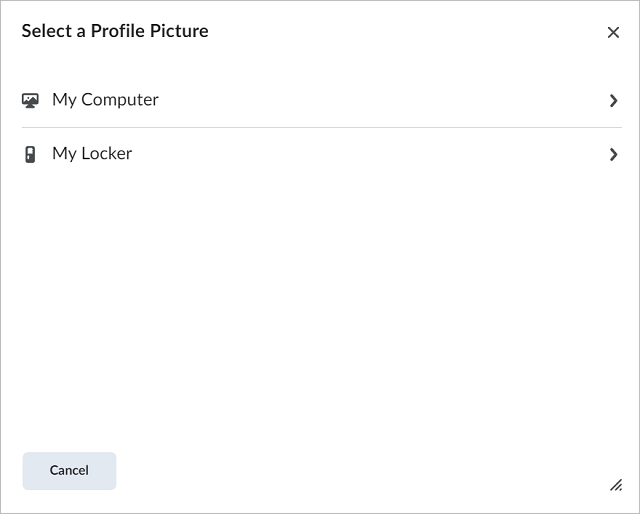
Note: The maximum image file size limit is 1 MB. For the best quality and proportions, upload an image with a width and height of 100 by 100 pixels. The accepted file formats are JPG, PNG, and GIF.
- Click Add.
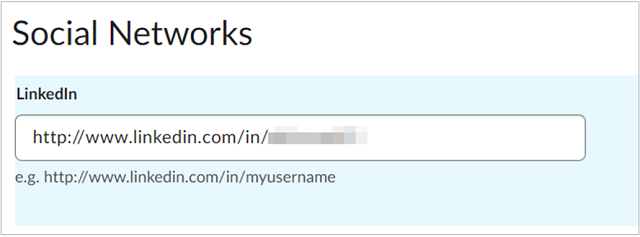
- Social Networks: In the LinkedIn field, enter the URL to your social network.
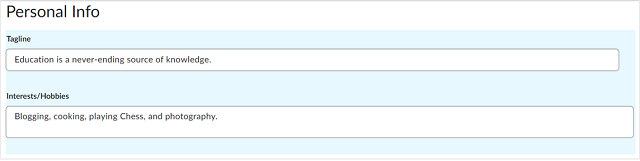
- Personal Info: Enter a Tagline and add your interests or hobbies.
Note: All Personal Info fields have a character limit of 4,000 characters.
- Click Save and Close to apply the new Profile settings and go back to your Course Homepage. Otherwise, click Save to stay on the Profile settings page.
Your profile settings are updated and saved.
Change notification settings
Notifications enable you to customize what methods you want to use to receive notifications, such as Email, as well as what events will trigger notifications.
To change Notifications settings
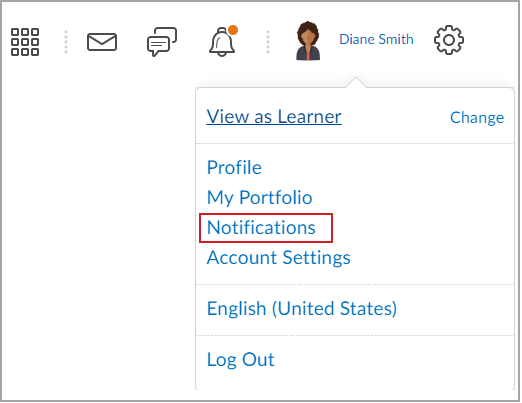
- Click your username and then select Notifications.
- You can optionally connect with your instructors and classmates and stay informed about course-related updates by downloading the Pulse App on the App Store or Google Play.
- You can change the following Notifications settings:
- Contact Methods
- To change your existing email address
- Click Change your email settings.
- Select Use custom email, add your new email address, and then click Save.
Note: Your organization sends all email notifications from Brightspace to the updated email address. Contact your system administrator for further assistance.
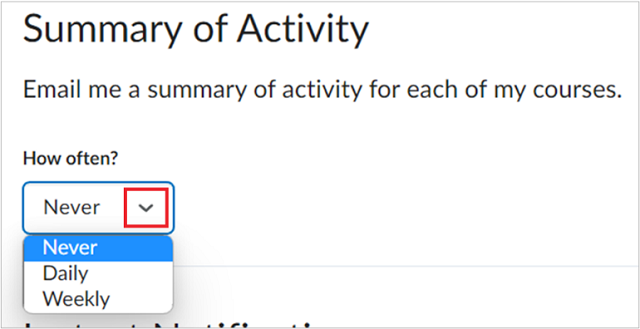
- Summary of Activity
To control how often you receive notifications about course-related activities, open the drop-down menu under How often? and select whether to receive notifications Daily, Weekly, or Never.
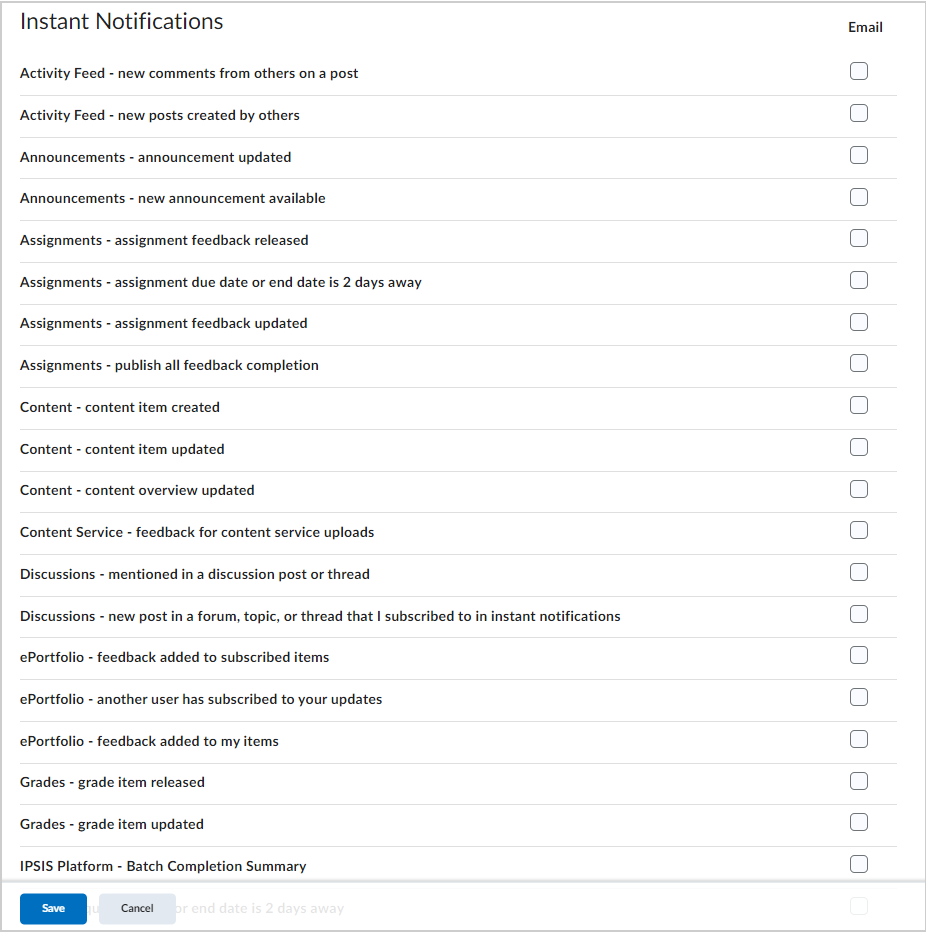
- Instant Notifications
To set individual notifications for course-related components, select the preferred notification type beside each component.
Note: To receive content-related individual notifications, use the Brightspace Pulse App or select the Email option notification type.
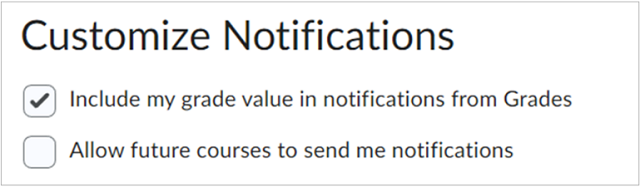
- Customize Notifications
Select whether to receive grade value notifications from the Grades tool or receive future courses-related notifications.
- Exclude some courses
To exclude receiving notifications from specific courses, click on the Manage my course exclusions link and then select the courses you want to exclude.
- After reviewing all the details, click Save.
Your notification settings are updated and saved.
Change account settings
Account Settings enables you to set your personal pronouns, change Brightspace font settings, enable two factor authentication, enable assistive technologies such as screen reader, and more.
To change Account Settings
- Click your username and then select Account Settings.
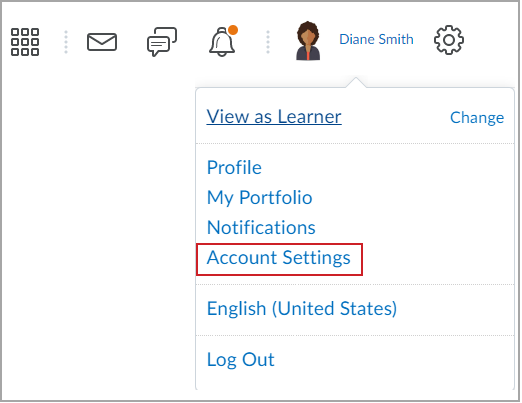
- From the Account Settings tab you can change the following settings:
- On the Discussions tab you can change the following settings:
- Personal Settings
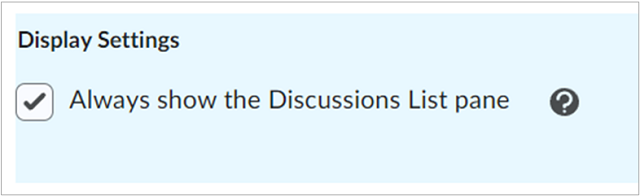
- Display Settings
Enabling this option will pin the Discussions List pane in the View Topic and View Thread pages.
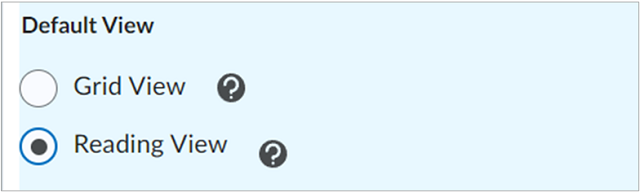
- Default View
- Select Grid View to display the discussion posts in a traditional grid view with post subjects shown in a grid.
- Select Reading View to display the discussion posts in reading view where the entire text of a post displays all posts.
- Reply Settings
Selecting this option includes the original post by default when composing a reply.

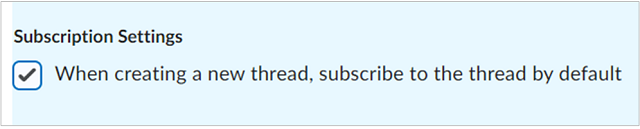
- Subscription Settings
Enabling this option allows you to subscribe to the thread by default when creating a new thread.
- Grid View Settings
- Default Threading Style
- Selecting the Threaded option displays the topics grouped together when accessing them.
- Selecting the Unthreaded option displays the default threading style used when accessing topics.

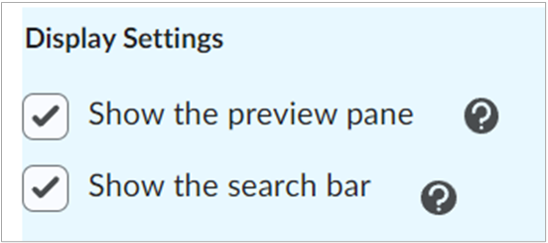
- Display Settings
- Show the preview pane
Enabling this option displays the lower Preview pane in Grid View. If this option is unselected, clicking on a post in the Grid View will open the post in a pop-up window.
- Show the search bar
Enabling this option displays the Search fields in Grid View.
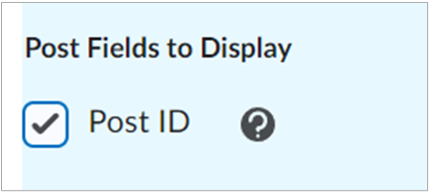
- Post Fields to Display
Enabling this option displays the Post ID for posts in Grid View.
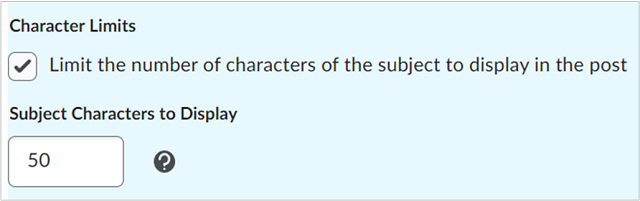
- Character Limits
Enabling this option allows you to limit the number of characters of the subject displayed for each post when browsing topics. The number of characters can be configured by entering an integer between 1 and 150 in the Subject Characters to Display field.
- After reviewing all the details, click Save and Close to apply the new Account Settings and go back to the Course Homepage. Otherwise, click Save to stay on the Account Settings page.
Your Account Settings are updated and saved.
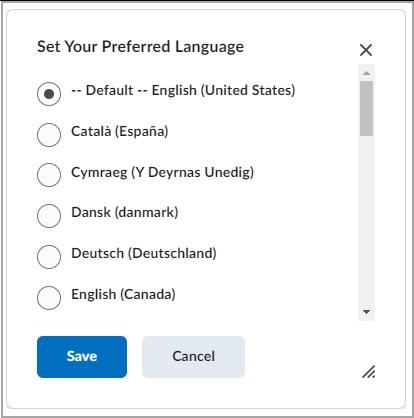
Update preferred language settings
The User menu displays the currently selected language setting; however, you can change that option using the language settings accessible by clicking current preferred language.
Only languages that are enabled by your organization are available for selection.
To change Language settings:
- Click your username and then select the current preferred language.
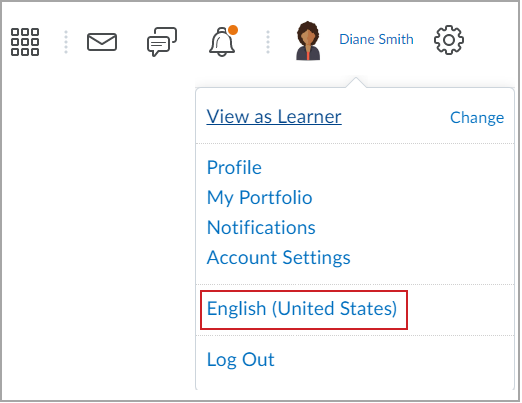
- Browse to select your preferred language, then click Save.
Note: Only languages that are enabled by your organization are available for selection.