Build quizzes using varying question types. Create quizzes that randomly select questions from a question pool or that shuffle the order of questions.
The Create a quiz page has a fully immersive page layout. This layout is consistent with other areas of Brightspace including Quizzes, Content, and Lessons, where you can create and configure a quiz.
Access the New Quiz page
To create a new quiz, you need to open the New Quiz page. This page can be reached from the Classic Content Experience, The New Content Experience (Lessons), or directly from the Quizzes tool.
To access the New Quiz page in the Classic Content Experience
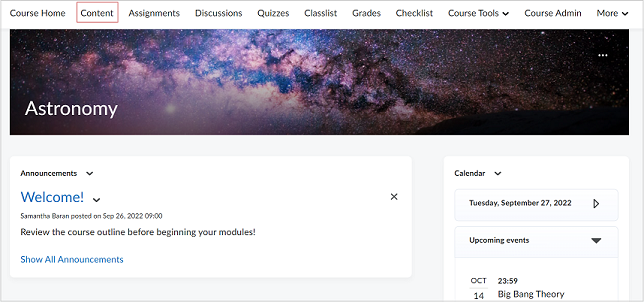
- From your course navbar, click Content.
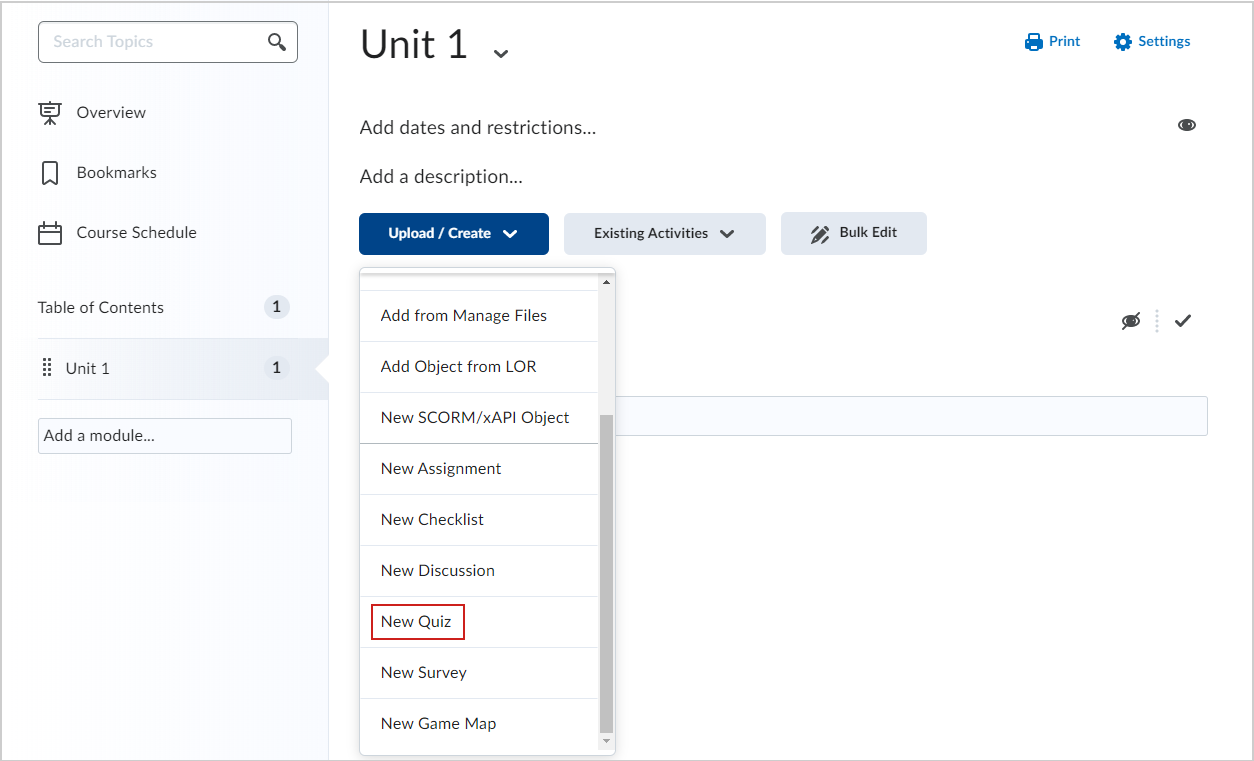
- Select the module where you want to create a quiz and click Upload/Create.
- Click New Quiz.
The New Quiz is page open, and you can customize your quiz.
Video: Create a Quiz using the Classic Content experience
To access the New Quiz page in the New Experience
- From your course homepage, navigate to Content.
- In the Table of Contents, in your desired module, click Create New.
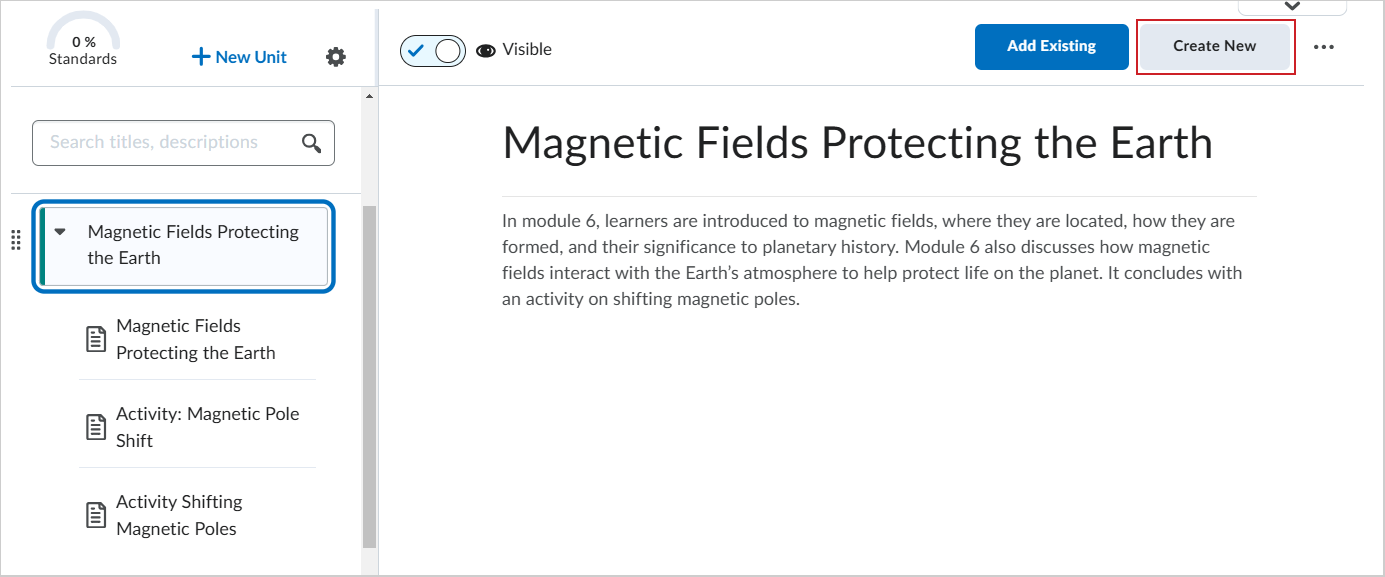
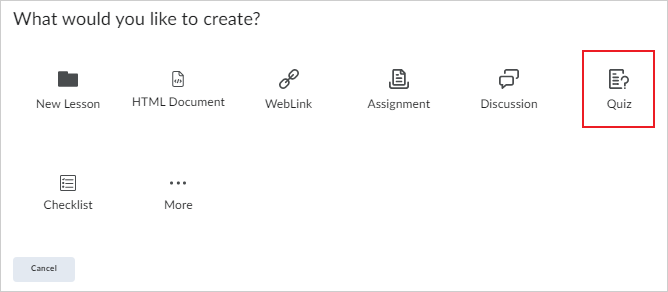
- On the What would you like to create? page, click Quiz.
To access the New Quiz page from the Quizzes tool
- From your course navbar, click Quizzes.
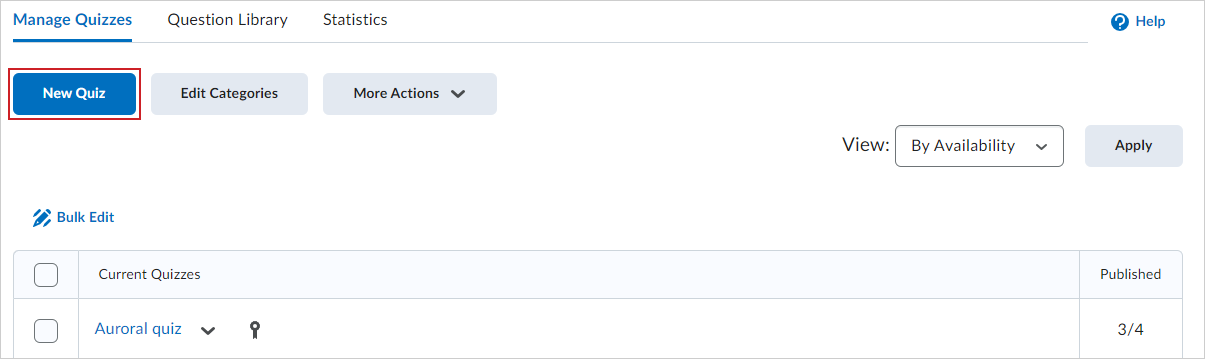
- From the Manage Quizzes tab, click New Quiz.
Copy an existing quiz
You can quickly create new quizzes from existing quizzes using the Copy functionality available on the individual quiz drop-down menu.
 |
Note: Copying a quiz copies all settings of an existing quiz in addition to its Special Access settings and aligned Learning Objectives. |
To copy an existing quiz
- Navigate to Quizzes.
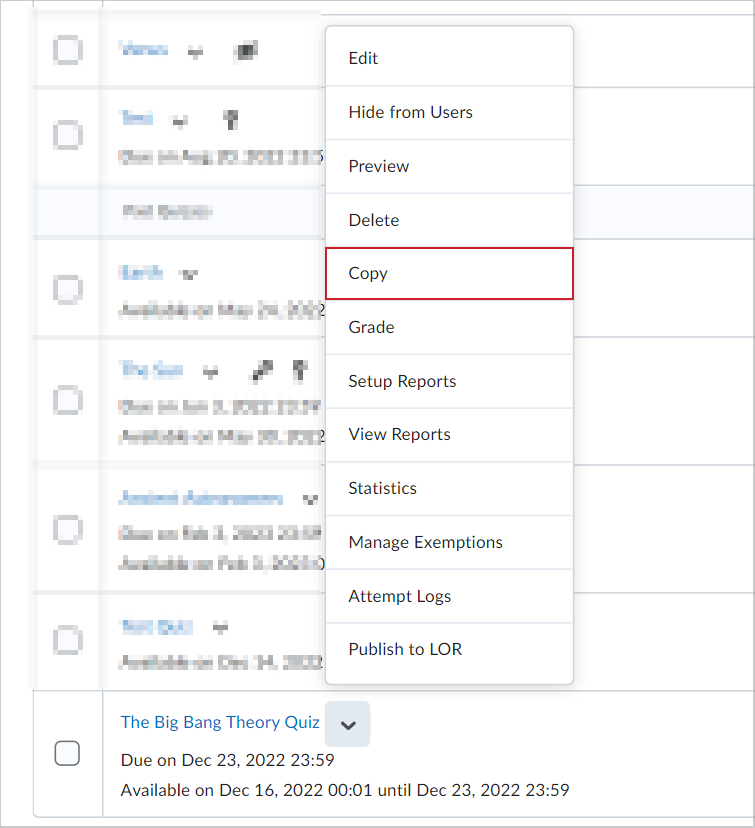
- From the drop-down menu of the quiz you want to copy, click Copy.
- The copied quiz opens in edit mode. Update the quiz title, grade out of, due date, description, and other settings of the copied quiz.
- Click Save.
The quiz is copied and added to the Manage Quizzes tab of the Quizzes tool.
Fill in quiz details
Once you have opened the Quiz Title page, you must start by entering basic details for your quiz.
|
Note: If you choose to not associate your quiz with a Grade Item in Grade Book, the Grade Out Of value is set to a default of 0 points. That value is read only, and automatically updates to represent the total amount of points assigned to all questions in the quiz.
If you choose to associate your quiz with a Grade Item in Grade Book, you can enter a custom Grade Out Of value that remains the same regardless of the number of points assigned to quiz questions.
|
To fill in quiz details
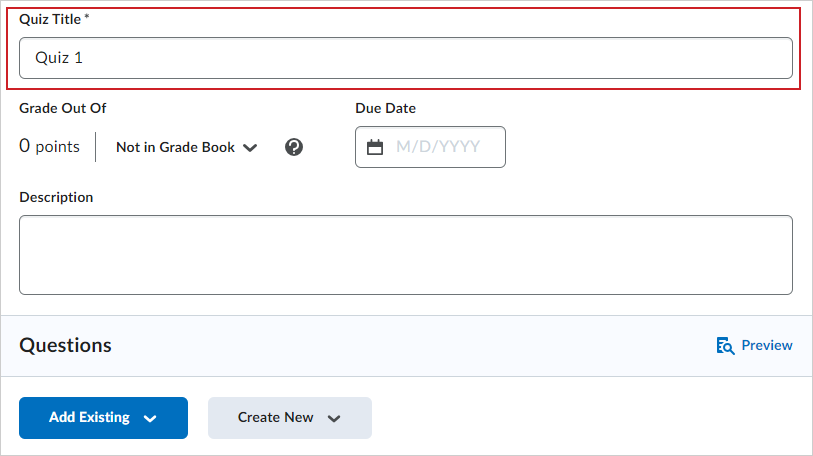
- From the New Quiz page, enter a Quiz Title for the quiz.
- If you do not wish to link your quiz to a grade item in Grade Book, select Not in Grade Book. The Grade Out Of option is set to 0 points and is read only.
- If you wish to link the quiz to Grade Book, do one of the following:
- Select Edit or Link to Existing: Choose to either create and link to a new grade item, or link to an existing grade item.
- Select Add to Grade Book.
- For Grade Out Of, enter the number of points for the quiz.
- Enter the Due Date for your quiz.
- Enter a Description for your quiz.
|
Note: The Description field has a character limit of 65,535 characters. |
Now you can add quiz questions to your quiz.
Create a new quiz question
You can create and customize new quiz questions from the New Quiz page.
To create a new quiz question
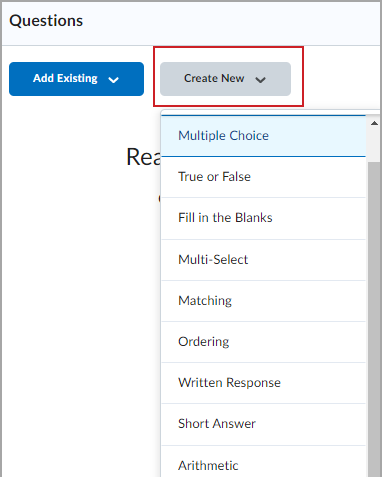
- On the Create Quiz page, click Create New > New Question.
- Click the question type from the list and complete the question details.
- Note: Written response questions require you to manually grade responses.
- Do one of the following:
- Click Save and New to create another quiz question.
- Click Save and Copy to save the quiz question and make a copy of the quiz question to add to your quiz.
- Click Save to return to the Create Quiz page.
New quiz questions are added to your quiz.
 |
Important: Written response questions have a character limit of 1,000,000. Short answer, multi-short answer, and fill-in-the-blanks questions have a character limit of 10,000.
|
Add existing quiz questions
You can also add existing quiz questions by uploading a file, browsing the quiz library, or importing from another learning repository.
To add existing quiz questions
- On the Create Quiz page, click Add Existing.
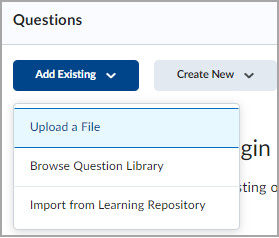
- Do one of the following:
- Click Upload a File to attach a file from your personal device.
- Then click Browse files and select a file or drag the appropriate file to the Upload a File window.
- Click Import All to import the questions in the file.
- Select Browse Question Library to import questions from the Question Library or to reuse questions from previous quizzes.
- Select the checkbox beside the questions you want to add to your quiz.
- Then, click Import.
- Select Import from the Learning Repository to browse and choose resources to add to your quiz.
- Search for a repository or select one of the available categories.
- Click to select the questions you want to add. Then, click Select.
Existing quiz questions are added to your new quiz.
You can assign 0 (zero) points to a quiz question to collect non-graded information, such as feedback or personal input.
Edit quiz questions
You can edit quiz questions by choosing to edit a quiz or during the quiz creation process.
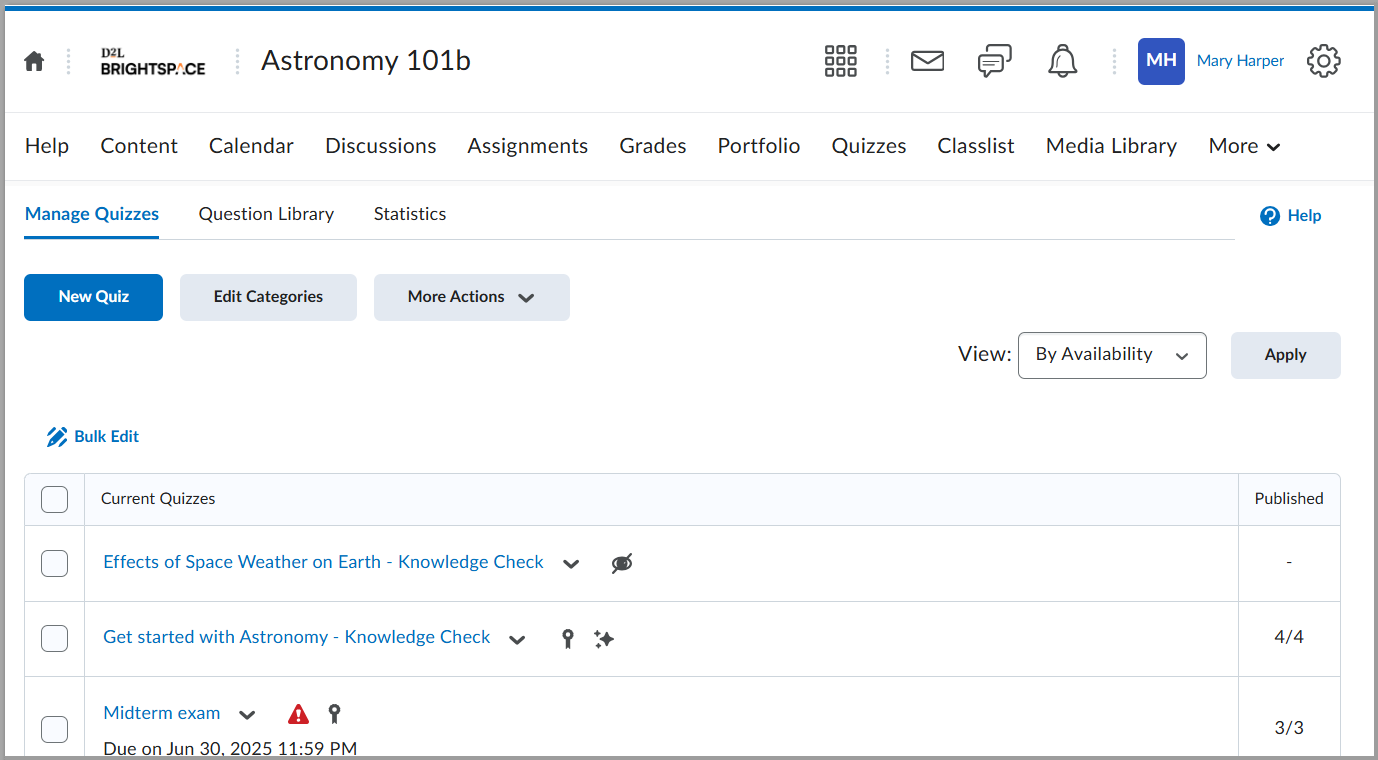
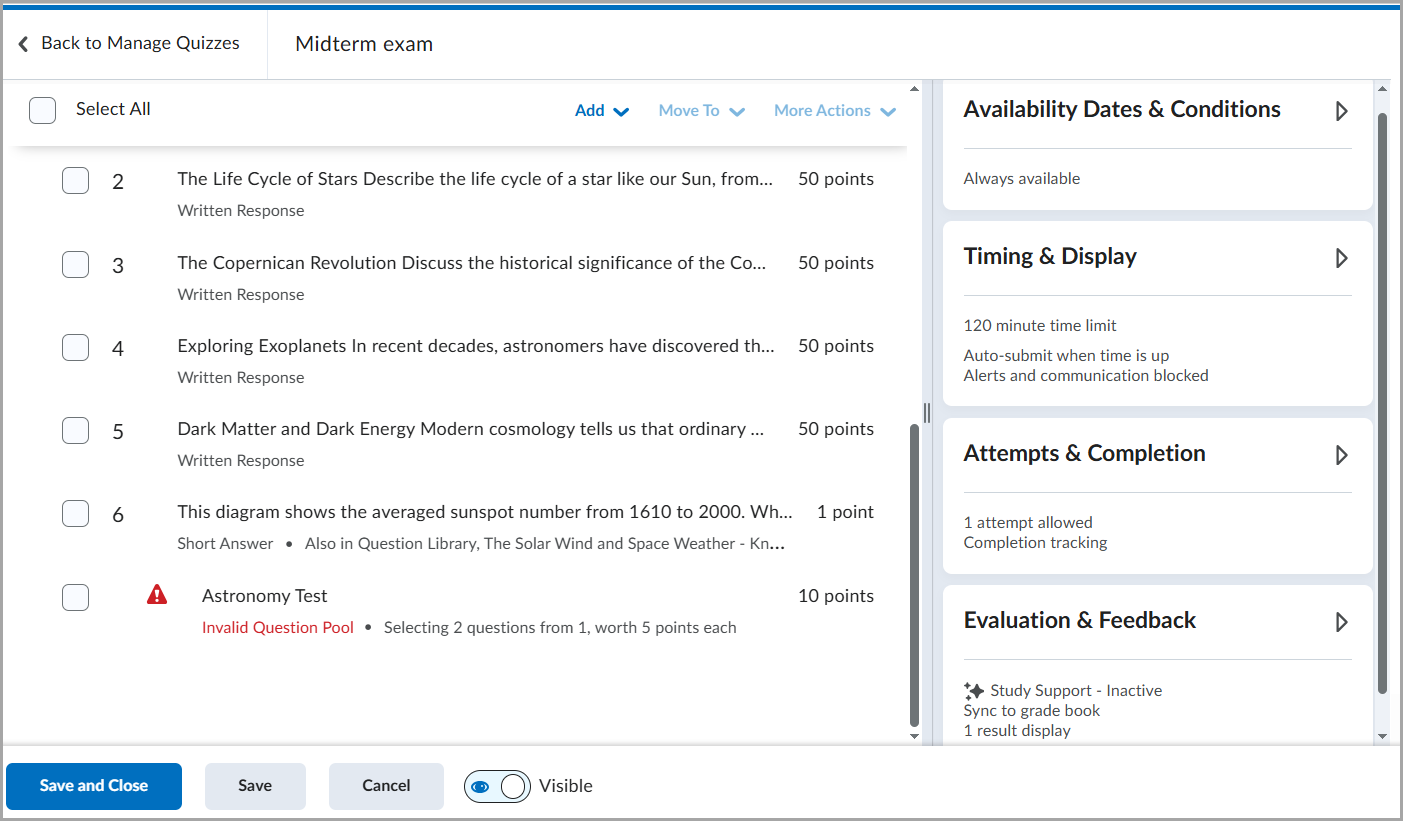
When a question pool has insufficient questions, a warning indicator appears, allowing you to edit the questions to resolve the issue before learners begin a quiz attempt. This occurs if a quiz attempts to draw more questions than are available in the question pool (e.g., 12 questions requested but only 10 available). The interface displays a warning indicator in such cases.
Visual warnings appear on the Manage Quizzes page and the Edit Quiz page.
On the Manage Quizzes page, a status indicator flags quizzes with insufficient question pools.
On the Edit Quiz page (Quiz Builder), a warning icon appears directly on the affected question pool.
To edit quiz questions
- Navigate to Quizzes.
- Click the name of the quiz you want to change.
- In the Questions section, click the question you want to edit.
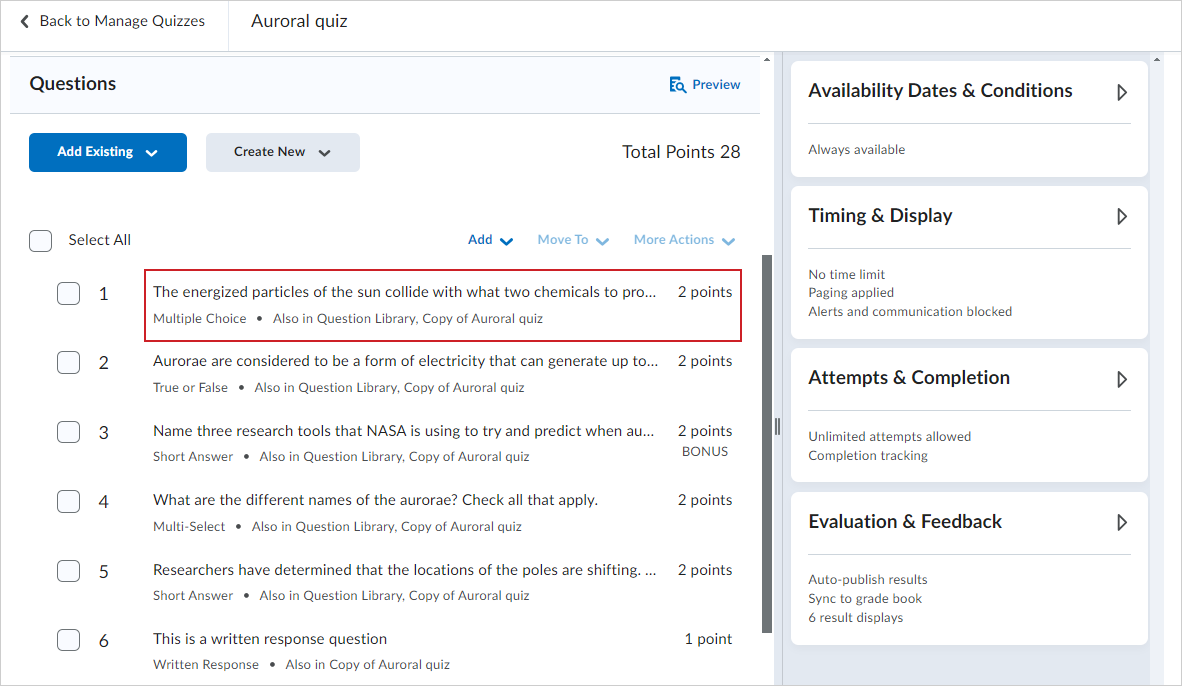
- In the Edit dialog, edit your question by performing one or more of the following:
- To edit the question text, click inside the respective fields and write your change.
- If you want to edit the text format, click inside the field and click the Fullscreen option in the pop-up bar. Brightspace Editor opens in full with your question text. Click More Actions to trigger more editing options. Change the font size, format, add links, or use Insert Stuff to add more content.
- Note: The Edit dialog provides different editing options depending on the quiz question type you are editing.
- When you're done editing, click the Fullscreen button again (if applicable) and click Save in the dialog.
- Repeat steps 3-5 for other questions you want to edit.
- Click Save and Close.
- Use Question Library and Question Pools to create a randomized set of quiz questions
You have edited quiz questions.
Set up Availability Dates & Conditions
Set a time frame for when the quiz is available and create conditions for accessing the quiz.
|
Note:
Quiz Availability Dates & Conditions allow you to set start dates, due dates, and end dates for quizzes. The start date determines when a quiz becomes available to learners. The end date determines when a quiz becomes unavailable to learners. The due date specifies a time when a quiz is expected to be completed. A quiz is considered late if it is submitted after the due date is reached. If a quiz has an enforced time limit and the learner uses more than the allotted time, the quiz is marked as exceeded time limit.
|
To set availability and conditions
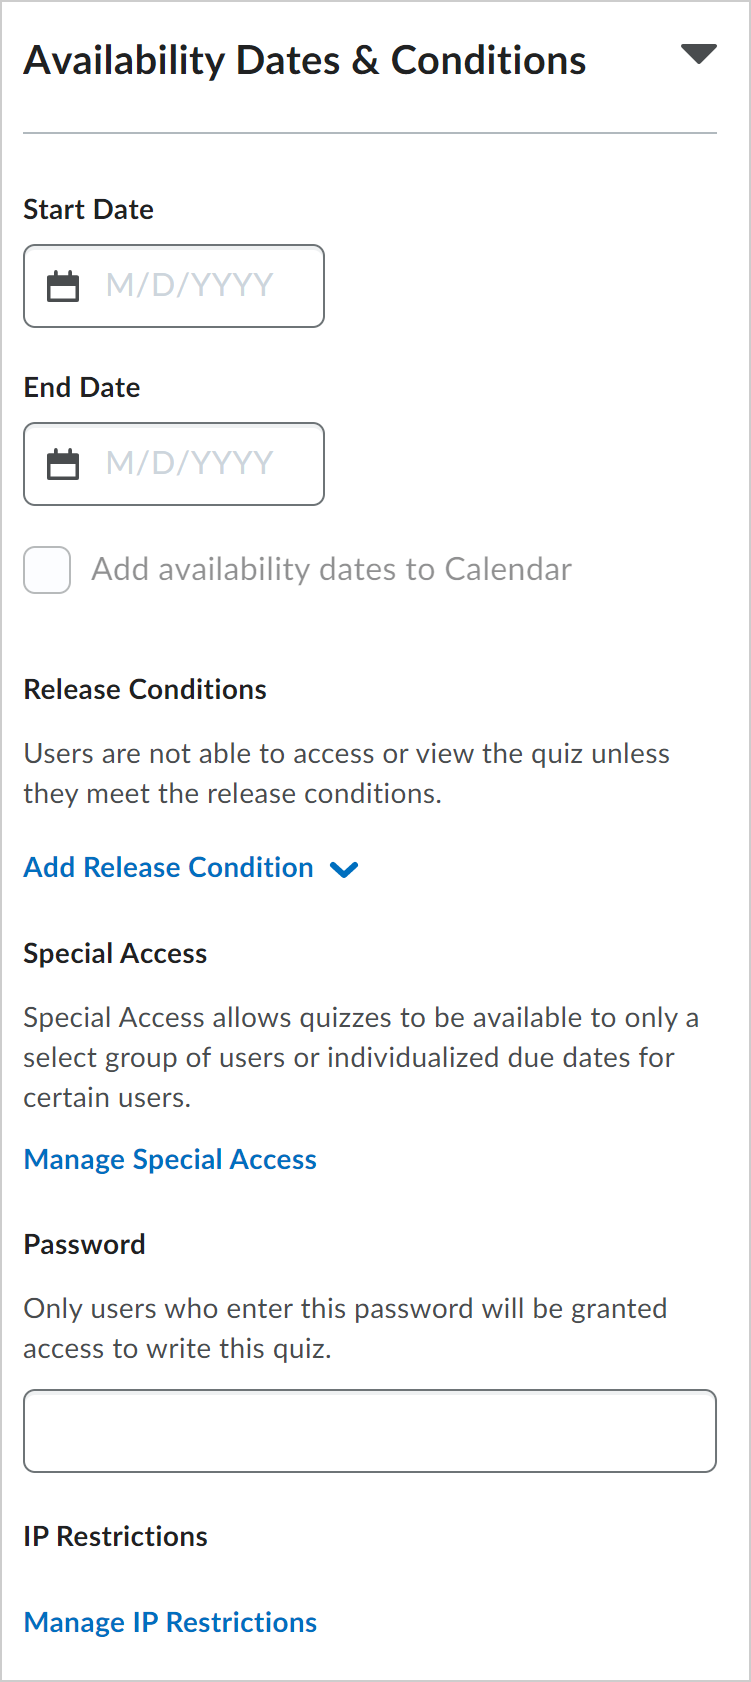
- From the New Quiz page, click to expand the Availability Dates & Conditions section.
- Customize any of the following:
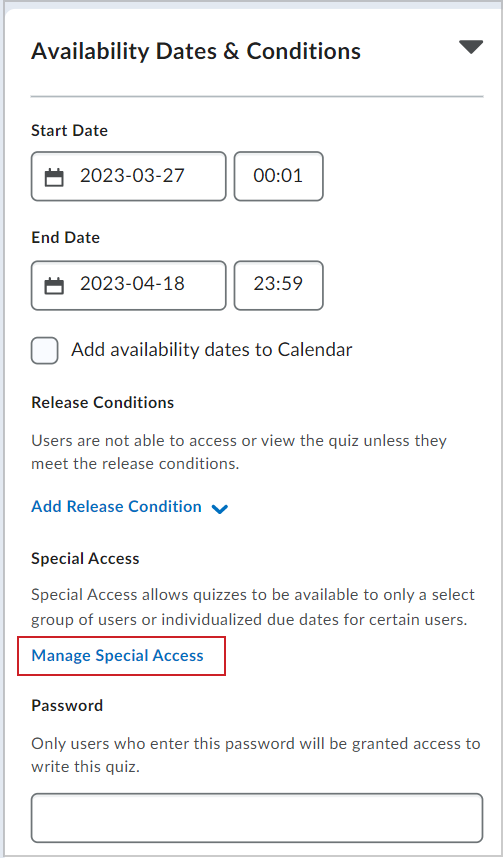
- Start Date: Specify the date when your quiz becomes available to learners.
- End Date: Specify the date when your quiz is no longer available.
- Add availability dates to Calendar: Select the checkbox to add quiz availability dates to your course Calendar. Learners will see the quiz availability dates in their Calendar. Calendar events are generated as the following:
- If the Start Date and End Date are set, separate events are created for when the quiz starts and when the quiz ends.
- If the Start Date is set, a Start Date event is created.
- If the End Date is set, an End Date event is created.
- Release Conditions: Only allow learners to access the quiz if they meet its release conditions, or requirements. Click Add Release Conditions followed by either Create New or Add Existing. For example, you can create a release condition that only lets learners view the quiz after they complete a specific topic, module, or unit.
- Special Access: Makes the quiz available to select groups of learners or create individualized due dates and customize the timing settings for certain learners.
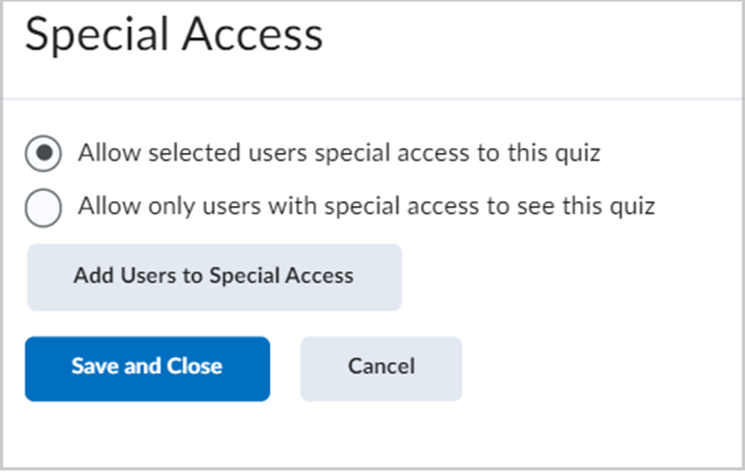
- Click Manage Special Access to set the conditions.
- Select one of the following options:
- Allow selected users special access to this quiz
- Allow only users with special access to see this quiz
-
Click Add Users to Special Access.
- Specify Properties: Due and Availability Dates.
- Set one or both of the following Timing options.
-
Set an Attempts option. If you select Override attempts allowed, you can set the number of attempts allowed from 1 to 10 and click Apply. If more than one attempt is applied, you can select optional Advanced Attempt Conditions. To restrict access to attempts, enter a minimum and maximum percentage (from 0% to 100%) that needs to be achieved on the previous attempt to qualify for another attempt.
-
Select users for Special Access. You can filter by Groups and Sections.
-
Click Save.
- Password: Only learners who enter the password can access the quiz to write it.
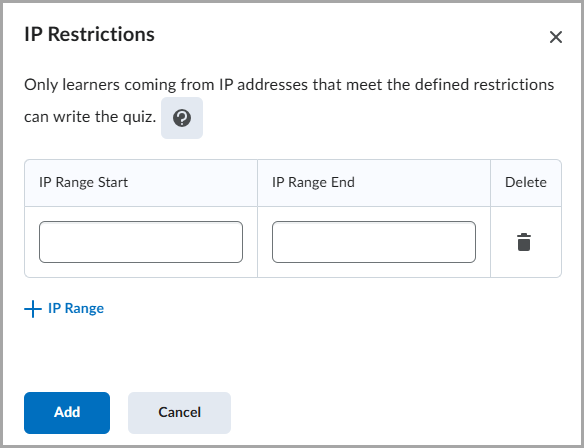
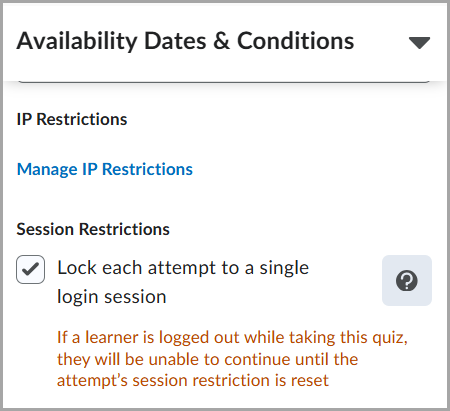
- IP Restrictions: Only learners with the IP addresses that you define can access the quiz. You can restrict quiz access based on either IPv4 or IPv6 address ranges. To define the allowed IP ranges, click Manage IP Restrictions, and specify the IP addresses in the IP Range Start and IP Range End fields.
-
Lock each attempt to a single login session to restrict attempts to one active session. When this setting is enabled, learners cannot resume the quiz using another browser session.
Note that this setting is controlled by D2L.Tools.Quizzes.SingleSessionQuizzes (OrgUnit) configuration variable. By default, this configuration is disabled. Administrators can enable it as needed.
- If you have completed customizing your quiz, click Save and Close.
Availability dates and conditions are saved for your quiz.
|
Note: On the Quiz List page, a key icon  indicates that a quiz is session-restricted. indicates that a quiz is session-restricted.
When you reset a session lock for an attempt, and the learner re-enters the quiz, all previously submitted answers are retained. |
Add special access to a quiz that requires Respondus LockDown Browser
If Respondus LockDown Browser is enabled for the course offering a quiz resides in, you can exempt individual learners from the requirement to use the LockDown Browser when taking that quiz.
To exempt a user from having to use LockDown Browser while taking a quiz
- Navigate to Quizzes.
- On the Manage Quizzes tab, select the quiz to which you want to add special access.
- Click the Availability Dates & Conditions section.
- Click Manage Special Access.
- Click Add Users to Special Access.
- On the Add Special Access to Quiz page, under LockDown Broswer, select Not required to take this quiz.
- Select the learners that you want to exempt from using the LockDown Browser for this quiz, and click Save. The learners to whom you have granted this special access appear below the Add Users to Special Access button with a Do not require LockDown Browser for this quiz icon beside their names.
|
Note: The special access settings do not apply to all quizzes in a course offering automatically. You must add special access for learners to each quiz separately. |
Set up Timing & Display
You can create a time limit for your quiz if needed and set up how the quiz displays to learners.
|
Note: If you do not want to set a time limit, do not select the Set time limit option. |
To set a time limit
- From the New Quiz page, click to expand the Timing & Display section.
- Select Set time limit.
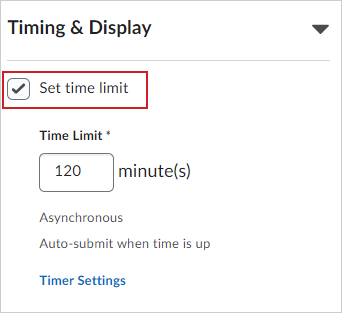
- In the Time Limit field, specify the length of time for the quiz in minutes.
- Click Timer Settings.
- In the Timing dialog, under Quiz Start, select one of the following:
- In the Timing dialog, under When The Time Limit Expires, select one of the following:
- If you want to automatically submit the quiz when the time limit is exceeded, select Automatically submit quiz attempt.
- If you want learners to be able to continue working after the time limit, select Flag as time limit exceeded and allow the learner to continue working.
- If you do not want to enforce the time limit, select Do nothing: the time limit is not enforced.
- Click OK.
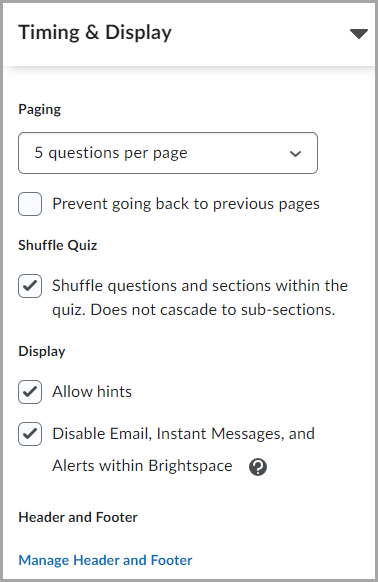
To set quiz display
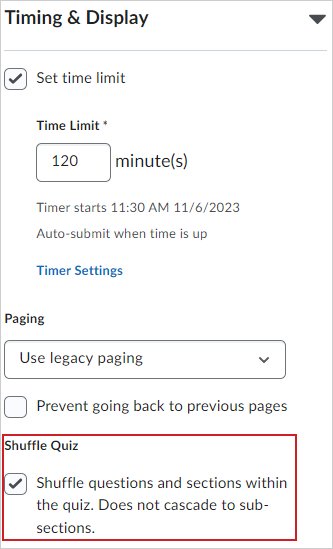
- From the New Quiz page, click to expand the Timing & Display section.
- Configure the following:
- Paging: Choose how questions are displayed on the quiz.
- Shuffle Quiz: To shuffle quiz questions and sections, select Shuffle Quiz.
- Display:
- To disable separate types of notifications, select Disable Email, Instant Messages, and Alerts within Brightspace.
- To show your quiz hints, select Allow Hints.
- Header and Footer: Click Manage Header and Footer to create a header or footer for your quiz.
The Header and Footer each have a character limit of 65,535 characters.
- If you have completed customizing your quiz, click Save and Close.
Timing and display settings are set for your quiz.
Video: Synchronize Quizzes for Learners
Set up Attempts & Completion
Configure the number of quiz attempts and manage how you track learners’ quiz completion.
To set up attempts & completion
- From the New Quiz page, click to expand the Attempts & Completion section.
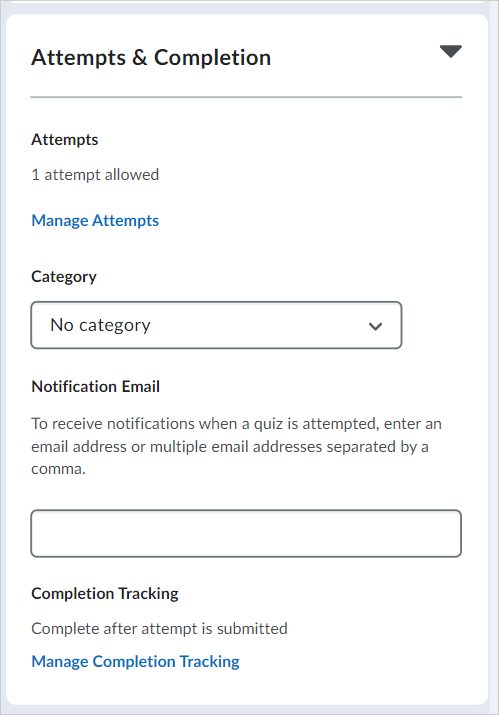
- Customize the following:
- Attempts: Click Manage Attempts to set how many times a learner can take a quiz.
- Category: Select a category for your quiz from the drop-down menu.
- Important: If you cannot see the Category drop-down menu, contact your administrator to ensure that your instance or Org Unit has the required configuration variable enabled.
- Notification Email: Enter email addresses for notification emails when a learner completes a quiz.
- Completion Tracking: Click Manage Completion Tracking to set when a learner is considered to have completed the quiz. If you select The student is marked as complete if they have a Passing Overall Quiz Grade and enter a grade, then you can trigger a message with emoticons at the end of the quiz that notifies learners if they passed or failed.
- Important: If you do not see Completion Tracking or Manage Completion Tracking in your quiz setup screen, your organization has either not purchased Completion Tracking as an add-on or your organization needs to enable it. To learn more about quiz creation experiences, refer to Comparing Quiz Creation Experiences.
- If you have completed customizing your quiz, click Save and Close.
Attempts and completion settings are set for your quiz.
Set up Evaluation & Feedback
You can add assessment options to your quizzes to share attempt feedback and results using Evaluation & Feedback settings. This enables you to display quiz results upon completion and associating quizzes to grade items for the purposes of assessment.
To set up quiz results and feedback
- From the New Quiz page, click to expand the Evaluation & Feedback section.
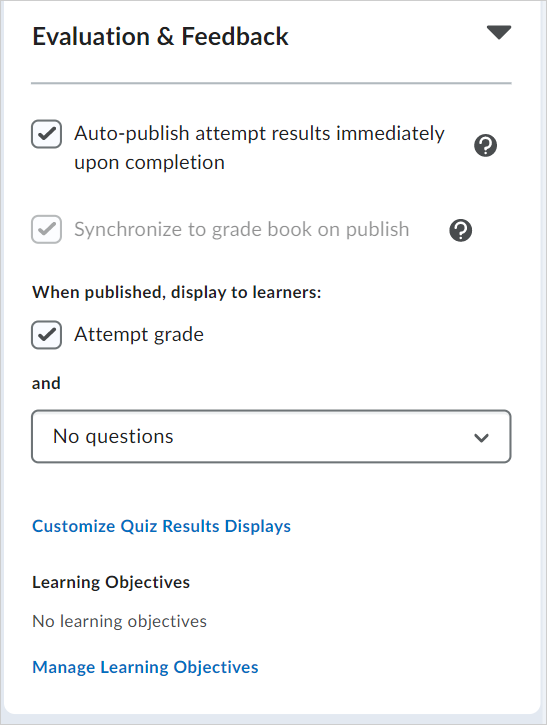
- Customize the following:
- Auto-publish attempt results immediately upon completion: Publish quiz results for learners immediately after they complete the quiz.
- Synchronize to grade book on publish: Sync this quiz’s grades to Grade Book. The option is grayed if you have not set up Grade Book.
- When published, display to learners: Click Attempt grade to display learners’ attempt grade. Click the question display drop-down menu to select which questions are displayed to learners after publishing the quiz.
- Customize Quiz Results Display: Create a custom dialog for learners after they finish their quiz. You can customize the Primary View that will appear immediately after learners complete their quiz and a Secondary View that will appear later based on a date set by you.
- Learning Objectives: Click Manage Learning Objectives to associate learning objectives with your quiz.
- If you have completed customizing your quiz, click Save and Close.
Evaluation and feedback settings are saved for your quiz.
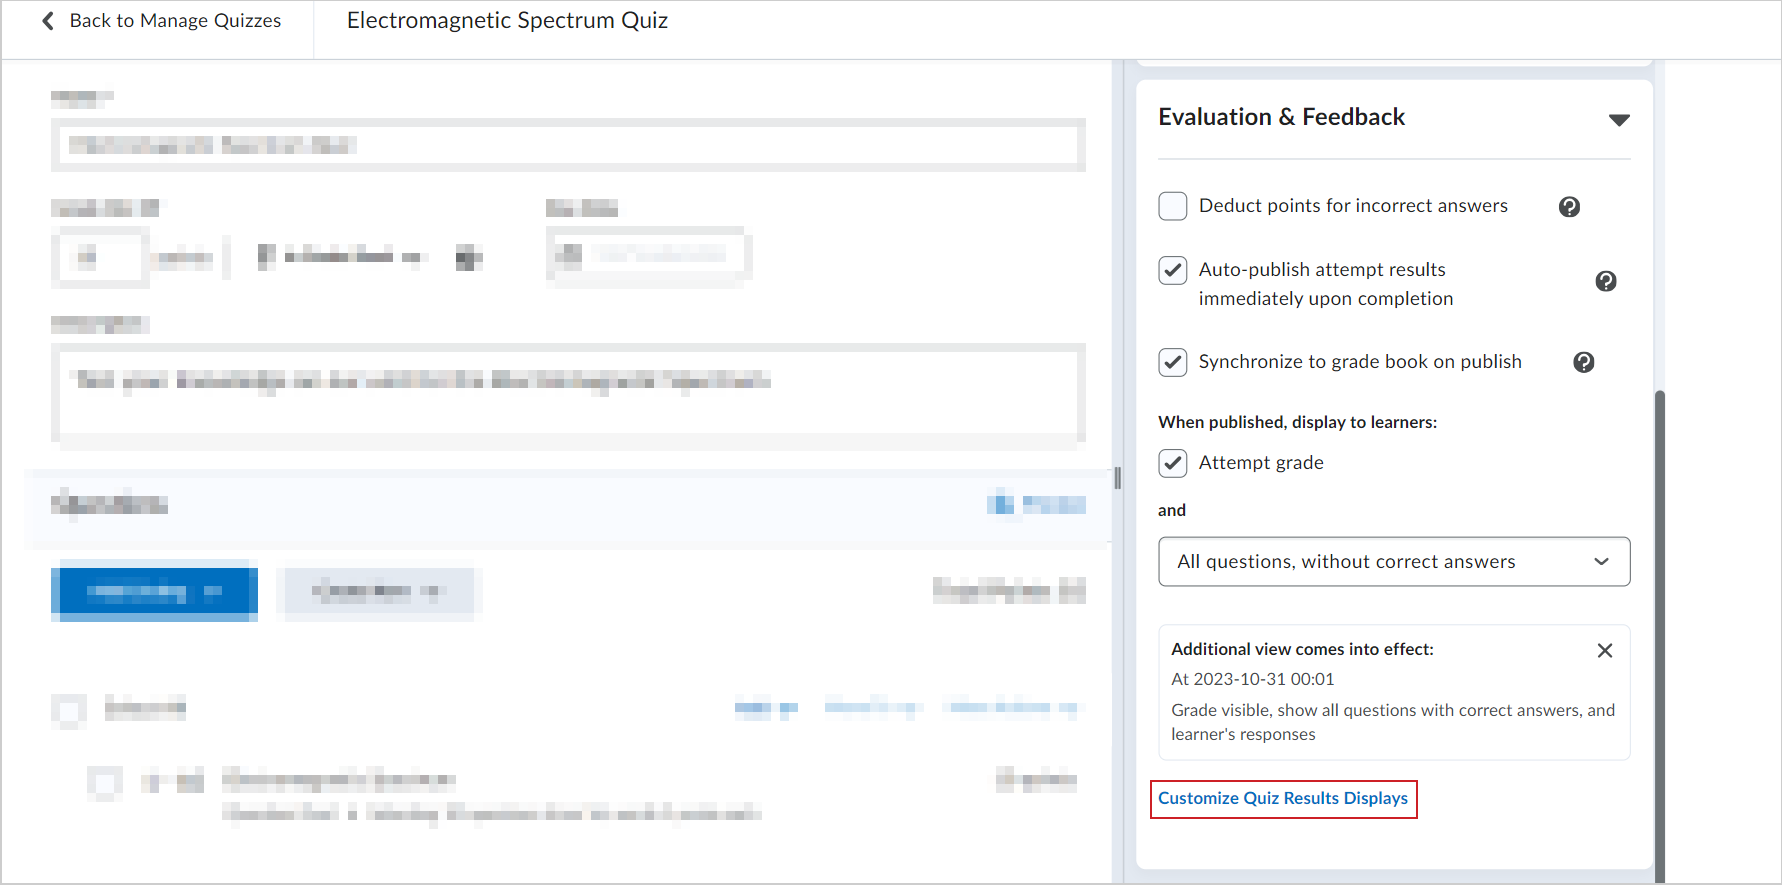
Customize the Quiz Results Display
By default, learners only see their attempted grades when attempts are evaluated upon submission. However, you can create a custom quiz result display that provides learners with more insight into their attempt and the attempts of their peers.
To customize the quiz results display
- From the New Quiz page or the editing page of an existing quiz, click the Evaluation & Feedback section.
- Click Customize Quiz Results Displays.
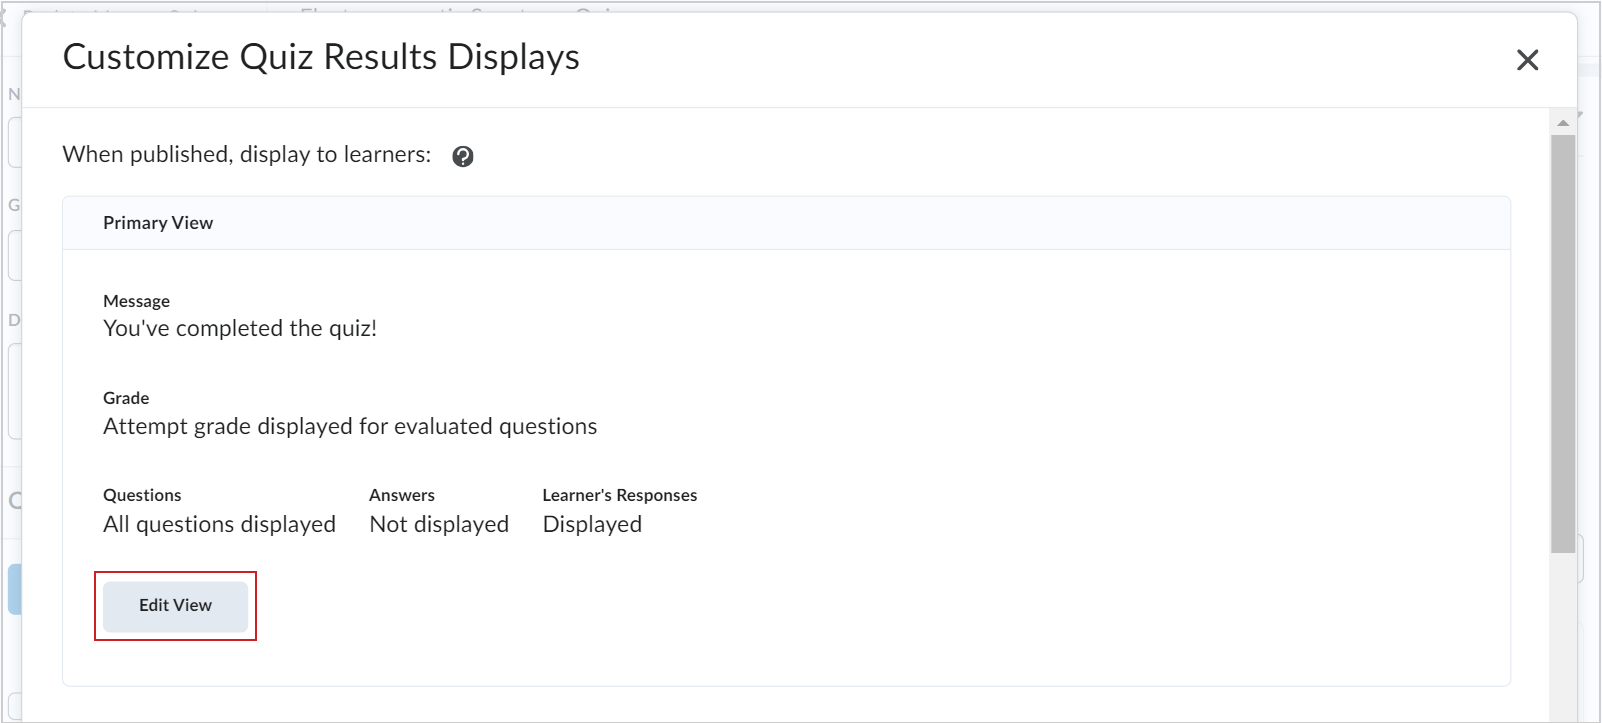
- In the Customize Quiz Results Displays dialog, in the Primary View display section, click Edit View.
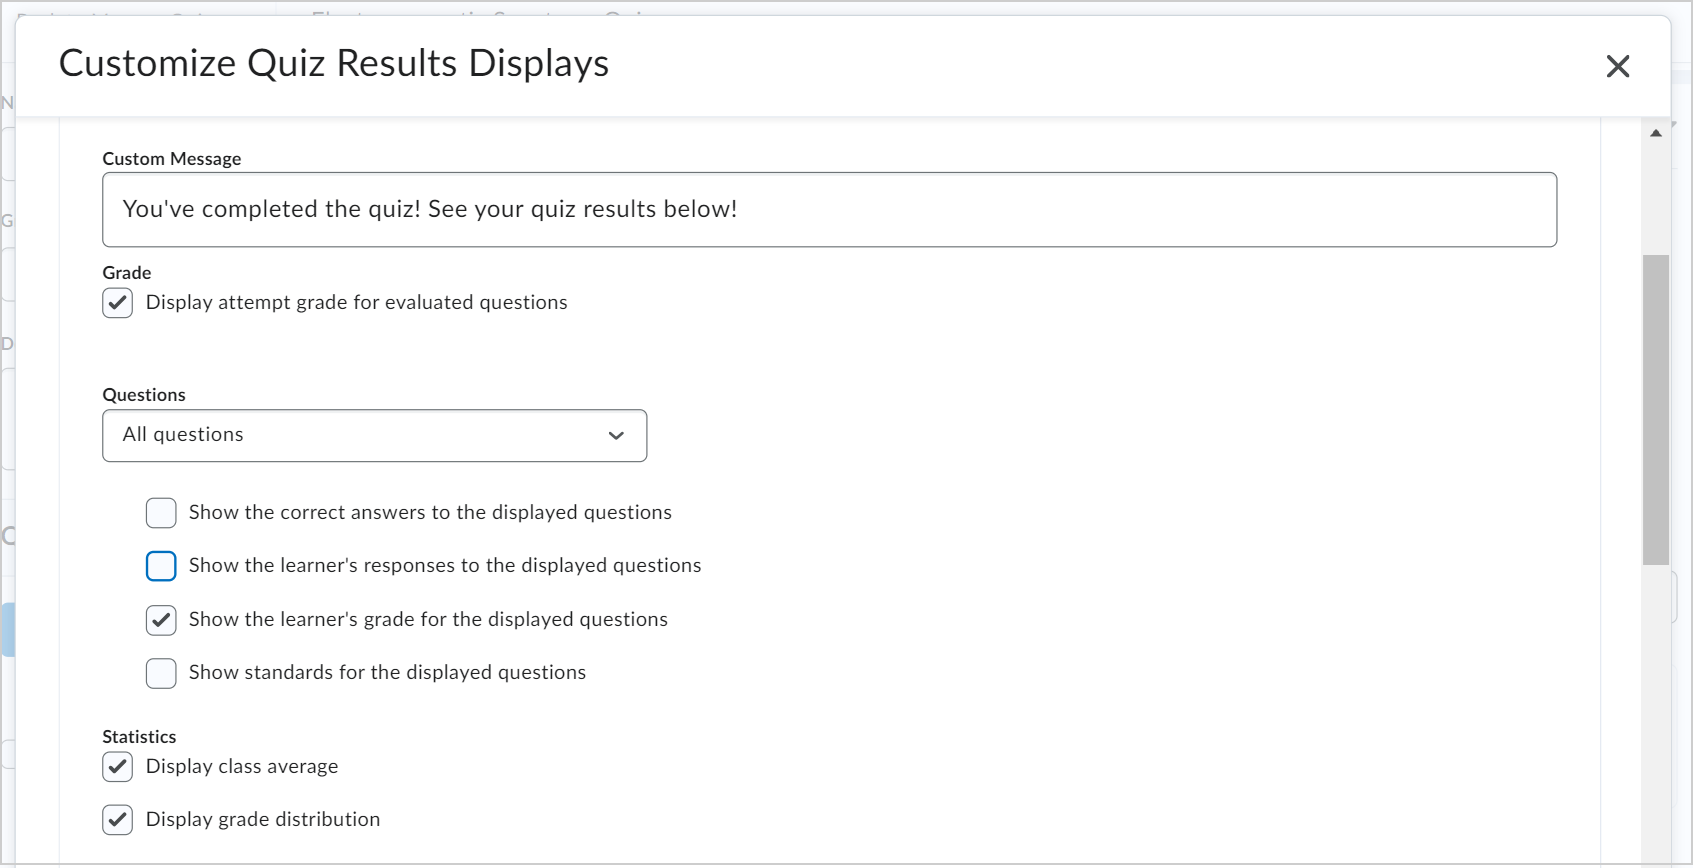
- Customize the quiz results display with the following details:
- Enter a message in the Custom Message field.
- In the Grade section, select or unselect the Display attempt grade for evaluated questions checkbox.
- In the Questions drop-down menu, select an option for how you want quiz questions displayed after a learner submits their quiz.
- In the Statistics section, select the desired checkboxes if you want to Display class average or Display grade distribution stats to learners.
- Click Update.
- If you want to add an additional view to the quiz, click the +Additional View button. The customization options are the same except you can also set a date and time when you want the additional view to appear.
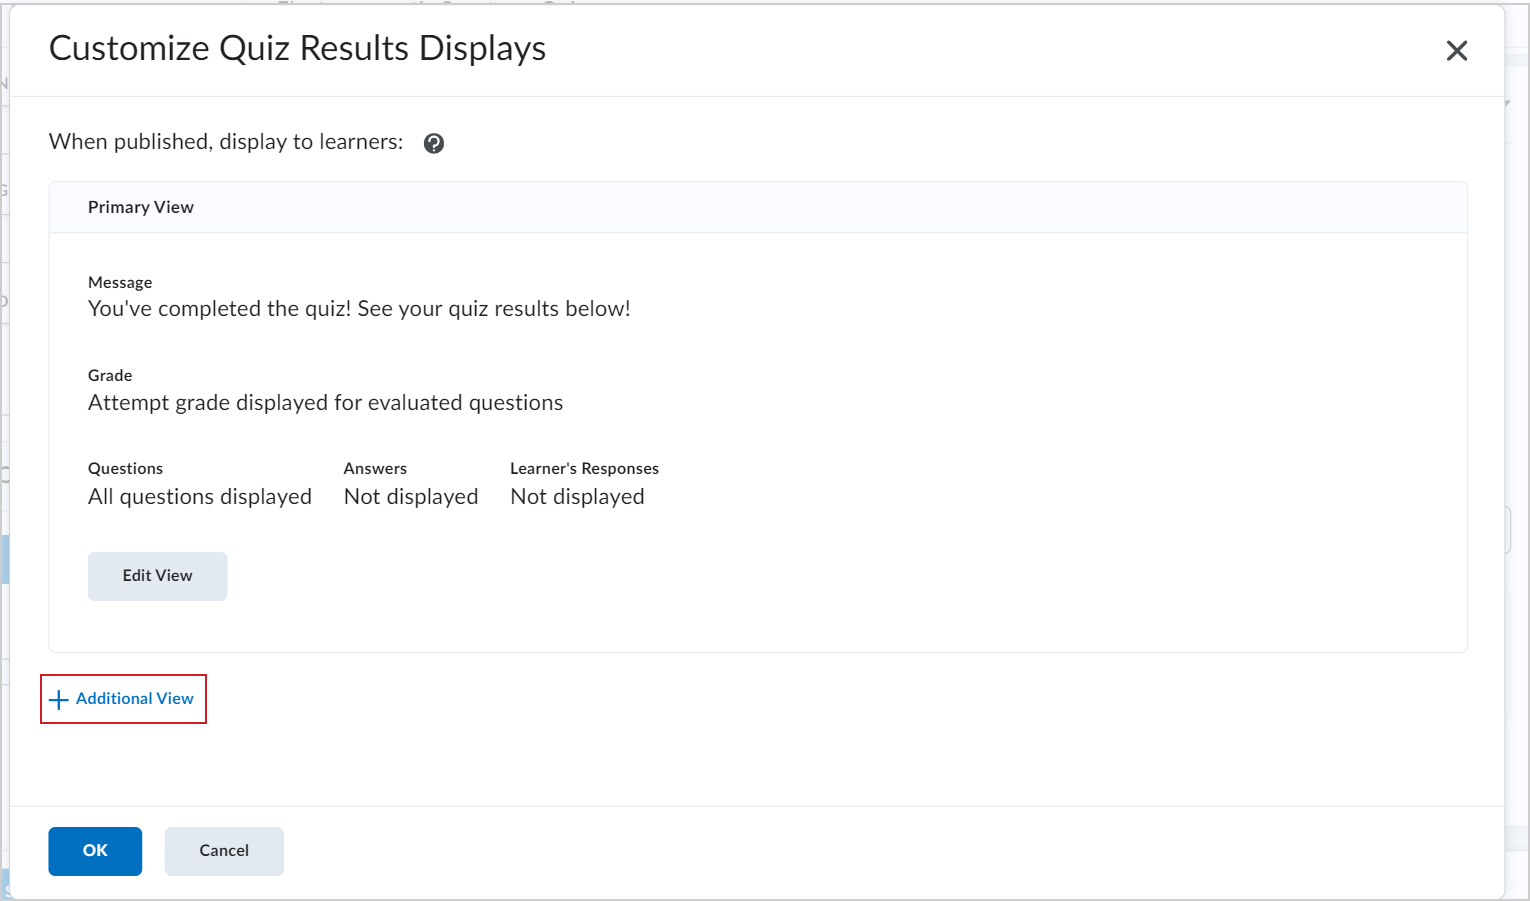
- Click Create.
- Click OK.
- Click Save and Close.
Your custom quiz results display appears when learners submit their quiz. If you also created an additional quiz results display, it will appear for learners on the date and time set by you.
Video: Customize the Quiz Results Display
Create a quiz with point deduction
You can use the Evaluation & Feedback settings of your quiz to enable point deduction when creating or editing a quiz. Point deduction sets a quiz to deduct a percentage of a question's point value for incorrect answers submitted. This feature applies specifically to question types that are auto-graded, for example, multiple-choice and true or false questions. The only question type that cannot be auto-graded is written response. The Deduction value subtracts a percentage of the point value of each quiz question. For example, if a quiz question is worth 1 point, a deduction of 25% will penalize users -0.25 points if their submitted answer is incorrect. The Deduction value cannot be higher than 100%. You can also edit existing quizzes to apply point deduction.
|
Important: D2L strongly recommends that you do not add mandatory questions to quizzes with point deduction and auto-submit enabled. This is because forcing learners to answer mandatory questions before submitting their quiz may also force learners to guess and incur an unfair point deduction. Point deduction is controlled by a configuration variable that is set to OFF by default. To enable point deduction in your course or Brightspace instance, contact your administrator.
|
To create a quiz with point deduction
- Select the module where you want to create a quiz and click Upload/Create.
- Click New Quiz.
- Expand Evaluation & Feedback and select Deduct points for incorrect answers.
- Enter a percent value under Deduction.
- Select Save and Close.
Your quiz now deducts points for incorrect answers submitted.
|
Note: If you are using Import/Export/Copy Components to import a quiz with a deduction percentage set, but point deduction is not turned on in your Org Unit or instance, deduction percentages are stored and display when point deduction is turned on. |
Restore a deleted quiz
Once a quiz has been deleted, you can restore that quiz, along with any associated quiz attempts, statistics, and scores for those quiz attempts.
|
Important: Learning Outcomes associated with quiz questions are unaffected, and re-appear with the questions when the quiz is restored. Links to a grade item and competencies are not restored. To restore a quiz requires the View Quiz Setup and Delete and Restore Quizzes permissions. Contact your administrator if these permissions have not been granted to your role. Quizzes deleted before the August 2022 / 20.22.8 Release cannot be restored using this method.
|
To restore a deleted quiz:
- In the Quizzes tool, navigate to Manage Quizzes > More Actions.
- Click Restore.
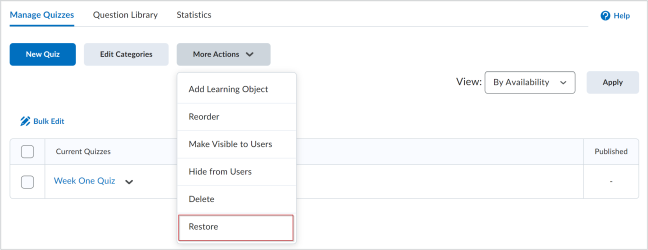
- Find the quiz you wish to restore on the Restore Quizzes page.
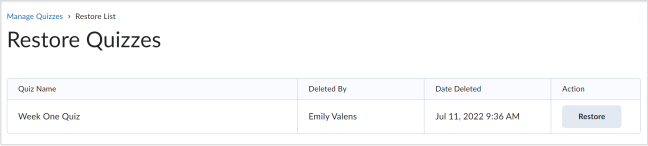
- Click Restore.
The selected quiz is restored to the Manage Quizzes tab.
Make your quiz visible
Make your quiz visible to learners.
To make your quiz visible
- When you are editing a quiz, toggle your quiz to be Hidden or Visible to learners.

- Save and Close.
Your quiz is visible to learners.
Hide a quiz
Hide quizzes from view so that learners cannot access or see them.
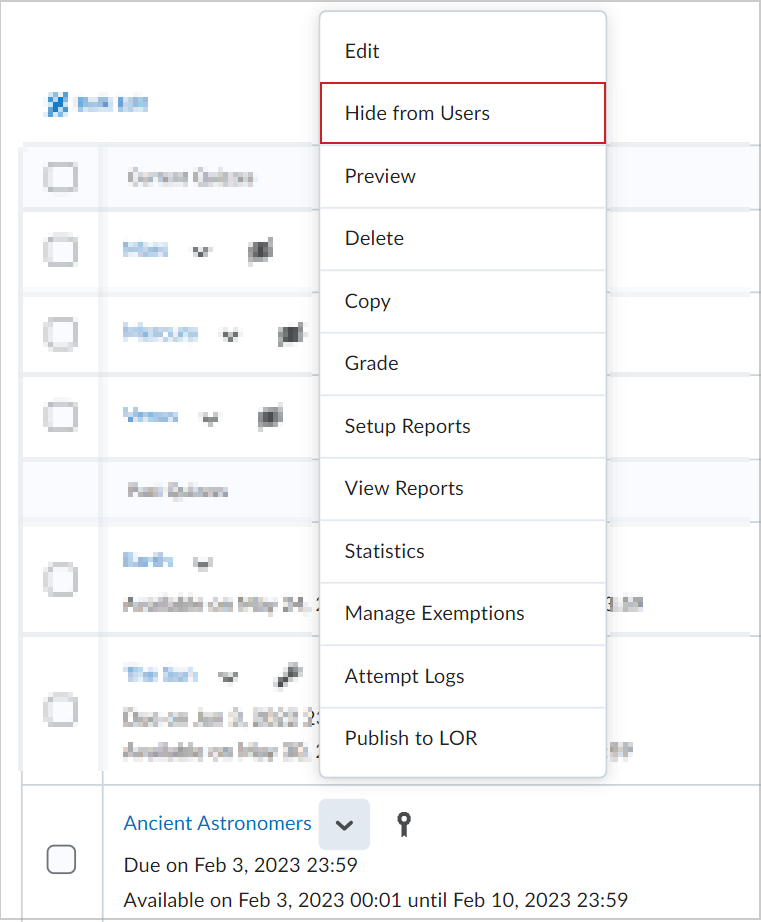
To hide a quiz
- Navigate to Quizzes.
- On the Manage Quizzes page, from the Actions menu of a quiz, select Hide from Users.
 |
Tip: You can also click Actions > Edit and change the quiz visibility. |
Make hidden quizzes visible
Make quizzes visible so that learners can take them and see them.
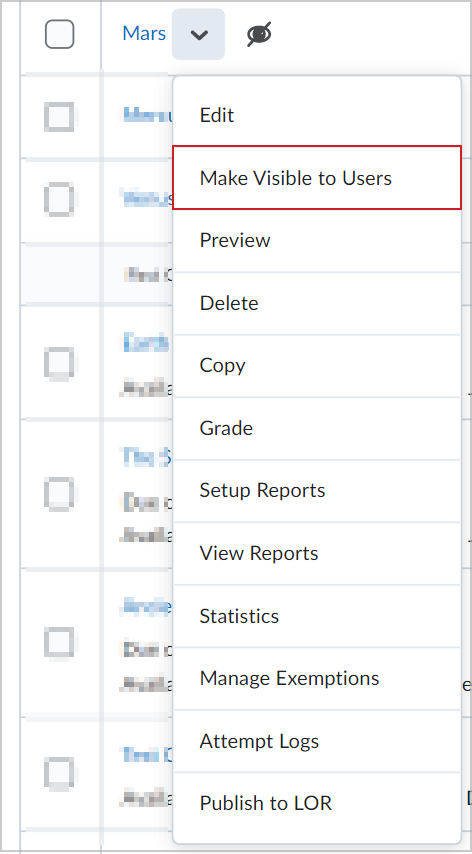
To make hidden quizzes visible
- Navigate to Quizzes.
- On the Manage Quizzes page, from the Actions menu of a quiz, select Make Visible to Users.
|
Tip: You can also click Actions > Edit and change the quiz visibility. |
Bulk hide or display quizzes
Bulk hide or make quizzes visible to change learners' view.
|
Important: D2L recommends that you do not select and bulk edit more than 250 quizzes at a time to ensure optimal performance.
|
To bulk hide or display quizzes
- Navigate to Quizzes.
- On the Manage Quizzes page, select the checkbox for any item you want to change the visibility of.
- Click More Actions and select Make Visible to Users or Hide from Users.
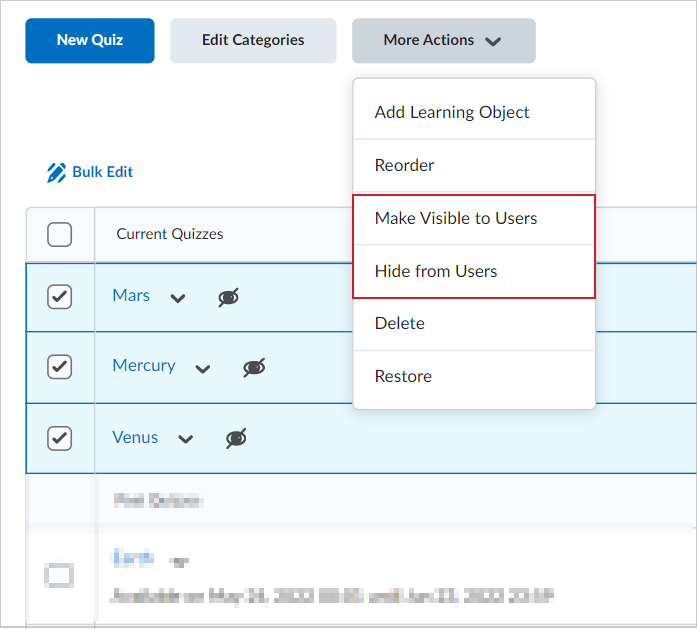
All selected quizzes are hidden or visible.
Manage Exemptions
You can manage exemptions by launching the Manage Exemptions page from the following locations in the Quizzes tool:
- On the Manage Quizzes page, in the context drop-down menu to the right of a quiz.
- On the Grade Quiz page as a button at the top of the page.
Preview a quiz attempt
There are often situations where you would like to see the end-to-end flow of submitting a quiz you created. This can easily be accomplished by clicking Preview within the Quizzes tool. You can go through the process of viewing and submitting a quiz and have your quiz attempt available in the evaluation workflow.
|
Note: Your preview submissions will not impact the statistics for your course. |
To preview a quiz attempt
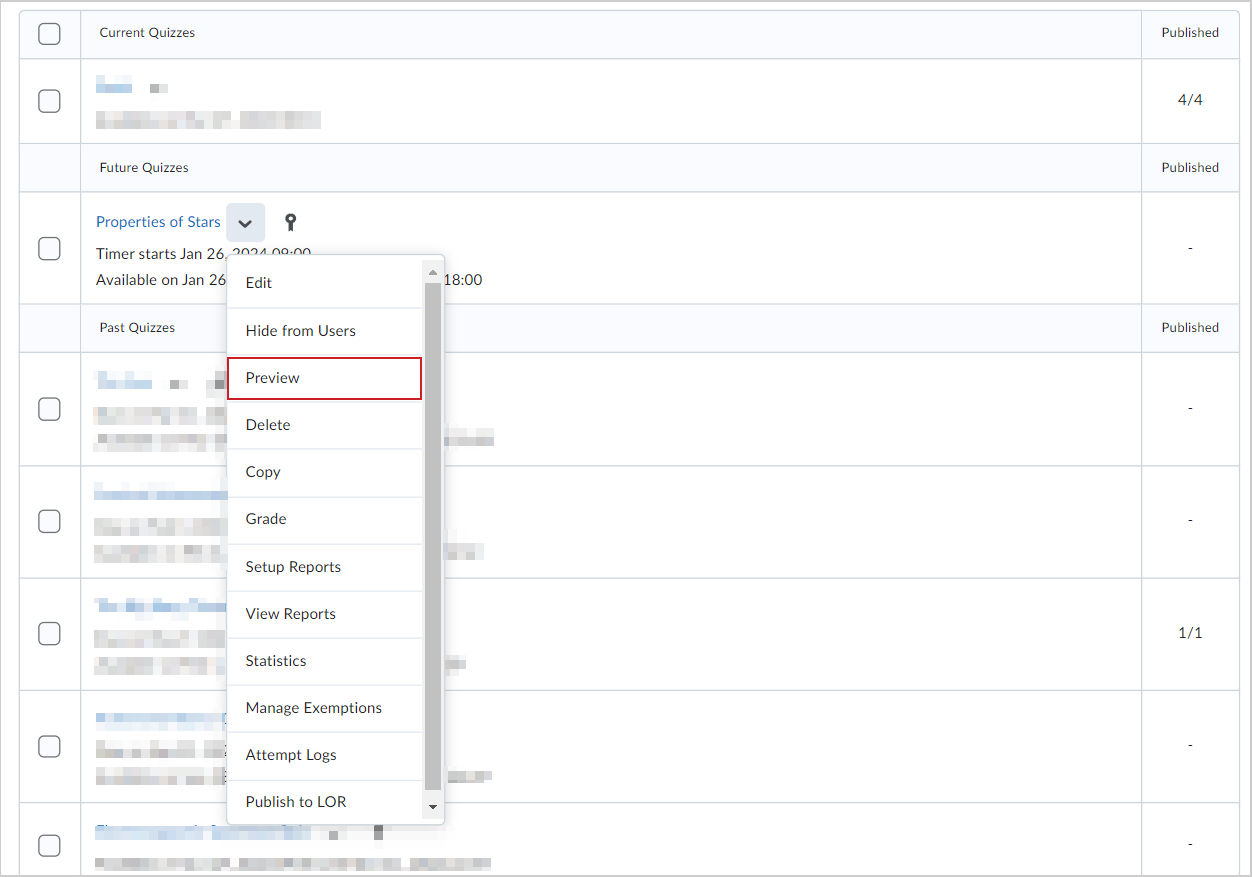
- Navigate to Quizzes.
- Select the context menu of the quiz you want and click Preview.
- Click the Start Quiz! button to take the quiz as a preview attempt.
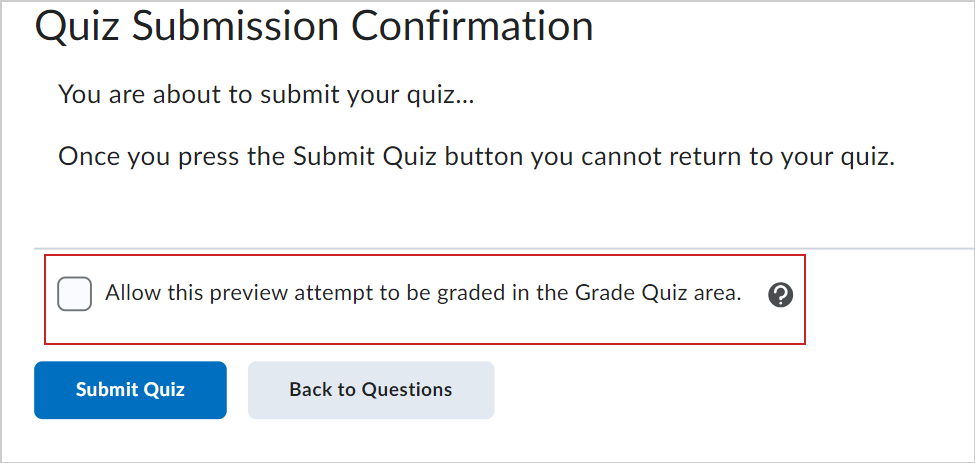
- Click Submit Quiz when you complete the quiz.
- Select Allow this preview attempt to be graded in the Grade Quiz area and click Submit Quiz again.
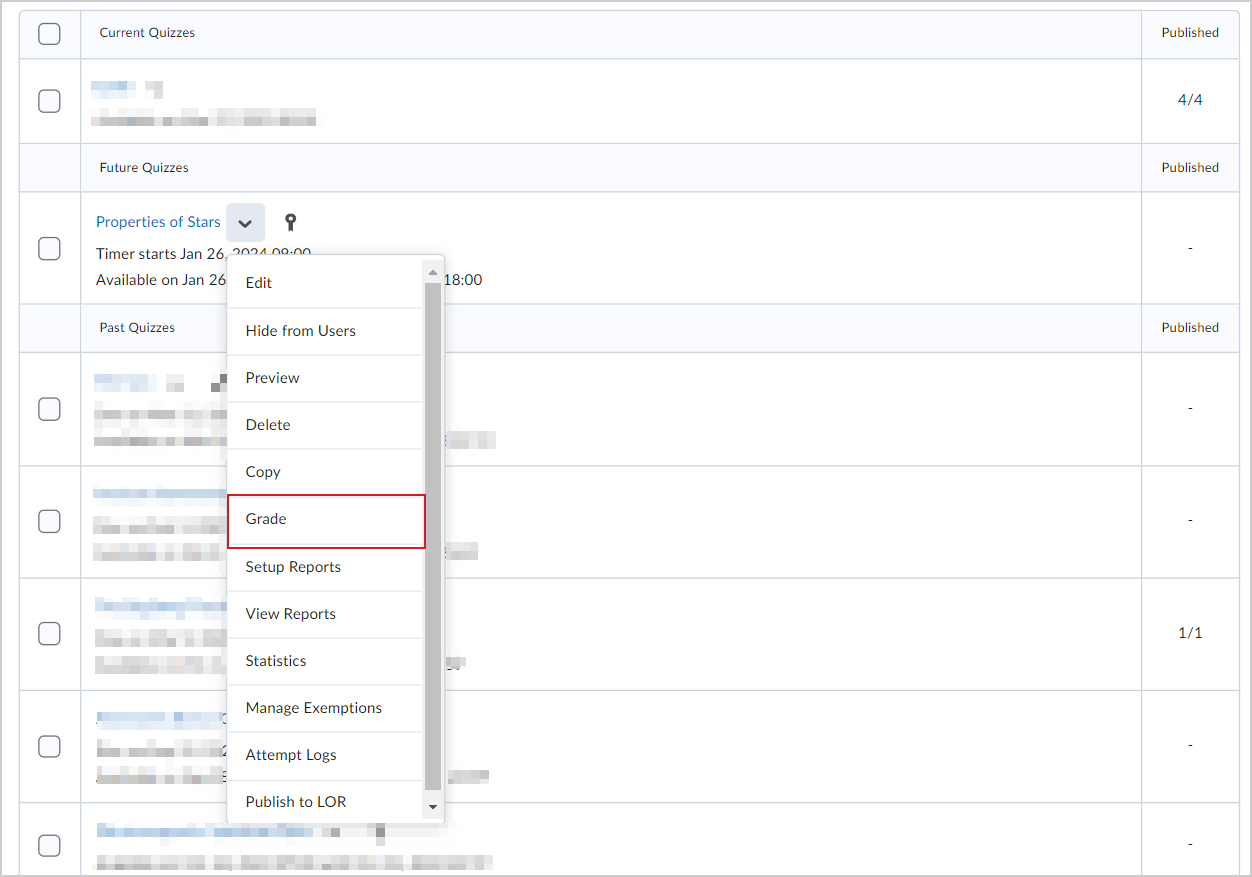
- Click Exit Preview.
- Click the context menu for the same quiz and click Grade.
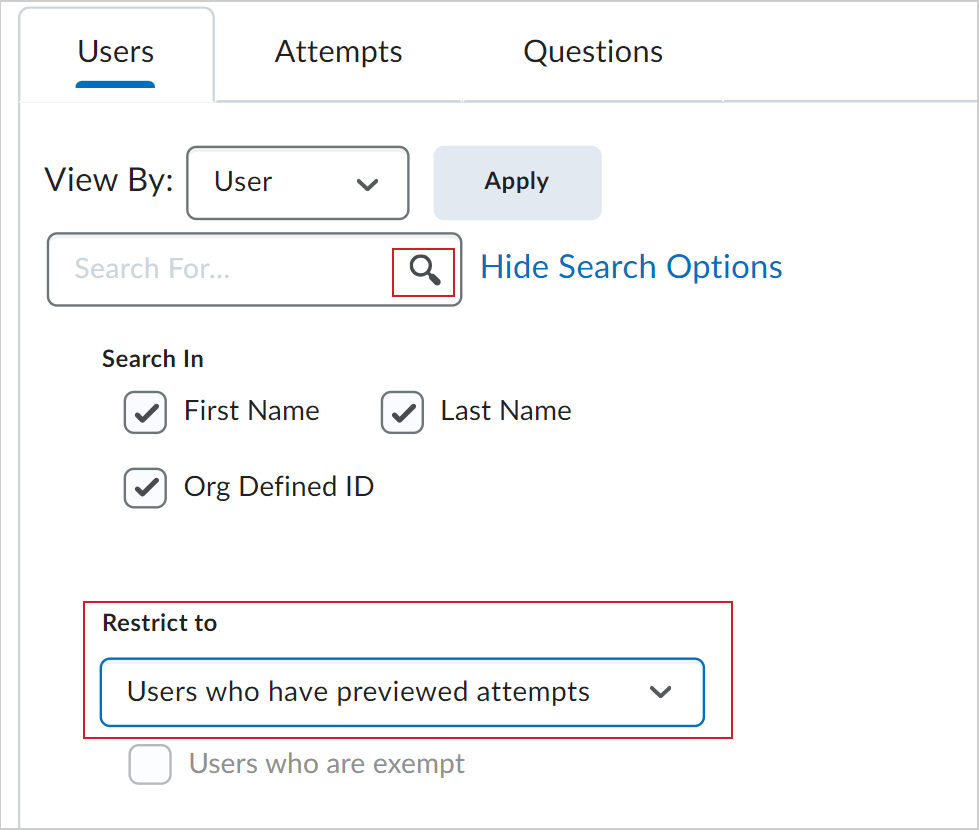
- In the Users tab, click Show Search Options.
- In the Restrict to section, select Users who have previewed attempts.
- Click the Search icon.
You can now access the quiz attempt and see the evaluation workflow.
Set up a quiz report
You can view and export quiz reports to a CSV or Microsoft Excel file for data analysis. The file contains all applicable information from the quiz so that you can query, sort, and evaluate the data without being connected to the learning management system. All statistics are calculated based on a user's first attempt of the quiz. If a question is changed after attempts have occurred, then only the attempts on the newest version of the question are included in the statistical calculations. Average grade is calculated only for first attempts of the quiz. For all reports, you can set a release date and select roles to release the report to.
|
Note: Quiz statistics are not computed for questions in a Question Pool. |
|
Report Type
|
Details
|
|
Question Statistics
|
The average score on questions by points and percentage.
You can choose to include or exclude the class average, grade distribution, bonus questions, the Out Of value, standard deviation, point biserial, and discrimination index.
|
|
Question Details
|
All of the answers provided for each quiz attempt, how many users chose each possible answer, the total number of responses, and the average score on each question.
You can choose to include or exclude the level of difficulty, text responses, bonus questions, private comments added to the report, standard deviation, point biserial, and discrimination index.
|
|
User Statistics
|
The class average and standard deviation, grade distribution, and the grade of each user.
You can choose to include or exclude the class average, grade distribution, and Org Defined ID.
|
|
Attempt Details
|
The Org Defined ID, username, first name, and last name of each user. Detailed information about each question. The users’ responses for each question organized by attempt, including how long each attempt took.
You can choose to include or exclude the Org Defined ID and attempt duration.
|
|
User Attempts
|
The Org Defined ID, username, first name, and last name of each user. The users’ score for each question in points and percentage organized by attempt, including how long each attempt took.
You can choose to include or exclude the Org Defined ID and attempt duration.
|
Create a quiz report that can detail statistics such as the class average or score distribution for your quiz.
To create a quiz report
- On the navbar, click Quizzes.
- On the Manage Quizzes page, from the context menu of the quiz you want to create a report for, click Setup Reports.
- Enter a Report Name.
- Select your Report Type. Using the check boxes provided, customize your report's output.
- Select when you want to release the report, and which roles you want to release it to.
- Click Save.
A new quiz report is created.
To download your quiz reports
- From the View Statistics page, do any of the following:
- To export as a CSV file, click Export to CSV
- To export as an Excel file, click Export to Excel
You can generate and download the following types of reports asynchronously:
- Attempt Details
- Question Statistics
- Question Details
- User Statistics
- User Attempts
When reports are ready for download, Brightspace notifies you using the bell (update alerts) icon.
Video: How to create a quiz report
Export the event log of all quiz attempts
You can export an event log of all quiz attempts made by all learners in your course. The event log for a quiz includes data about which users have completed the quiz, how many attempts they made, the date and time of quiz completion, and displays other events related to the quiz.
To export an event log
- From your course navbar, click Quizzes.
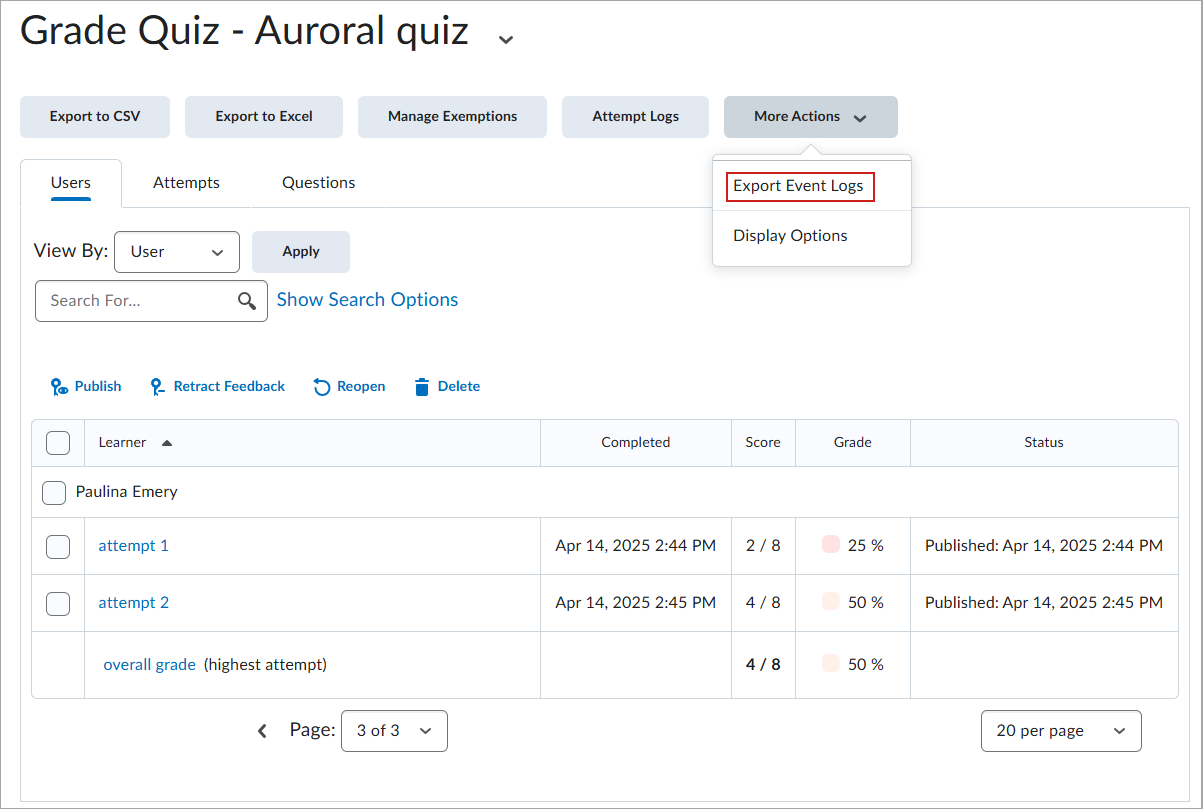
- Click the context menu next to the quiz you to export an event log for and select Grade.
- On the Grade Quiz page, click More Actions > Export Event Logs.
- Enter a name for the file.
- Specify where you want to save the file.
- Click Save.
The event log is exported.
View the event log of a single quiz attempt
You can view an event log of a single quiz attempt made by an individual learner.
To view the event log of a single quiz attempt
- From your course navbar, click Quizzes.
- Click the Actions icon next to a quiz and select Grade.
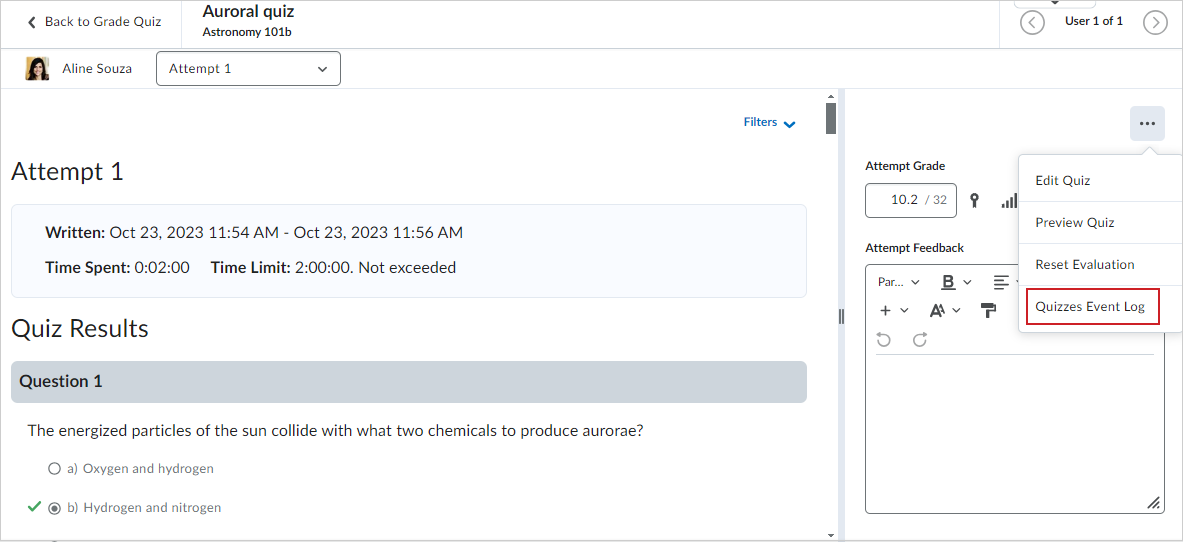
- Click the Attempts tab, and then click an attempt.
- From the Attempt page, click Event Options (...) and select Quizzes Event Log.
Use the Session ID column to identify when a learner has used multiple sessions within a quiz attempt, along with the IP Address column to identify when a learner has changing IP Addresses during a quiz attempt. 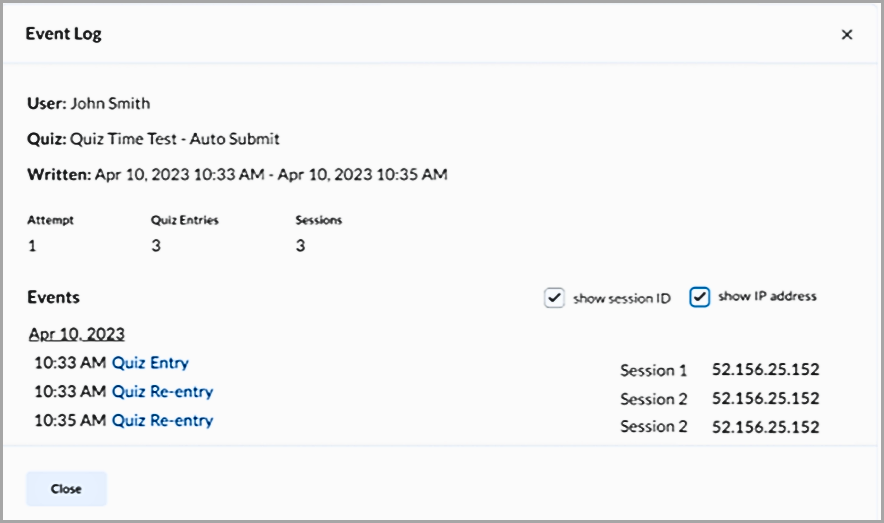
The event log of the quiz attempt is displayed.
|
Tip: You can also view the IP address of each event related to an attempt. Select show IP address from the Quizzes Event Log dialog. |
Academic Integrity in Quizzes
D2L takes academic integrity very seriously. Within the Quizzes tool, we provide several options to help reduce the possibility of cheating. However, different scenarios (in-person, fully remote, high-stakes testing, etc.) require different approaches, and no single option is likely to prevent all forms of academic misconduct.
The following options are available:
- Quiz Password – Requires learners to enter a password to access the quiz.
|
Tip: When administering quizzes in person, provide the password only after learners have put away their personal devices to reduce the risk of sharing it. |
- IP Restrictions – Allows you to restrict quiz access to specific IP address ranges.
- Question Pools – Ensures each learner receives a different set of questions by drawing randomly from a larger pool.
- Shuffle Questions – Randomizes the order of questions for each learner.
- Prevent Going Back to Previous Pages – Prevents learners from navigating back to earlier pages of the quiz.
- Randomize Answer Options – Randomizes the order of answer choices for multiple-choice and multi-select questions.
- Integrations – Third-party tools like Respondus, Proctorio, and Integrity Advocate provide additional proctoring and academic integrity functionalities.
Additionally, you can use the following features to investigate suspicious or concerning quiz activity:
- The Attempt Logs page provides detailed information about events during a quiz attempt, including quiz entry and re-entry times, and quiz completion. Where possible, IP addresses are logged for each event, which can help identify where the activity occurred. Multiple IP addresses within a single quiz attempt could be considered suspicious.
- When the d2l.Tools.Quizzes.ShowSessionId (OrgUnit) configuration variable is enabled, you can use the Session ID column to identify when learners have multiple sessions within a quiz attempt.
- Use the IP Address column to identify when learners have changed IP Addresses during a quiz attempt. This feature lets you determine whether different sessions were used for various quiz events.
|
Important: When reviewing a Quiz Attempt Log, we recommend using caution before concluding that cheating has occurred based solely on the presence of multiple IP addresses or Session IDs. There are valid reasons these may appear. This information is intended to support your investigation and should be evaluated in context, alongside other relevant data.
|
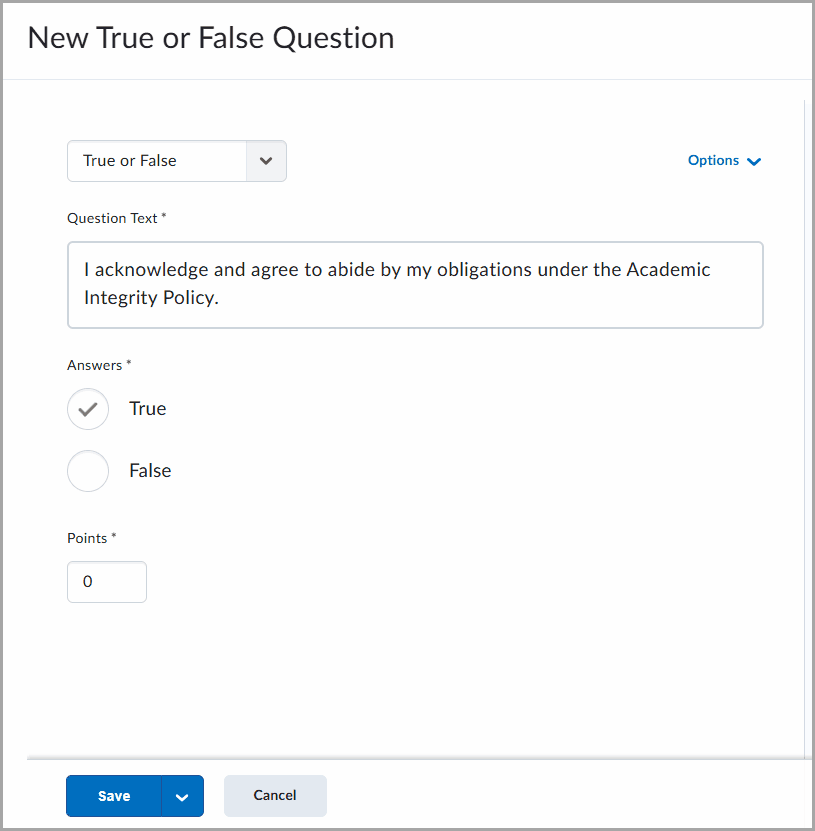
For gathering additional information from learners during a quiz or for implementing an "Honesty Code" question at the start, you can also use zero-point questions.