Scheduling a Meeting with Zoom Website

Tags Zoom

Overview

Zoom offers multiple methods to schedule a meeting. A host has control over the options for their scheduled meetings, except for settings that an administrator has locked for all users in the account or for all members of a specific group.

For instructions on scheduling using our plugins and extensions, see:

Note:

  • Your scheduler settings are synced from the Zoom web portal.
  • The asterisk (*) means your admin can restrict access to the setting/options, or the setting has additional prerequisites. These settings may not be visible. Click the relevant embedded links for more information.
  • If you set up calendar and contacts integration, install the Zoom add-in for your calendar service for a better experience. When scheduling or editing meetings, use your third-party calendar service instead of the Zoom desktop client.
  1. Open your Zoom client and sign in to Zoom.
  2. Click on the Schedule icon.

    This will open the scheduler window.
  3. Select your meeting settings. Note that some of these options might not be available if they were disabled and locked to the off position at the account or group level.
    • Topic: Enter a topic or name for your meeting.
    • Date & Time
      • Start: Select a date and time for your meeting. You can start your meeting at any time before the scheduled time. You can also manually enter any time. For example, you can enter 15 in the minutes field to schedule a time with a 15-minute increment.
      • Time Zone: By default, Zoom will use your computer's time zone. Click the drop-down menu to select a different time zone.
      • Recurring meeting: Choose if you would like a recurring meeting (the meeting ID will remain the same for each session).
    • Meeting ID
      • Generate Automatically: Generate a random unique meeting ID.
      • Personal Meeting ID*: Use your Personal Meeting ID.
    • Security
      • Passcode: Enter a meeting passcode. Joining participants will be required to input this before joining your scheduled meeting.
        Note: The meeting passcode must meet complexity requirements set by your admin.
      • Waiting Room: Enable Waiting Room for the meeting.
      • Only authenticated users can join: Restrict access to the meeting so that only signed-in using can join.
    • Encryption: Choose between the standard Enhanced encryption and End-to-end encryption for your meeting. 
    • Video
      • Host: Choose if you would like the host's video on or off when joining the meeting. Even if you choose off, the host will have the option to start their video.
      • Participants: Choose if you would like the participants' videos on or off when joining the meeting. Even if you choose off, the participants will have the option to start their video.
    • Audio*: Allow users to call in using Telephone only, Computer Audio only, Both, or 3rd Party Audio (if enabled for your account).
      • Dial in From: If Telephone or Both is enabled for this meeting, click Edit to select the dial-in countries to include in the invitation. By default, this includes your Global Dial-In Countries listed in your meeting settings.
    • Calendar: Select a calendar service to add the meeting to and send out invites to participants.
      • Outlook: Open the Outlook desktop app and create an event for the meeting.
        Note: You will see Outlook when using the Windows client.
      • iCal: Open iCal and create an event for the meeting.
        Note: You will see iCal when using a macOS.
      • Google Calendar: Open Google Calendar in your default browser and create an event for the meeting.
      • Other Calendars: Open a new window, where the meeting text can be copied pasted into the user's preferred communication method. You can also down an ICS file which can be opened in most email applications.
    • Advanced Options: Click on the arrow to view additional meeting options.
      • Allow participants to join before start time: Allow participants to join the meeting without you or before you join. The meeting will end after 40-minutes for Basic (free) users if 3 or more people join the meeting. If enabled, you can also choose how far in advance of the scheduled start time you wish them to be able to join: 5 minutes, 10 minutes, 15 minutes, or Anytime.
      • Mute participants on entry: If join before host is not enabled, this will mute participants as they join the meeting. Participants can unmute themselves after joining the meeting. 
        Note: To mute all participants currently in a meeting, see the options to manage participants.
      • Request permission to unmute participants: Participants will be prompted to provide the host with consent to be unmuted at will by the host. If declined, the host will still have the option to Ask to unmute
      • Automatically record meeting: Select if you want to record Locally (to your computer) or In the cloud.
      • Enable additional data center regions for this meeting*
      • Schedule for*: If you have scheduling privilege for another user, you will be able to choose who you want to schedule for from the drop-down menu.
      • Show in Public Event List: Add the meeting to a public calendar associated with your vanity URL.
      • Alternative hosts: Enter the email address of another Zoom user who is Licensed, on your account to allow them to start the meeting in your absence.
      • Interpretation (only supported in Windows and macOS clients)*: Enable language interpretation for the meeting.
  4. Click Save to finish, and open the selected calendar service to add the meeting.
    Note:
    • If you are scheduling a recurring meeting, you will need to set the recurrence in your calendar service.
    • Choosing Other Calendars will allow you to copy and paste the scheduled meeting information such as date, time, and meeting URL.
 

Web

  1. Sign in to the Zoom web portal.
  2. Click Meetings, and click Schedule a Meeting.
  3. Select the meeting options.  Note that some of these options might not be available if they were disabled and locked to the off position at the account or group level.
    • Topic: Enter a topic or name for your meeting.
    • Description: Enter in an optional meeting description.
    • Use a template: Apply a meeting template.
    • When: Select a date and time for your meeting. You can manually enter any time and press enter to select it. For example, you can enter 15 in the minutes field to schedule a time with a 15-minute increment.
    • Duration: Choose the approximate duration of the meeting. This is only for scheduling purposes. The meeting will not end after this length of time.
    • Time Zone: By default, Zoom will use the time zone set in your profile. Click the drop-down menu to select a different time zone.
    • Recurring meeting: Check if you would like a recurring meeting (the meeting ID will remain the same for each session). This will open up additional recurrence options.
      • Recurrence: Select how often you need the meeting to recur: Daily, Weekly, Monthly, or No Fixed Time. Meetings can recur up to 50 times, so if you need more than 50 recurrences, use the No Fixed Time option.
      • The other recurrence options will depend on how often the meeting recurs. You can configure the meeting to end after a set amount of occurrences or have the recurring meeting end on a specific date.
    • List this meeting in the Public Events List: Add the meeting to a public calendar associated with your vanity URL.
    • Registration: Check this option if your meeting will require registration. Instead of a join link for your participants, you will be provided a registration link. If registration is required and the meeting is reoccurring, choose one of these options:
      • Attendees register once and can attend any of the occurrences: Registrants can attend all of the occurrences. All dates and times of the meeting will be listed and the registrant will be registered for all occurrences.
      • Attendees need to register for each occurrence to attend: Registrants need to register separately for each occurrence to attend. They can only choose one date and time on the registrant page.
      • Attendees register once and can choose one or more occurrences to attend: Registrants register once and can choose one or more occurrences to attend. They will need to select which dates and times they would like to attend and they will only be registered for those occurrences. They can choose multiple options.
    • Schedule For*: If you have scheduling privilege for another user, you will be able to choose who you want to schedule for from the drop down.
    • Meeting ID
      • Generate Automatically: Generate a random unique meeting ID.
      • Personal Meeting ID*: Use your Personal Meeting ID.
    • Security
      • Passcode: Enter a meeting passcode. Joining participants will be required to input this before joining your scheduled meeting.
        Note: The meeting passcode must meet complexity requirements set by your admin.
      • Waiting Room: Enable Waiting Room for the meeting.
      • Require authentication to join: Restrict access to the meeting so that only signed-in using can join.
    • Video
      • Host: Choose if you would like the host's video on or off when joining the meeting. Even if you choose off, the host will have the option to start their video.
      • Participants: Choose if you would like the participants' videos on or off when joining the meeting. Even if you choose off, the participants will have the option to start their video.
    • Audio*: Allow users to call in using Telephone only, Computer Audio only, Both, or 3rd Party Audio (if enabled for your account).
      • Dial in From: If Telephone or Both is enabled for this meeting, click Edit to select the dial-in countries to include in the invitation. By default, this includes your Global Dial-In Countries listed in your meeting settings.
    • Meeting options
      • Allow participants to join before start time: Allow participants to join the meeting without you or before you join. The meeting will end after 40-minutes for Basic (free) users if 3 or more people join the meeting. If enabled, you can also choose how far in advance of the scheduled start time you wish them to be able to join: 5 minutes, 10 minutes, 15 minutes, or Anytime.
      • Mute participants on entry: If join before host is not enabled, mute participants as they join the meeting. Participants can unmute themselves after joining the meeting. 
        Note: To mute all participants currently in a meeting, see the options to manage participants.
      • Breakout Room pre-assign*: Pre-assign participants to breakout rooms.
      • Automatically record meeting: Select if you want to record On the local computer or In the cloud.
      • Enable additional data center regions for this meeting*
      • Approve or block entry to users from specific regions/countries: Allow users from specific regions to join your meetings; or block users from specific regions from joining your meetings. Users' region/country is determined by their IP address.
        Note: You change the default regions/countries in your web portal settings.
    • Alternative hosts: Enter the email address of another Zoom user who is Licensed, on your account to allow them to start the meeting in your absence.
    • Interpretation (only supported in Windows and macOS clients)*: Enable language interpretation for the meeting.
  4. Click Save to finish.

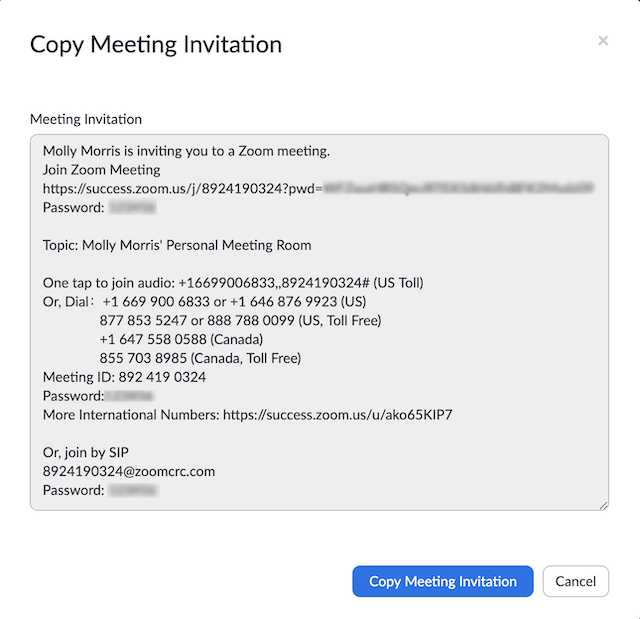
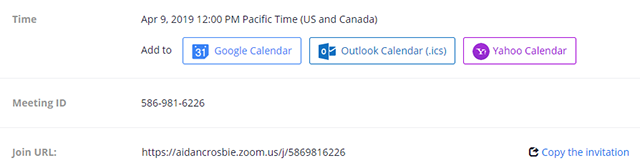
Once finished, you can either select a calendar option to add the scheduled meeting to your calendar or select Copy The Invitation to send out the invitation to your Zoom meeting.

Copy the Invitation will open up a window where you can copy the full invitation to send out via email.

Note: Using the Outlook Calendar option, will also launch the .ics in iCal if Outlook is not the default email program in macOS. 

  1. Sign in to the Zoom mobile app.
  2. Tap Schedule.
  3. Select the meeting options. Some of these options might not be available if they were disabled and locked to the off position at the account or group level.
    • Topic: Enter a topic or name for your meeting.
    • Date, From, To: Select a date and time for your meeting.
    • Time Zone: By default, Zoom will use your device's time zone setting. To change the time zone, tap this field.
    • Repeat: Choose if you would like a recurring meeting (the same meeting ID for all occurrences), and select your recurrence pattern: Every Day, Every Week, Every 2 Weeks, Every Month, Every Year
    • Use Personal Meeting ID (PMI): Check this if you want to use your Personal Meeting ID. If not selected, a random unique meeting ID will be generated.
    • Security
      • Require Meeting Passcode: Participant must enter the meeting's passcode you set up to enter the scheduled meeting.
        • Passcode: Enter a passcode that participants will be required to input before joining your scheduled meeting.
      • Enable Waiting Room: Send participants to the Waiting Room before you admit them into the scheduled meeting.
      • Only Allow Authenticated Users: Restrict access to the meeting so that only signed-in using can join.
      • Encryption: Choose between Enhanced encryption or End-to-End encryption. 
        Note: Use of end-to-end encryption disables some features from being used. 
    • Meeting Options
      • Host Video On: Turn the host's video on or off when joining the meeting. Even if you choose off, the host will have the option to start their video.
      • Participant Video On: Turn the participants' videos on or off when joining the meeting. Even if you choose off, the participants will have the option to start their video.
      • Audio option
        • Pick your audio connection: Allow users to call in using Device audio only, Telephone only, Telephone and Device Audio, or 3rd Party Audio (if enabled for your account).
        • Select dial-in country*: Select dial-in numbers to display in the meeting invite. Tap and drag each country to re-arrange the order.
      • Allow Join Before Host: Allow participants to join your meeting before you. The meeting will end after 40-minutes for Basic (free) users if 3 or more people join the meeting.
      • Join Before the Meeting Start Time: If Join Before Host is enabled, you can set how far in advance of the scheduled start time you wish them to be able to join: 5 minutes, 10 minutes, 15 minutes, or Anytime.
      • Request permission to unmute participants: Allows meeting attendees to choose if they wish the host to have pre-approved consent to unmute them. 
      • Automatically Record Meeting: Automatically record the meeting. 
      • Record location: Select if you want to recorded Local Computer (to your computer) or to the Cloud.
      • Additional data center regions*
      • List in the Public Event List: Designate the meeting to be added to your account's calendar of public meetings and webinars
      • Schedule For*: If you have scheduling privilege for another user, you will be able to choose who you want to schedule for from the drop down.
      • Alternative hosts: Select users in the same organization to allow them to start the meeting in your absence. 
    • Add to Calendar: Add the meeting to your default calendar app.
  4. Tap Save to finish scheduling.

Notes:

  • A non-recurring meeting ID will expire 30 days after the meeting is scheduled for. You can restart the same meeting ID as many times as you would like, within the 30-day period.
  • A recurring meeting ID will expire 365 days after the meeting is started on the last occurrence. You can re-use the meeting ID for future occurrences.
  • Scheduled meetings can be started at any time before the scheduled time. The links will not expire or become invalid unless it is past the 30-day period for a non-recurring meeting, has not been used for over 365 days for a recurring meeting, or has been deleted from your Zoom account. An instant meeting link will expire as soon as the meeting is over.

Details

Article ID: 126474
Created
Tue 1/26/21 10:10 AM
Modified
Tue 1/26/21 11:45 AM