Overview
Scheduling privilege is designed for a user or an executive admin to:
- You can assign or delegate a user or multiple users in your account to schedule meetings on your behalf.
- You can also schedule meetings on behalf of a user (or multiple users) that has assigned you scheduling privilege. If both users have a webinar license, they can also schedule webinars for you.
- You and the assigned scheduler must be Licensed or On-Prem.
- Users with Scheduling Privilege on your account will be able to manage and act as an alternative host for all meetings.
Note: If you receive a 3003 error when edit or canceling a meeting for another user, check that scheduling privileges have not been modified. Also, check that you and the user you are scheduling for are both Licensed users.
This article covers:
Prerequisites
- Both users must be Licensed or On-Prem and be on the same account
- For a webinar, both users must have the webinar add-on
- If scheduling for another user through a Zoom plugin, add-in, or add-on, install the latest version:
Setting up scheduling privilege
- Sign in to the Zoom web portal.
- Click Settings.
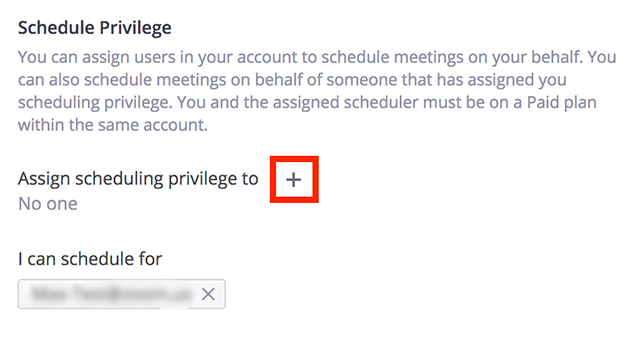
- Under Other, click the plus sign (+) next to Assign scheduling privilege to.
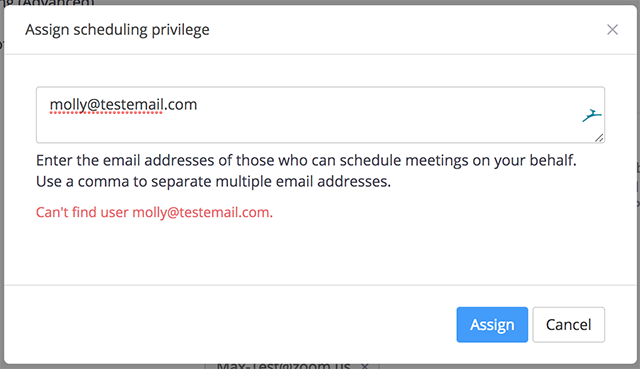
- Enter one or more email addresses in the window, separated with a comma.
- Click Assign.

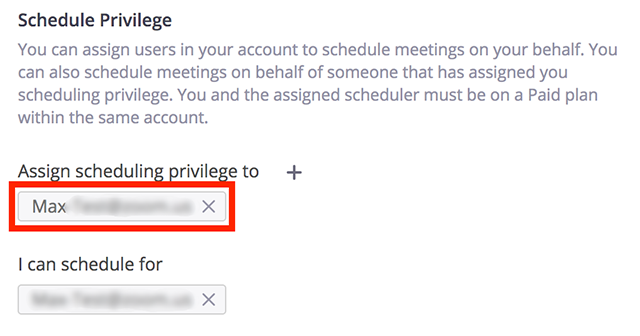
If the user was assigned successfully, they will appear under Assign Scheduling Privilege to. However, they will need to sign out of the Zoom desktop client and sign in again before they will be able to schedule for you there.
If scheduling privilege cannot be assigned because the user is not on your account or is not a Licensed user, you will receive an error message.
Scheduling for another user (Zoom plugins, add-ins, and add-ons)
Before beginning, make sure to set up scheduling privilege and install the latest version of the plugin, add-in, or add-on.
Note: You can also set up calendar integration if you want to see Zoom meetings scheduled in third-party calendars to display on the desktop client.
Outlook add-in
Follow the scheduling privilege PDF guide to learn about scheduling for another user. You can also follow these steps to schedule for another user in the Outlook add-in.
- Schedule a meeting using the Outlook add-in.
- While in the calendar event window, click Zoom then Settings.
- In the Schedule For drop-down menu, select the user you want to schedule the meeting for.
Note: If you want to allow someone else to manage your Outlook calendar, refer to the Office 365 support site.
Outlook plug-in
Follow the scheduling privilege PDF guide to learn about scheduling for another user. You can also follow these steps to schedule for another user in the Outlook plug-in.
- Schedule a meeting using the Outlook plug-in.
- While in the calendar event window, click Change Settings in the tool bar.
- Click the Schedule For check box, then select the user you want to schedule the meeting for.
Note: If you want to allow someone else to manage your Outlook calendar, refer to the Office 365 support site.
Other plugins and add-ons
Follow these PDF guides to learn about scheduling for another user:
Note: When you schedule for another user using a plugin, add-in, or add-on, the meeting will be scheduled for yourself. As a result, the meeting will not appear in Zoom for the person you're scheduling for. After scheduling the meeting in the third-party platform, follow these steps to change the user that the meeting was scheduled for:
- Sign in to the Zoom web portal.
- In the navigation menu, click Meetings.
- Click the meeting that you scheduled in the third-party platform.
- Click Edit this Meeting.
- In the Schedule For drop-down menu, select the user that assigned you scheduling privileges, then save the changes to the meeting.
The meeting will appear for the user when they sign in to the Zoom web portal, desktop client, or mobile app.
Scheduling for another user (Zoom)
The user given scheduling privilege will need to logout of the Zoom client and login again for the scheduling privilege option to appear.
- Sign in to the Zoom Desktop Client.
- Click on the Schedule icon.

This will open the scheduler window.
- Find the Schedule for section, found below the Topic section, and choose the user you want to Schedule For from the dropdown menu.
- Click Schedule to finish, and open up the calendar you have selected.
The user given scheduling privilege will need to logout of the Zoom client and login again for the scheduling privilege option to appear.
- Sign in to the Zoom Desktop Client.
- Click on the Schedule icon.
This will open the scheduler window.
- Find the Schedule for section, found below the Topic section, and choose the user you want to Schedule For from the dropdown menu.
- Click Schedule to finish, and open up the calendar you have selected.
- Sign in to the Zoom web portal.
- Click Meetings, then click Schedule A Meeting.
- Find the Schedule for section, found below the Registration option, and choose the user you want to Schedule For from the dropdown menu.
- Click Save to finish.
The user given scheduling privilege will need to logout of the Zoom client and login again for the scheduling privilege option to appear.
- Sign in to the Zoom Desktop Client.
- Click on the Schedule icon.

This will open the scheduler window.
- Find the Schedule for section, found below the Topic section, and choose the user you want to Schedule For from the dropdown menu.
- Click Schedule to finish, and open up the calendar you have selected.