Top Hat Discussions are incredibly versatile tools. They allow you to ask students subjective and interpretive questions that may not have a simple or absolute answer, gain real-time feedback during lectures, and facilitate dialogue between students.
Table of Contents
- Adding a Discussion
- Grading Options
- Response Options
- Character Limit
- Reply with an Image (Instructions for Students)
- Embedding Hyperlinks
Adding a Discussion
To add a discussion to your course, select the blue Add to course button and then select Discussion.
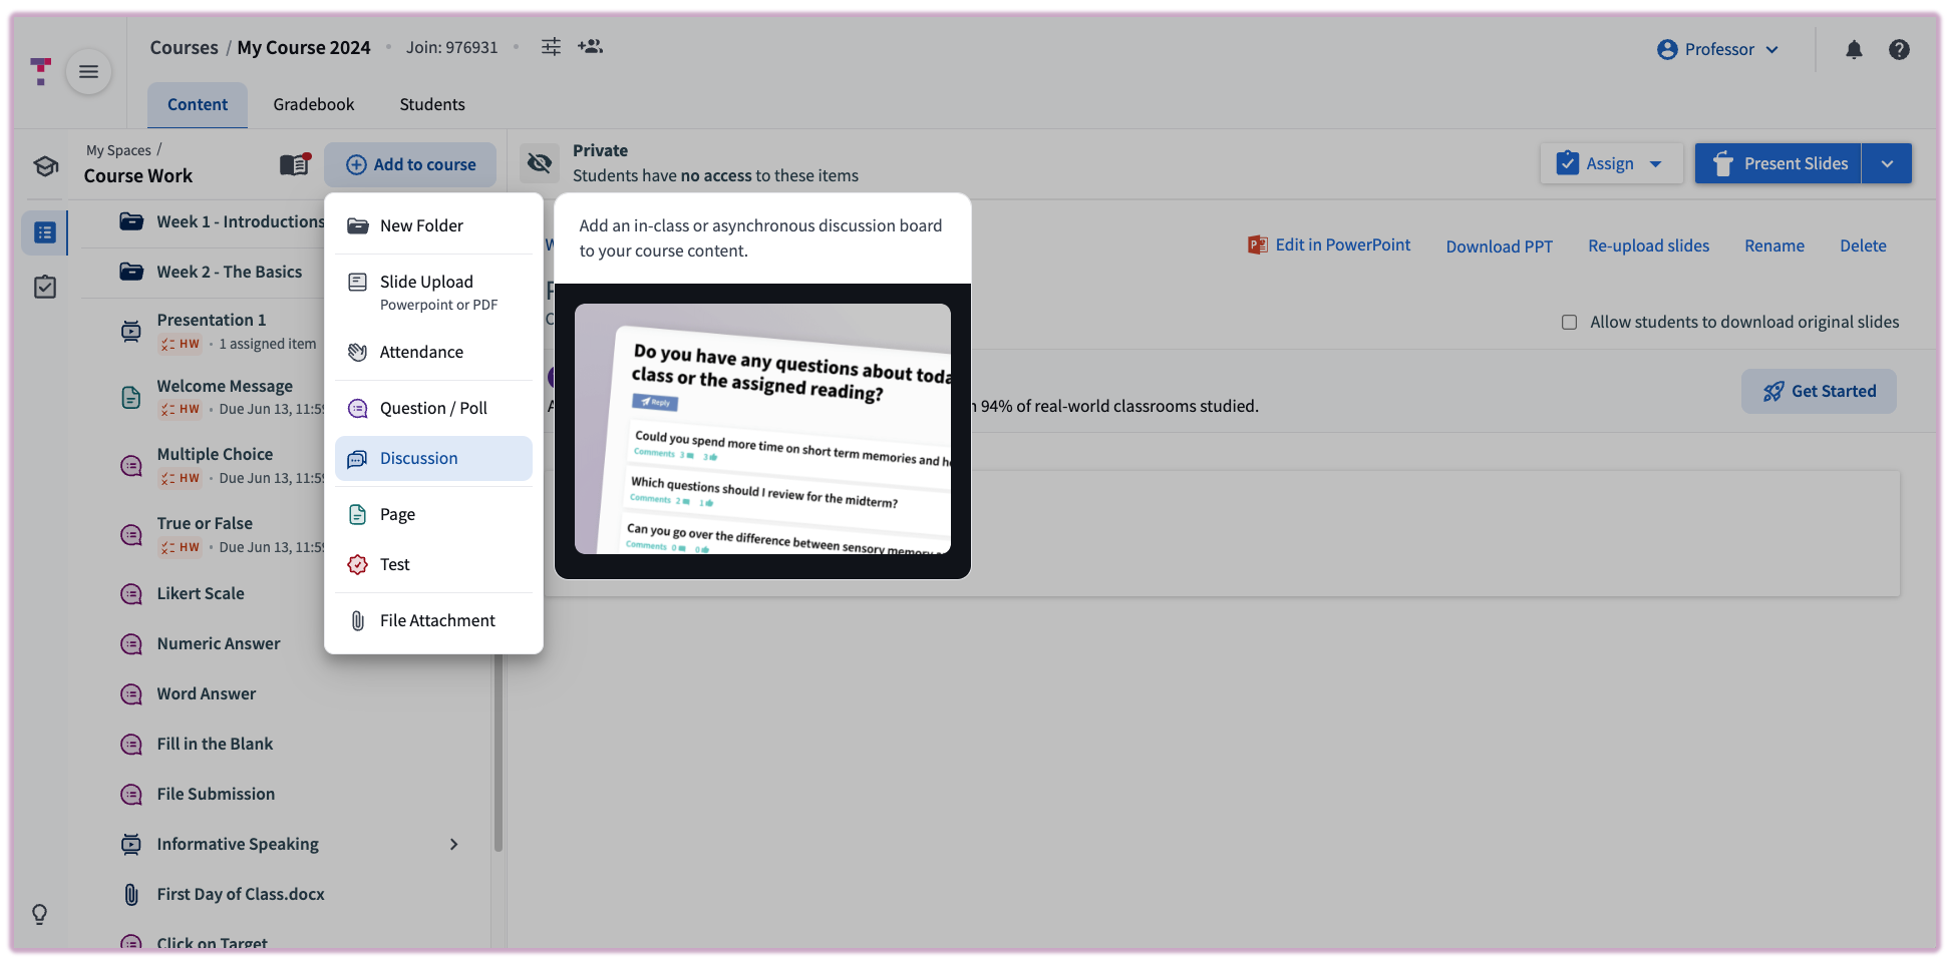 Image: Selecting Discussion from the Add to Course menu
Enter a Discussion Title and Topic (the prompt or question) in the window that appears.
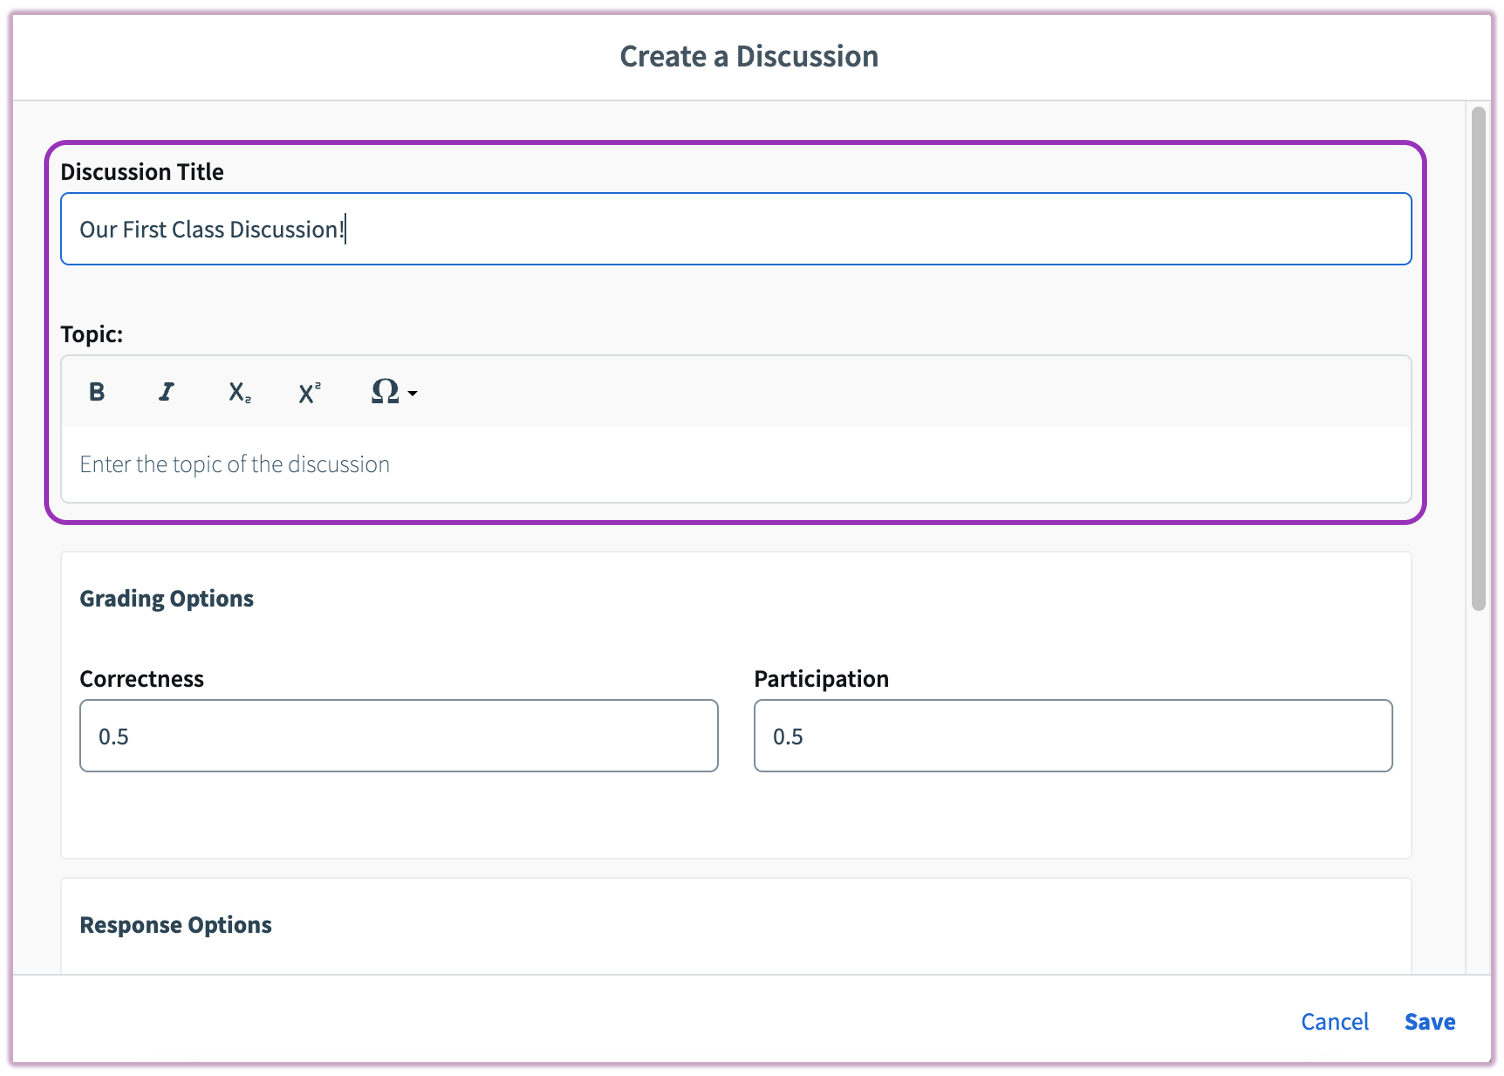 Image: Setting the Discussion Title and Topic
Grading Options
In the grading section, either keep the default values (0.5 Correctness / 0.5 Participation) or update them to your preferred weights.
- Participation: These points are allocated automatically to any student who responds to the discussion, regardless of the quality of their response.
- Correctness: Due to the subjective nature of discussions, you must manually assign these grades in the Gradebook after reviewing responses.
Note: Student comments on others' replies do not count toward participation or correctness. A student must submit an original reply to the main prompt to receive automatic participation points.
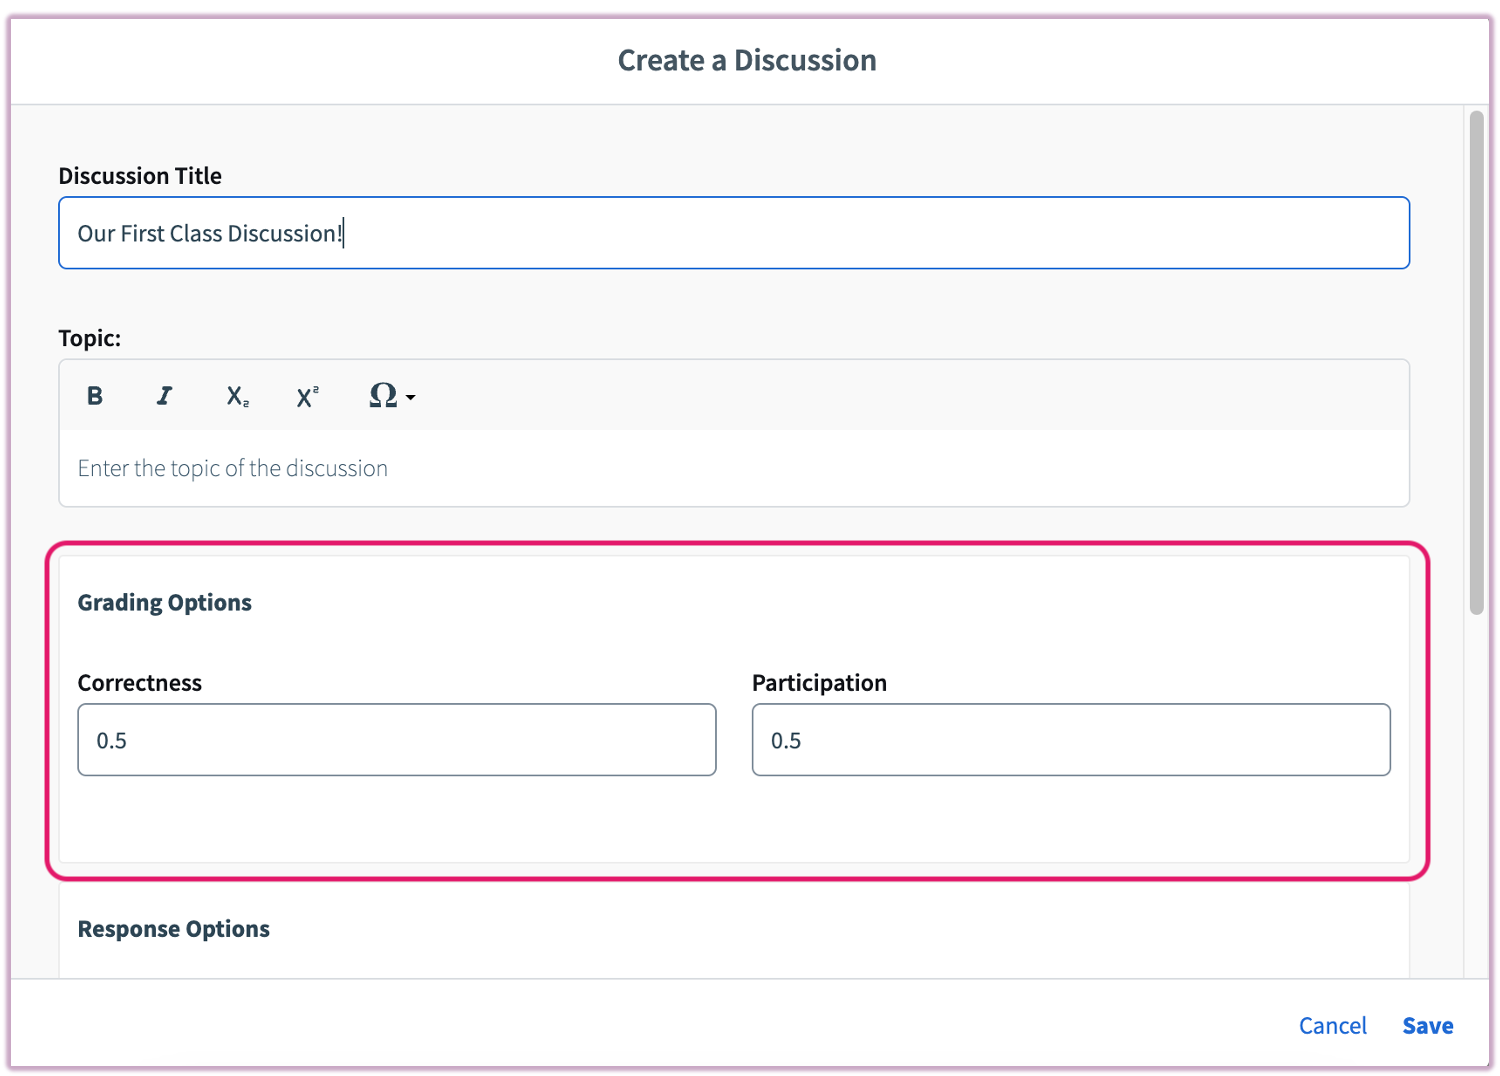 Image: Configuring Grading Options
Important: Anonymous Discussions cannot be graded. Additionally, responses cannot be deleted by students once submitted, as anonymity prevents the system from linking the action to a specific account.
Response Options
Next, you can decide who can view the discussion and what level of anonymity will be applied. These settings determine the visibility of student names and contributions.
| Responses visible to |
Authors anonymous to |
Discussion Style |
| Everyone |
No one |
Open: Students see all responses and names. |
| Everyone |
Participants only |
Open (No Names): Students see responses, but not names. Educators see names. |
| Everyone |
Everyone |
Anonymous: No one can see names. Cannot be graded. |
| Educator only |
Participants only |
Answer Submission: Students only see their own work. |
| Educator only |
Everyone |
Anonymous: Educator sees responses but no names. Cannot be graded. |
Lastly, you can decide if you would like to allow students to submit a drawing as part of their response.
Toggling "Allow students to respond with a drawing" will let you upload an image to accompany your discussion prompt and allow students to submit a drawing along with their post. Students can either draw on your uploaded image or on a blank canvas.
Tip: This feature is especially helpful if you want students to write out a complicated formula, draw a chemical reaction, or annotate a graph.
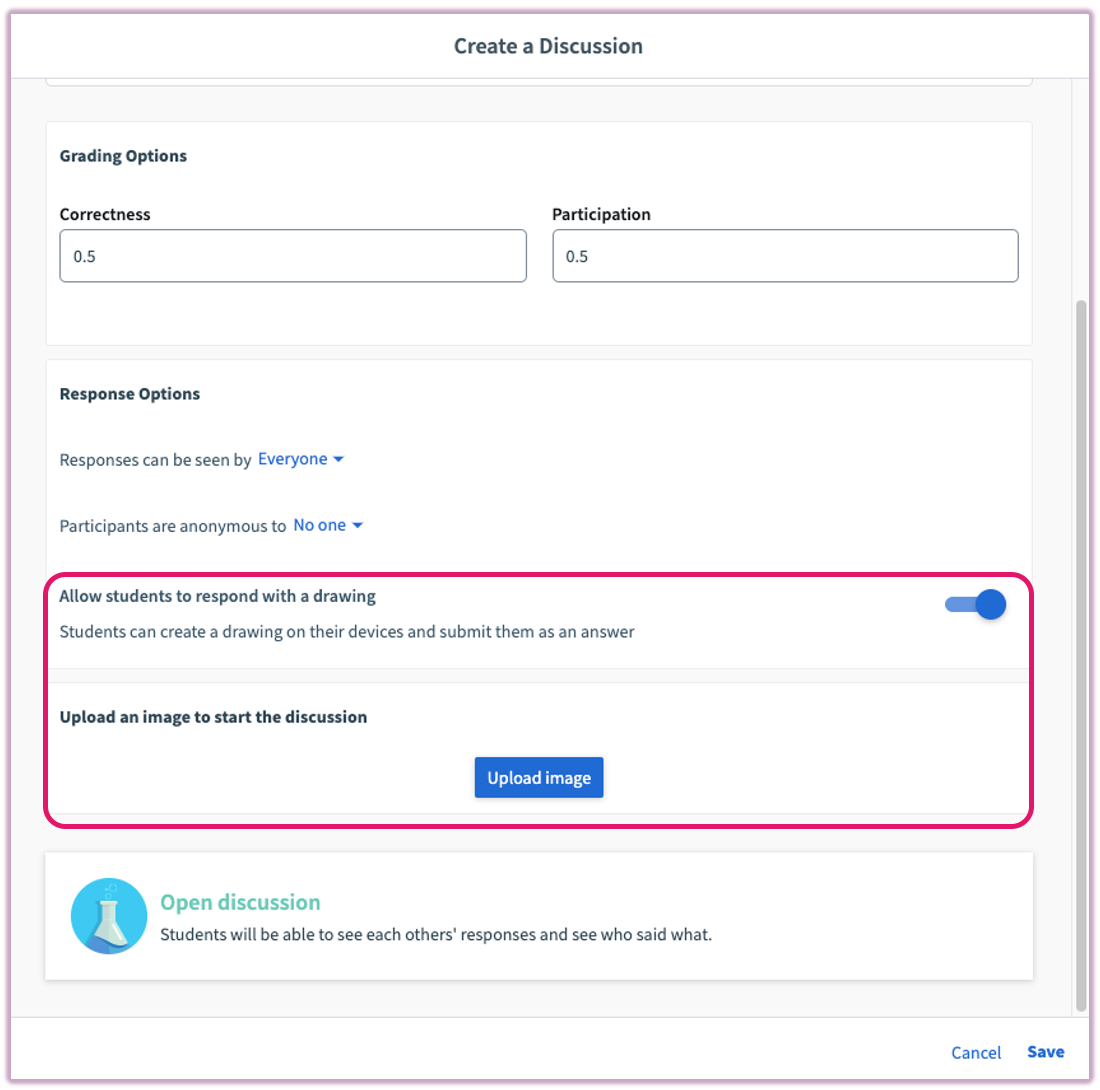 Image: Enabling drawing responses and uploading an image prompt
When you’re happy with the discussion you’ve created, simply click Save in the bottom-right corner. Your newly created discussion will appear in your course, ready to be organized into a folder or embedded into your slide presentation.
Character Limit
You can set a character limit to encourage concise reflections. During live lectures, a limit of 280 characters is recommended to keep engagement fast and focused.
Reply with an Image (Instructions for Students)
If you'd like students to respond with an image, this is possible—but it requires the image to be available as a direct URL.
You can instruct students to copy and paste the following Markdown syntax into their response field, replacing URL-HERE with the direct link to their image:

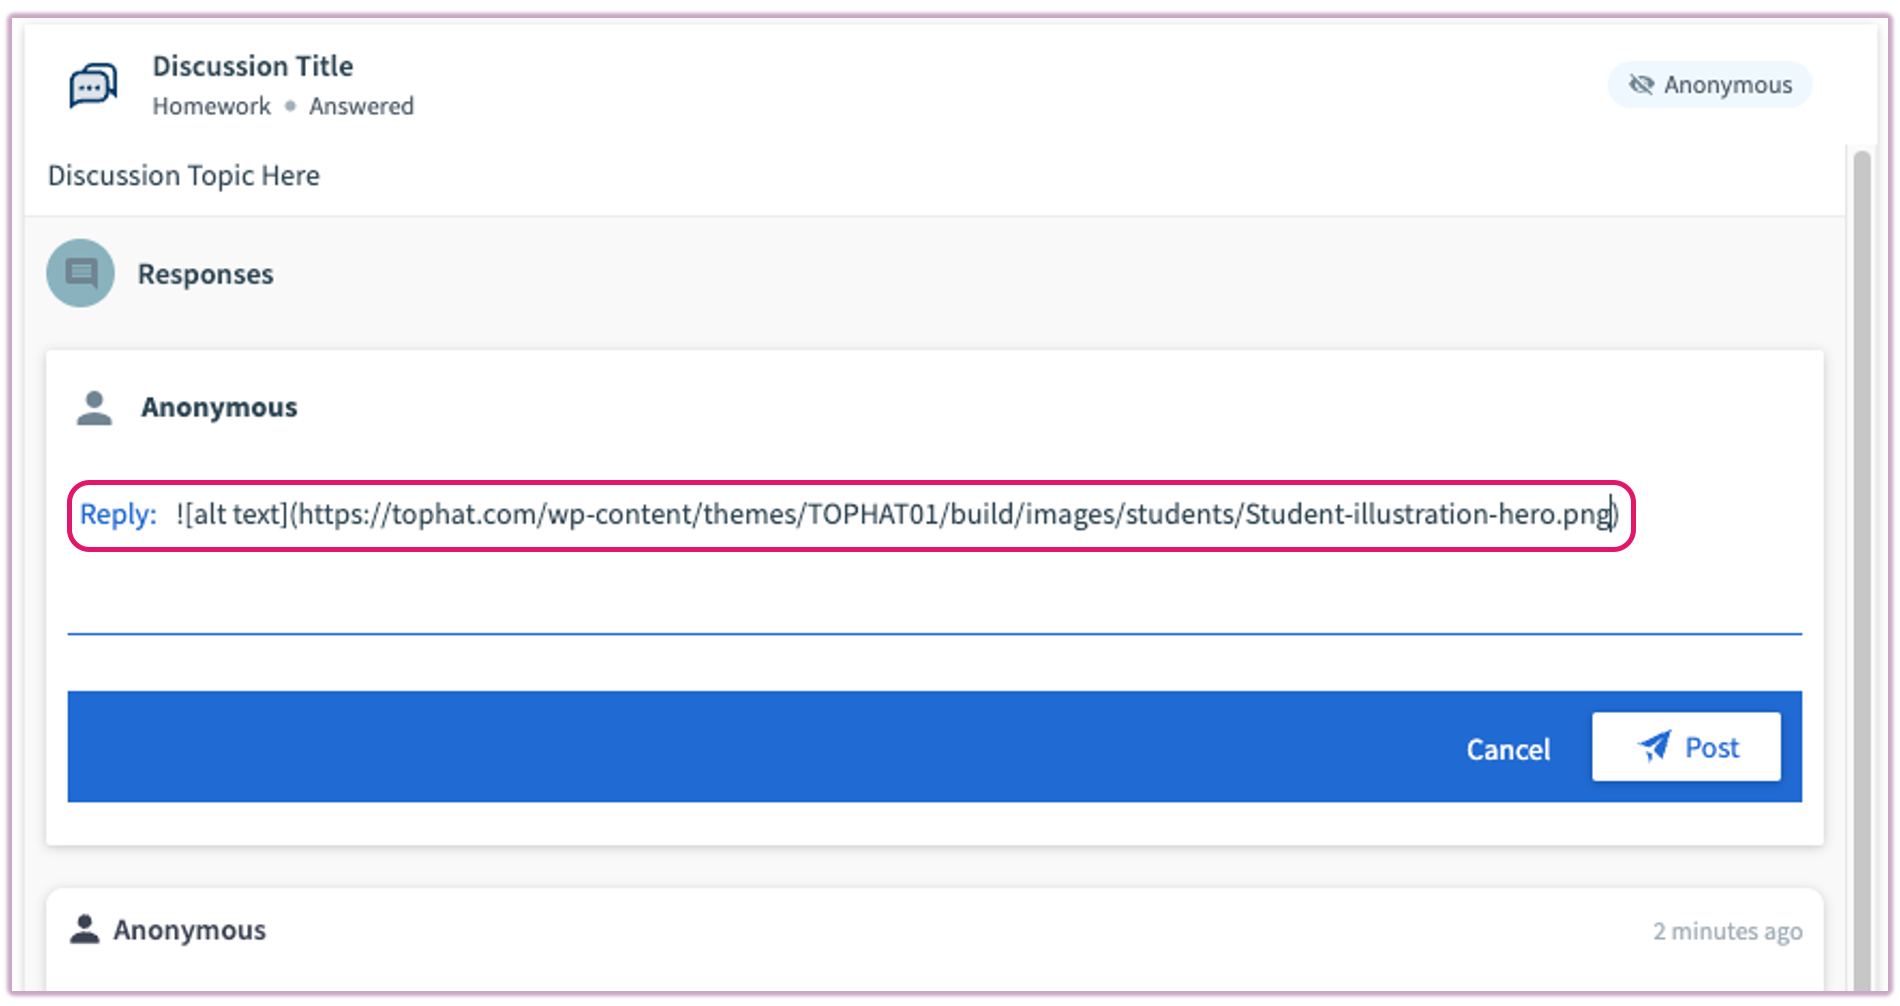 Image: Entering the image Markdown syntax in a response
Once submitted, the image will render directly in the student’s discussion response and will also appear in the Discussion view within your Course Work menu.
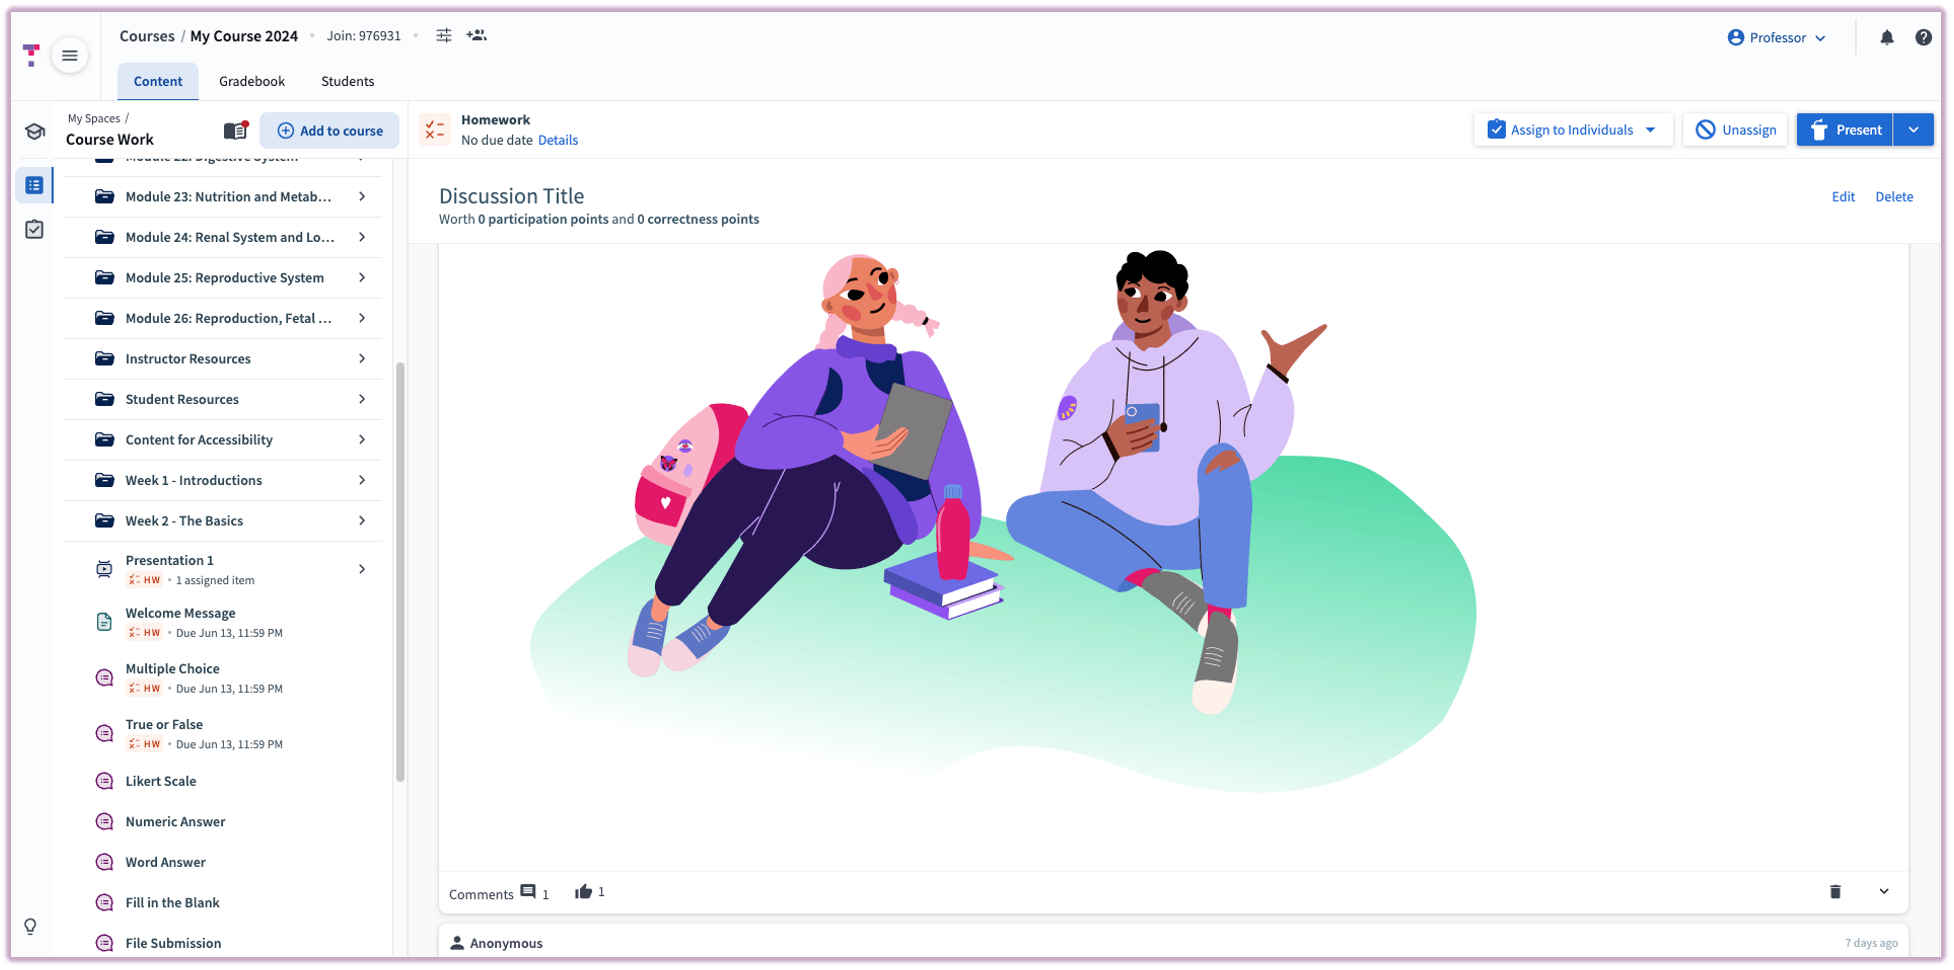 Image: A successfully rendered image within a discussion reply
Embedding Hyperlinks
Embedding hyperlinks in a Top Hat discussion is useful when you'd like students to reference or review external material as part of their response.
To embed a hyperlink within your discussion prompt or question text:
- Type the phrase you want to appear as the link and wrap it in square brackets — e.g.,
[Top Hat].
- Immediately after, type or paste the URL in parentheses — e.g.,
(https://www.tophat.com).
Example Markdown:
[Top Hat](https://www.tophat.com)
This will display as a clickable blue link in the discussion prompt:
Top Hat
Note: Do not add any spaces between the square brackets and parentheses when formatting your link.
When a student clicks the link, it will open in a new browser tab. To return to the Top Hat course, they simply need to click back to the Top Hat tab in their browser.
Links are accessible to students both when the discussion is activated in class and when it is assigned for homework or review.