Presenting your slides can be one of the most important ways in which students engage with your Top Hat course.
Table of Contents
- Setting Up and Presenting Slides
- Starting your Presentation
- Enable Presenter View
- Extend your Screen when Connected to a Projector
- Activating Interactive Elements
- Advancing your Slides
- Annotating
- Videos
- Hyperlinks
- Slide Animations
- Emoji Reactions
- Presenting Remotely
- Ending the Presentation
- End & Assign as Review
- Assigning Slides at a Later Date
- Limitations
Setting Up and Presenting Slides
Starting your Presentation
To start your presentation: Locate the slide deck within the content tree and select the folder or the first slide, then click the Present button.
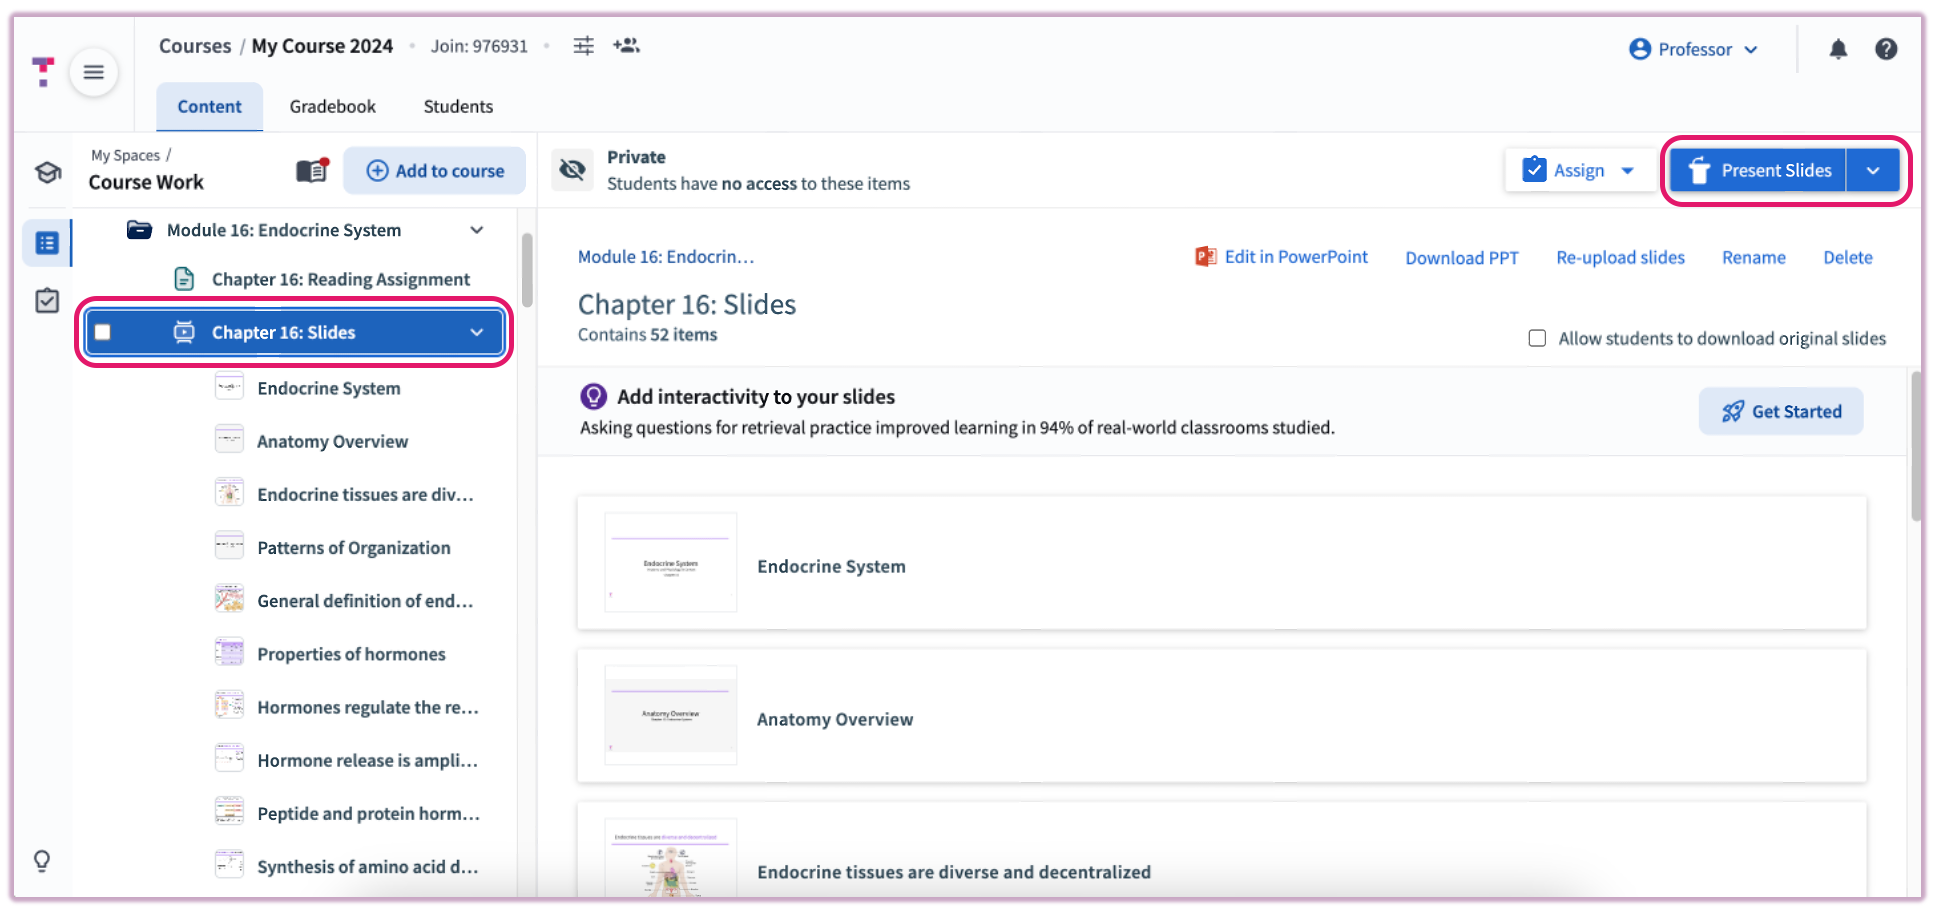 Image: Slide Deck selection and Present button
Before starting, you can toggle settings that affect your delivery. Access these by selecting the arrow next to the Present button or via the configuration screen that appears automatically.
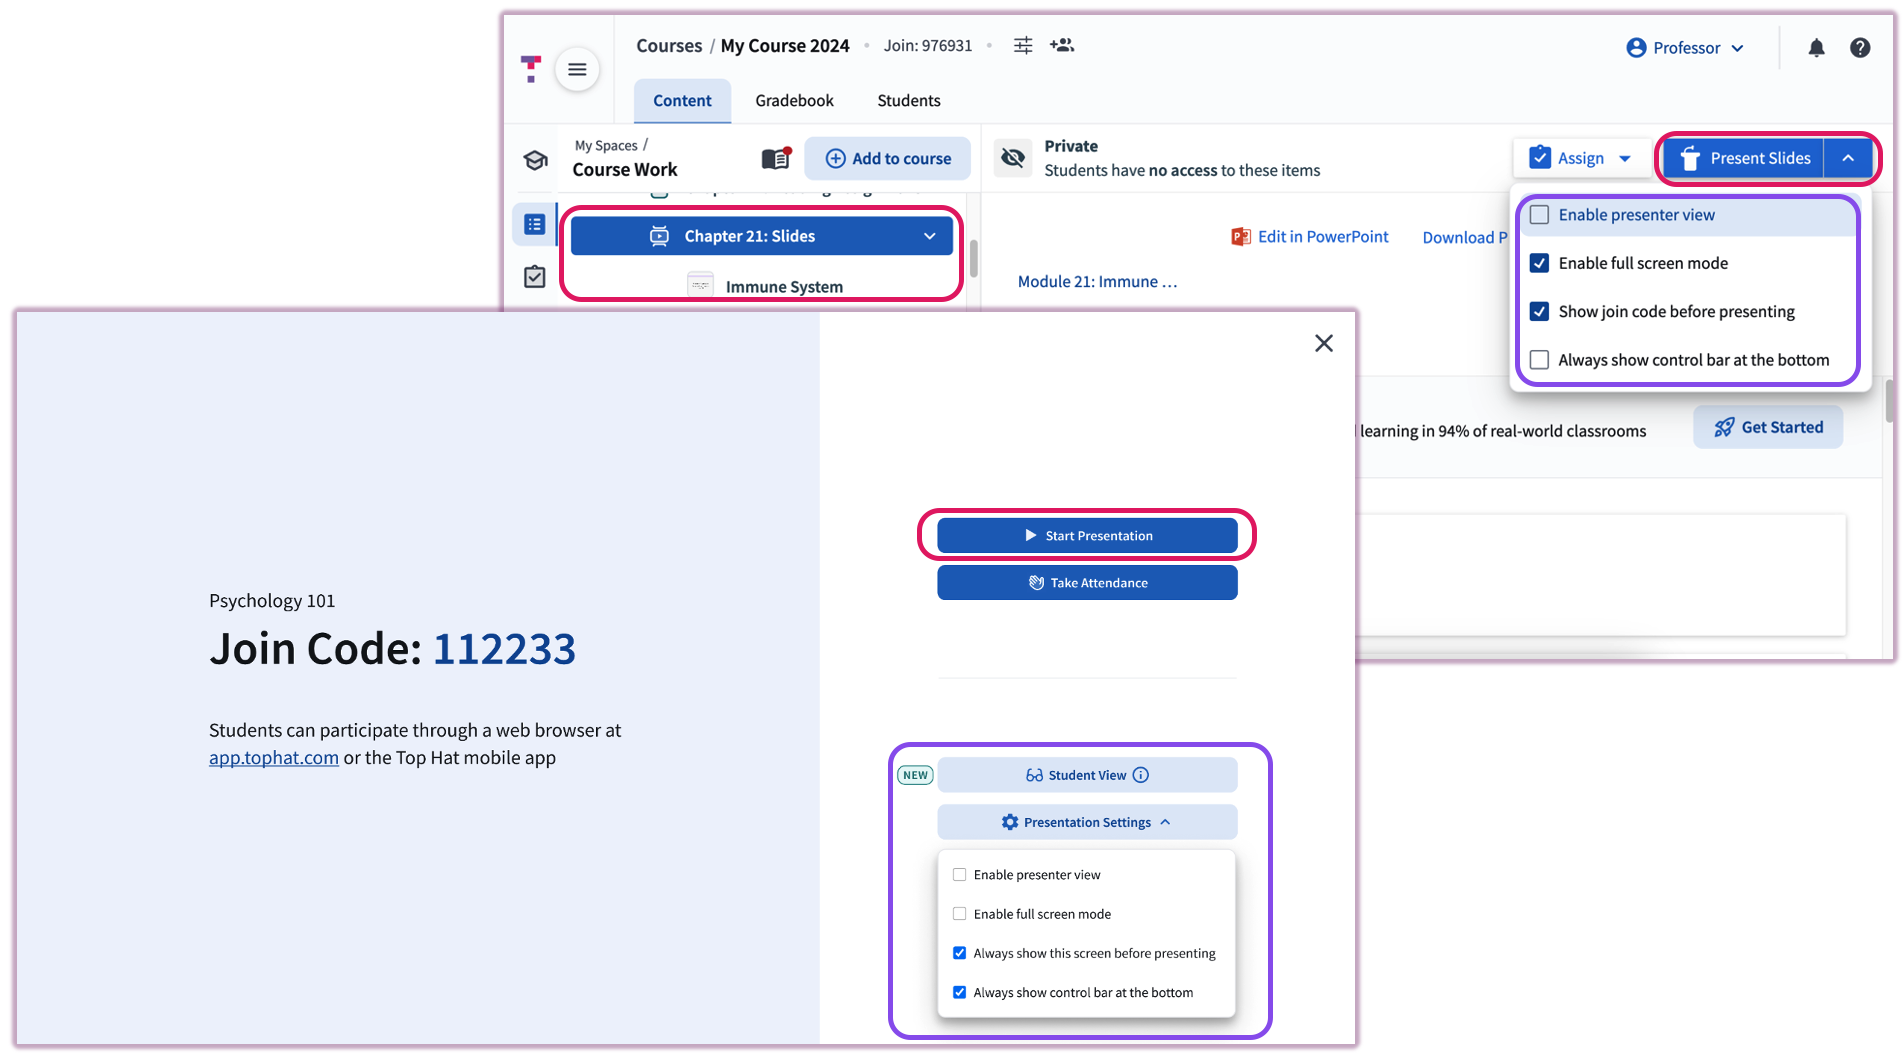 Image: Presentation configuration settings
Enable Presenter View
Presenter View provides a private second screen for lecture notes and response reports. Ensure your computer screen is set to Extend rather than Mirror so students only see your slides while you see your notes.
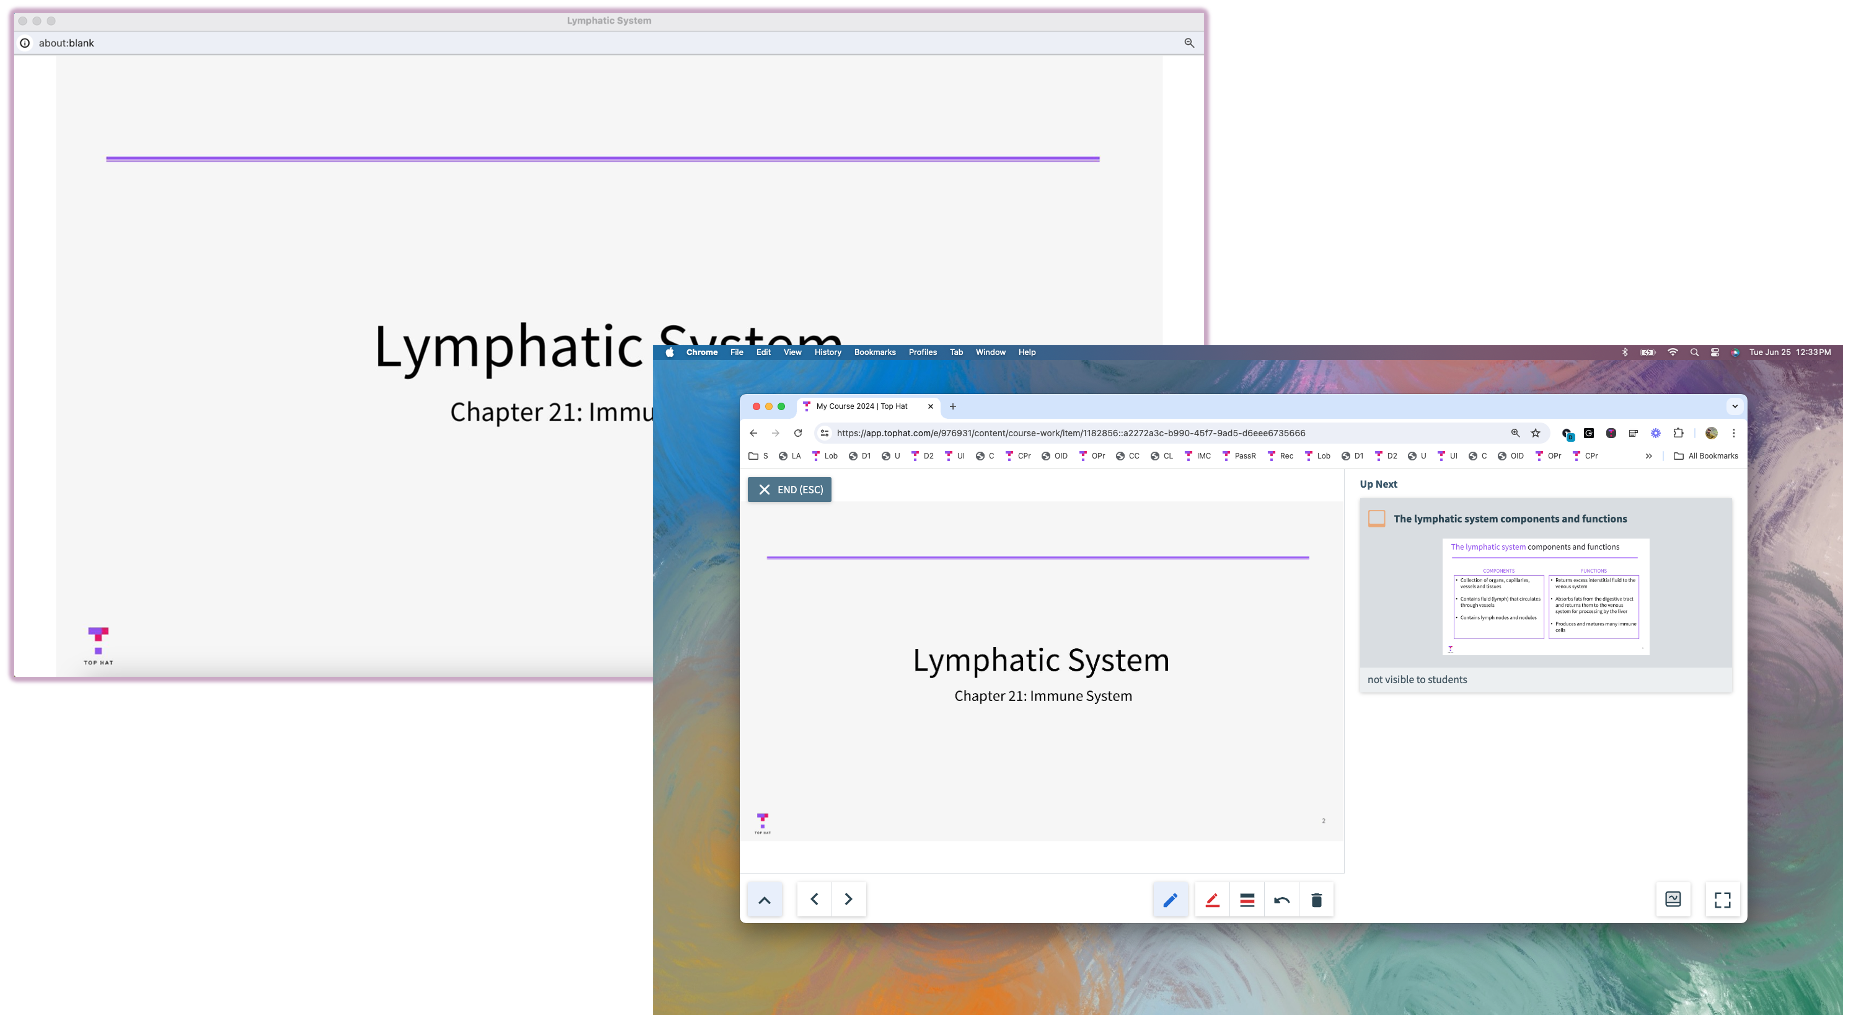 Image: Dual-window Presenter View
Extend Your Screen When Connected to a Projector
For Mac Users: Select the Apple icon > System Settings > Displays > Ensure Mirror is disabled.
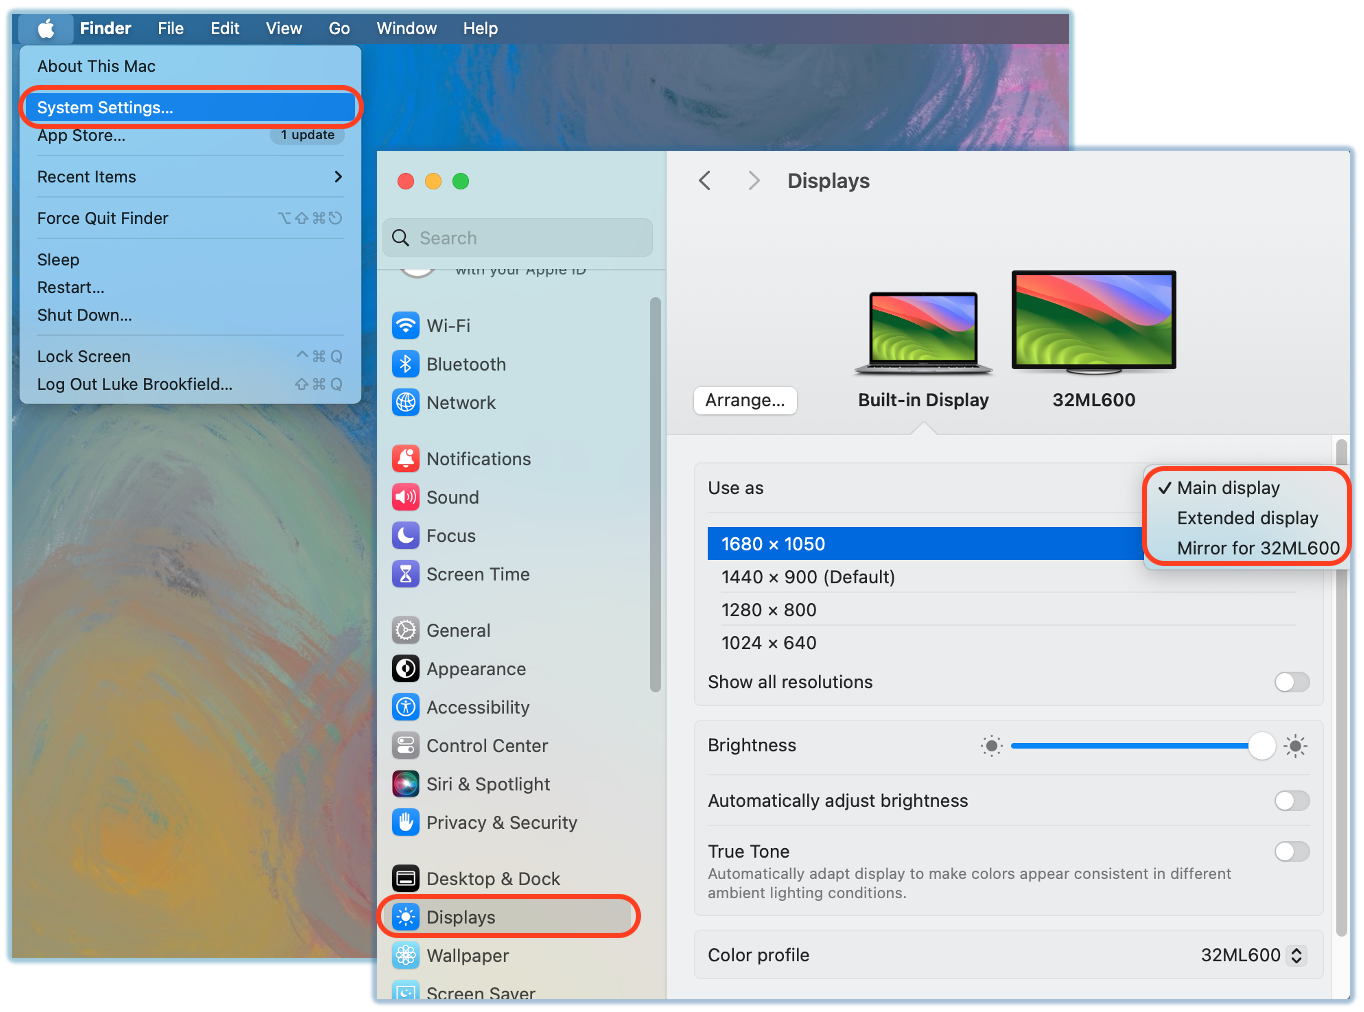 Image: MacOS Screen Settings
For PC Users: Press the Windows Key + P and select Extend.
 Image: Windows Projection Settings
Activating Interactive Elements
Questions and discussions activate automatically when you reach them in your deck. Use keyboard arrows to cycle states: Open → Closed → Responses → Correct.
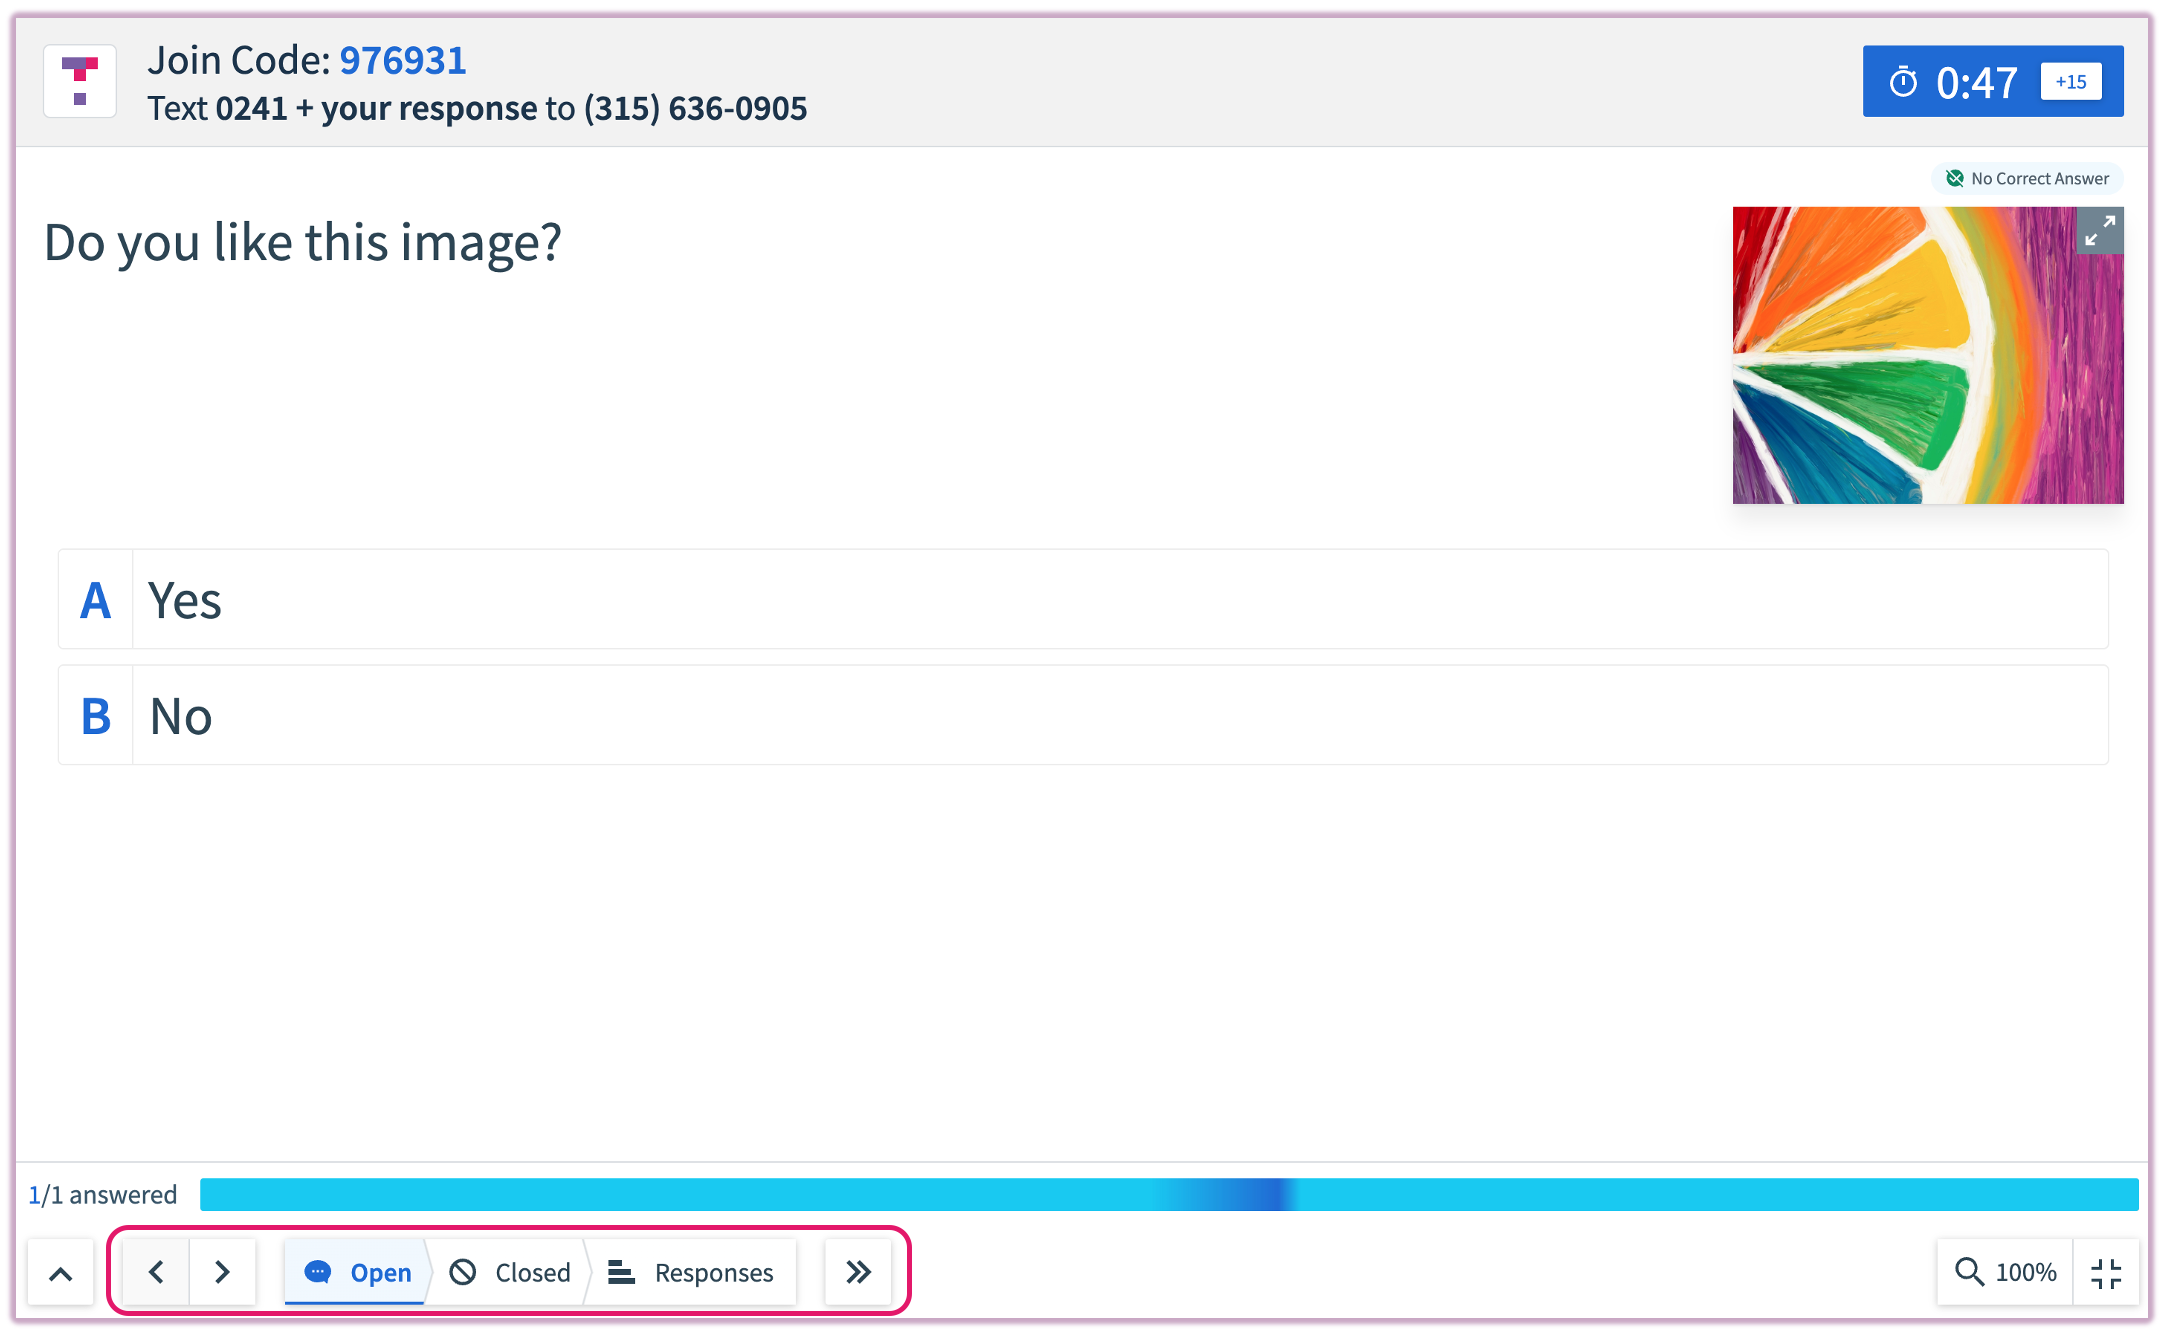 Image: Question navigation and status controls
Advancing Your Slides
Slide Navigation: Use your keyboard arrow keys or the control bar arrows (hover at the bottom of the screen) to move forward and backward through your slides.
Slide Drawer: Click the upward pointing arrow on the left of the control bar to open your slide drawer. From here, you can scroll through slides, start an attendance session, or add content without exiting the presentation. The drawer also allows you to see which slides are currently visible to students and side-scroll to access slides further in the deck.
Students cannot see further ahead in the slideshow than the slide you have currently reached. The slide drawer is commonly used to advance forward multiple slides at once or to bring in additional course materials from the content tree mid-lecture.
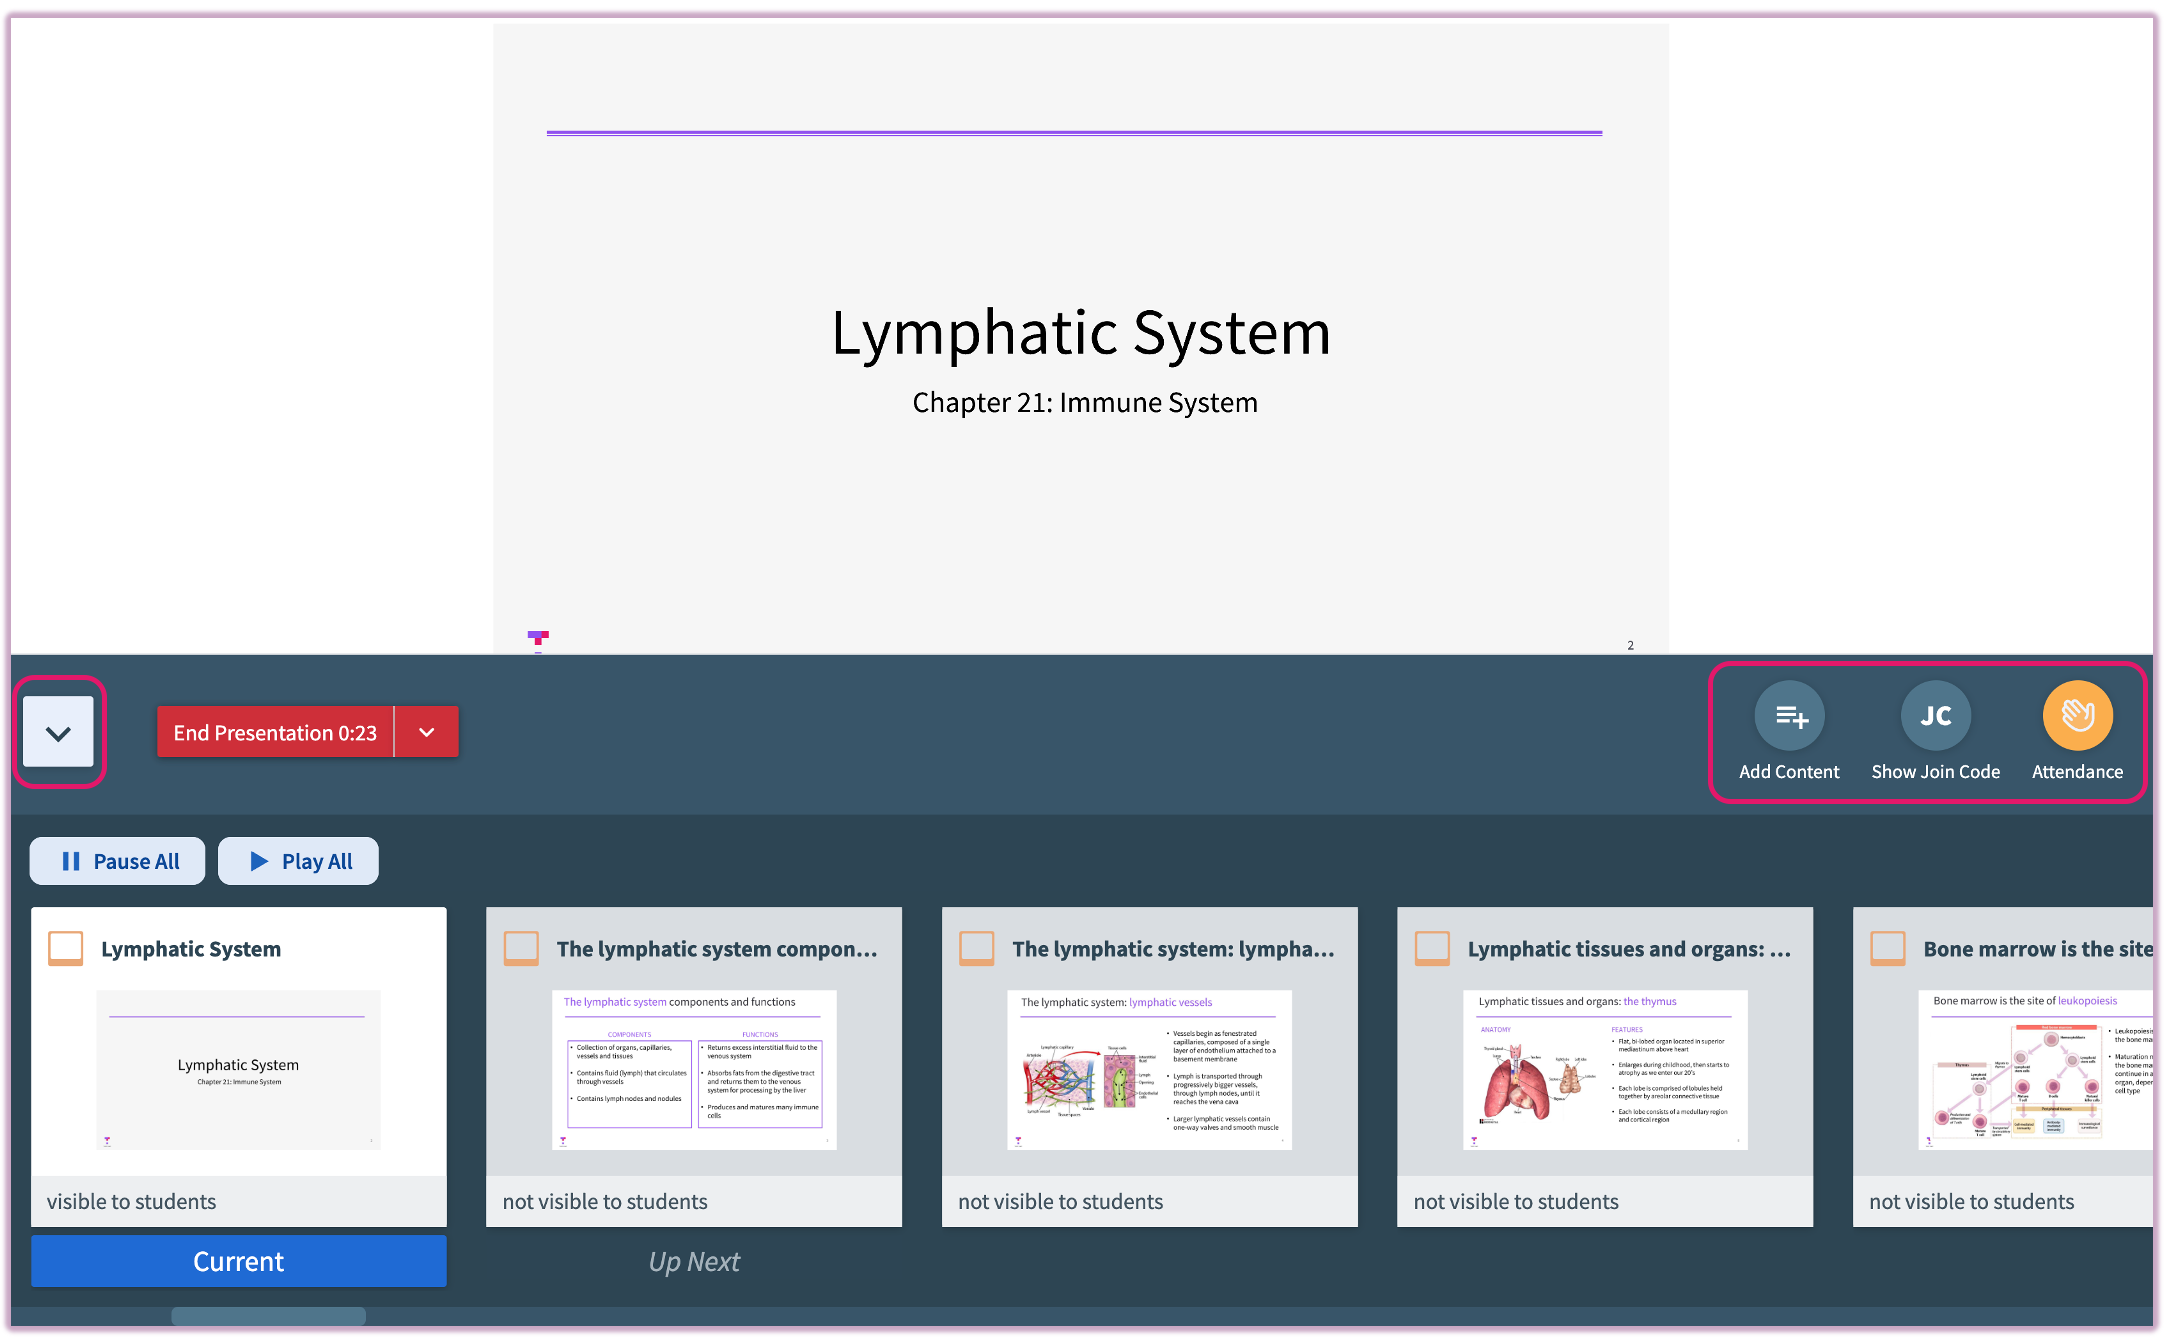 Image: Slide Drawer interface
Annotating
Note: Slide annotations are not available on MSM (Multi-Section Management) courses.
When your slides are open in Presenter Mode, you can annotate on them by selecting the pen icon in the center of the control bar that appears at the bottom of the screen.
Once the annotation tool is selected, the following options become available:
- Pen-on-paper icon: Displays different color choices for your annotations.
- Stacked lines icon: Provides options for different line thicknesses.
- Undo arrow icon: Reverts your most recent annotation.
- Eraser icon: Removes all annotations from the current slide.
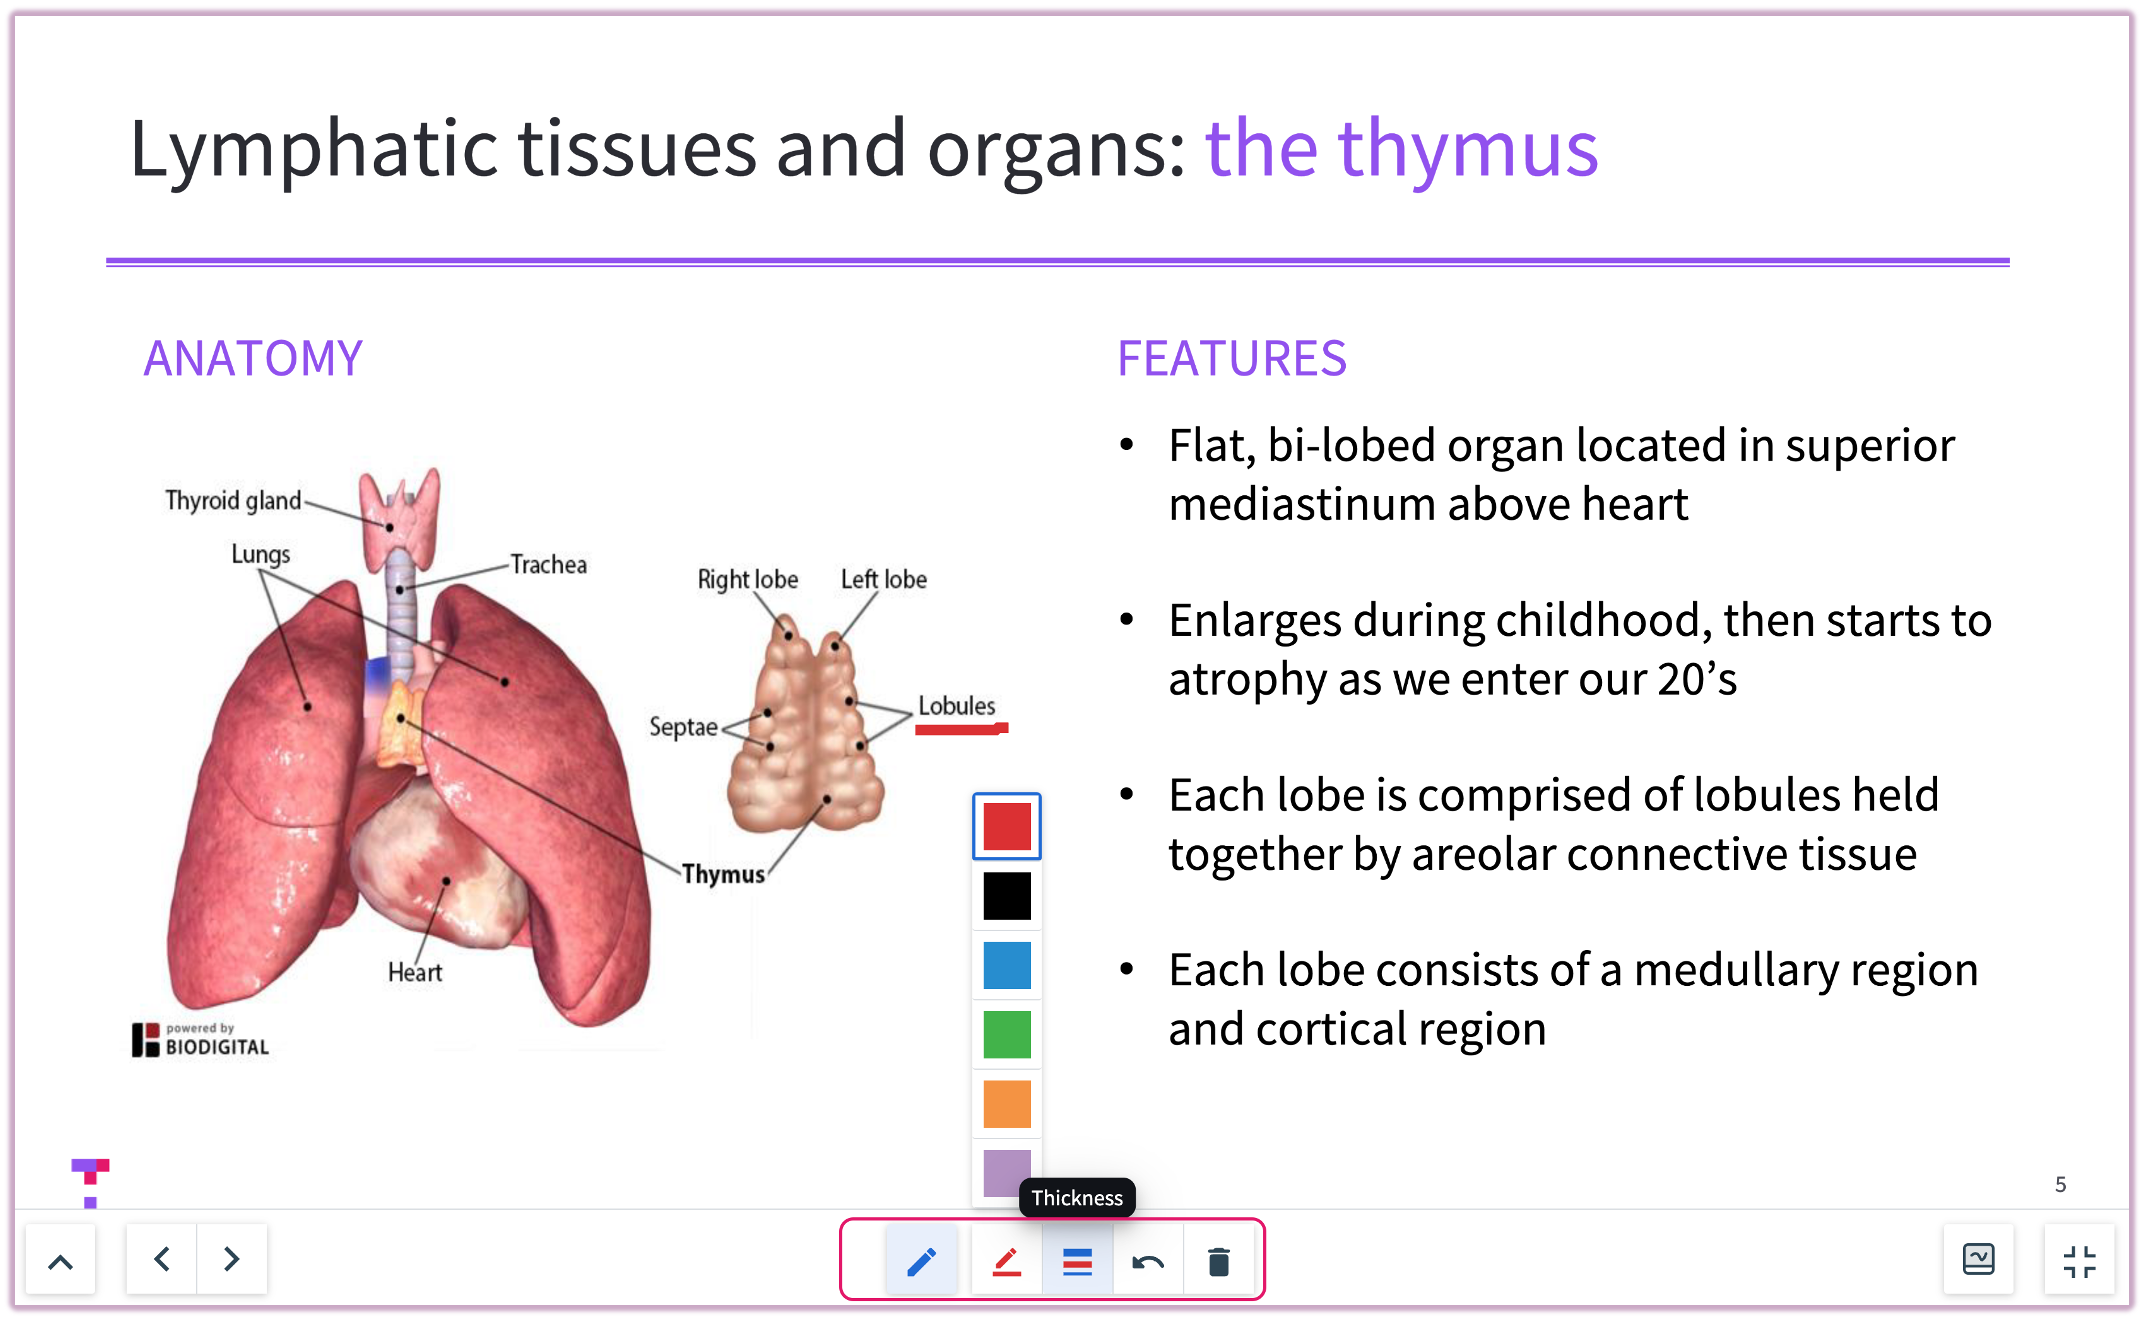 Image: Annotations on Screen
Annotations will be displayed on your projected screen as well as your students' devices. Embedding blank slides in your slideshow is particularly useful for educators who use the annotation tool to draw diagrams or write formulas.
Videos
Top Hat supports original video files (.mp4, .mov, or WebM), online videos (e.g., YouTube), and .gif files embedded in slides.
Note: While videos/GIFs embedded in PowerPoint presentations play on the projector screen, they will not play natively on student devices.
For students to play embedded media, they must download the original slide file. To ensure students can view video content on their own devices during class, embed the video directly into a Top Hat Question or Discussion.
When presenting, simply select the Play button in the center of the video. You can expand or shrink the video as you would with a native desktop player.
To use audio files, convert your audio to a video format (opens in a new window) before embedding it in PowerPoint and uploading to Top Hat.
Support Articles:
Hyperlinks
Hyperlinks within your slide deck remain active in Presenter Mode. Selecting hyperlinked text will open the web page in a new browser tab.
Slide Animations
Only the "Appear" animation is compatible with Top Hat. Complex animations like "Fly-In," "Fade-In," or "Float-In" are automatically converted to "Appear" during upload. This preserves the progressive reveal of information while removing elaborate motion effects.
Emoji Reactions
Emoji Reactions allow students to react in real-time during a presentation. This feature is disabled by default.
How to Enable or Disable Emoji Reactions:
- Before presenting: Select the dropdown arrow next to the Present button and check Enable Emoji Reactions.
- During a presentation: Select the Smiley face icon on the presentation toolbar to toggle the feature.
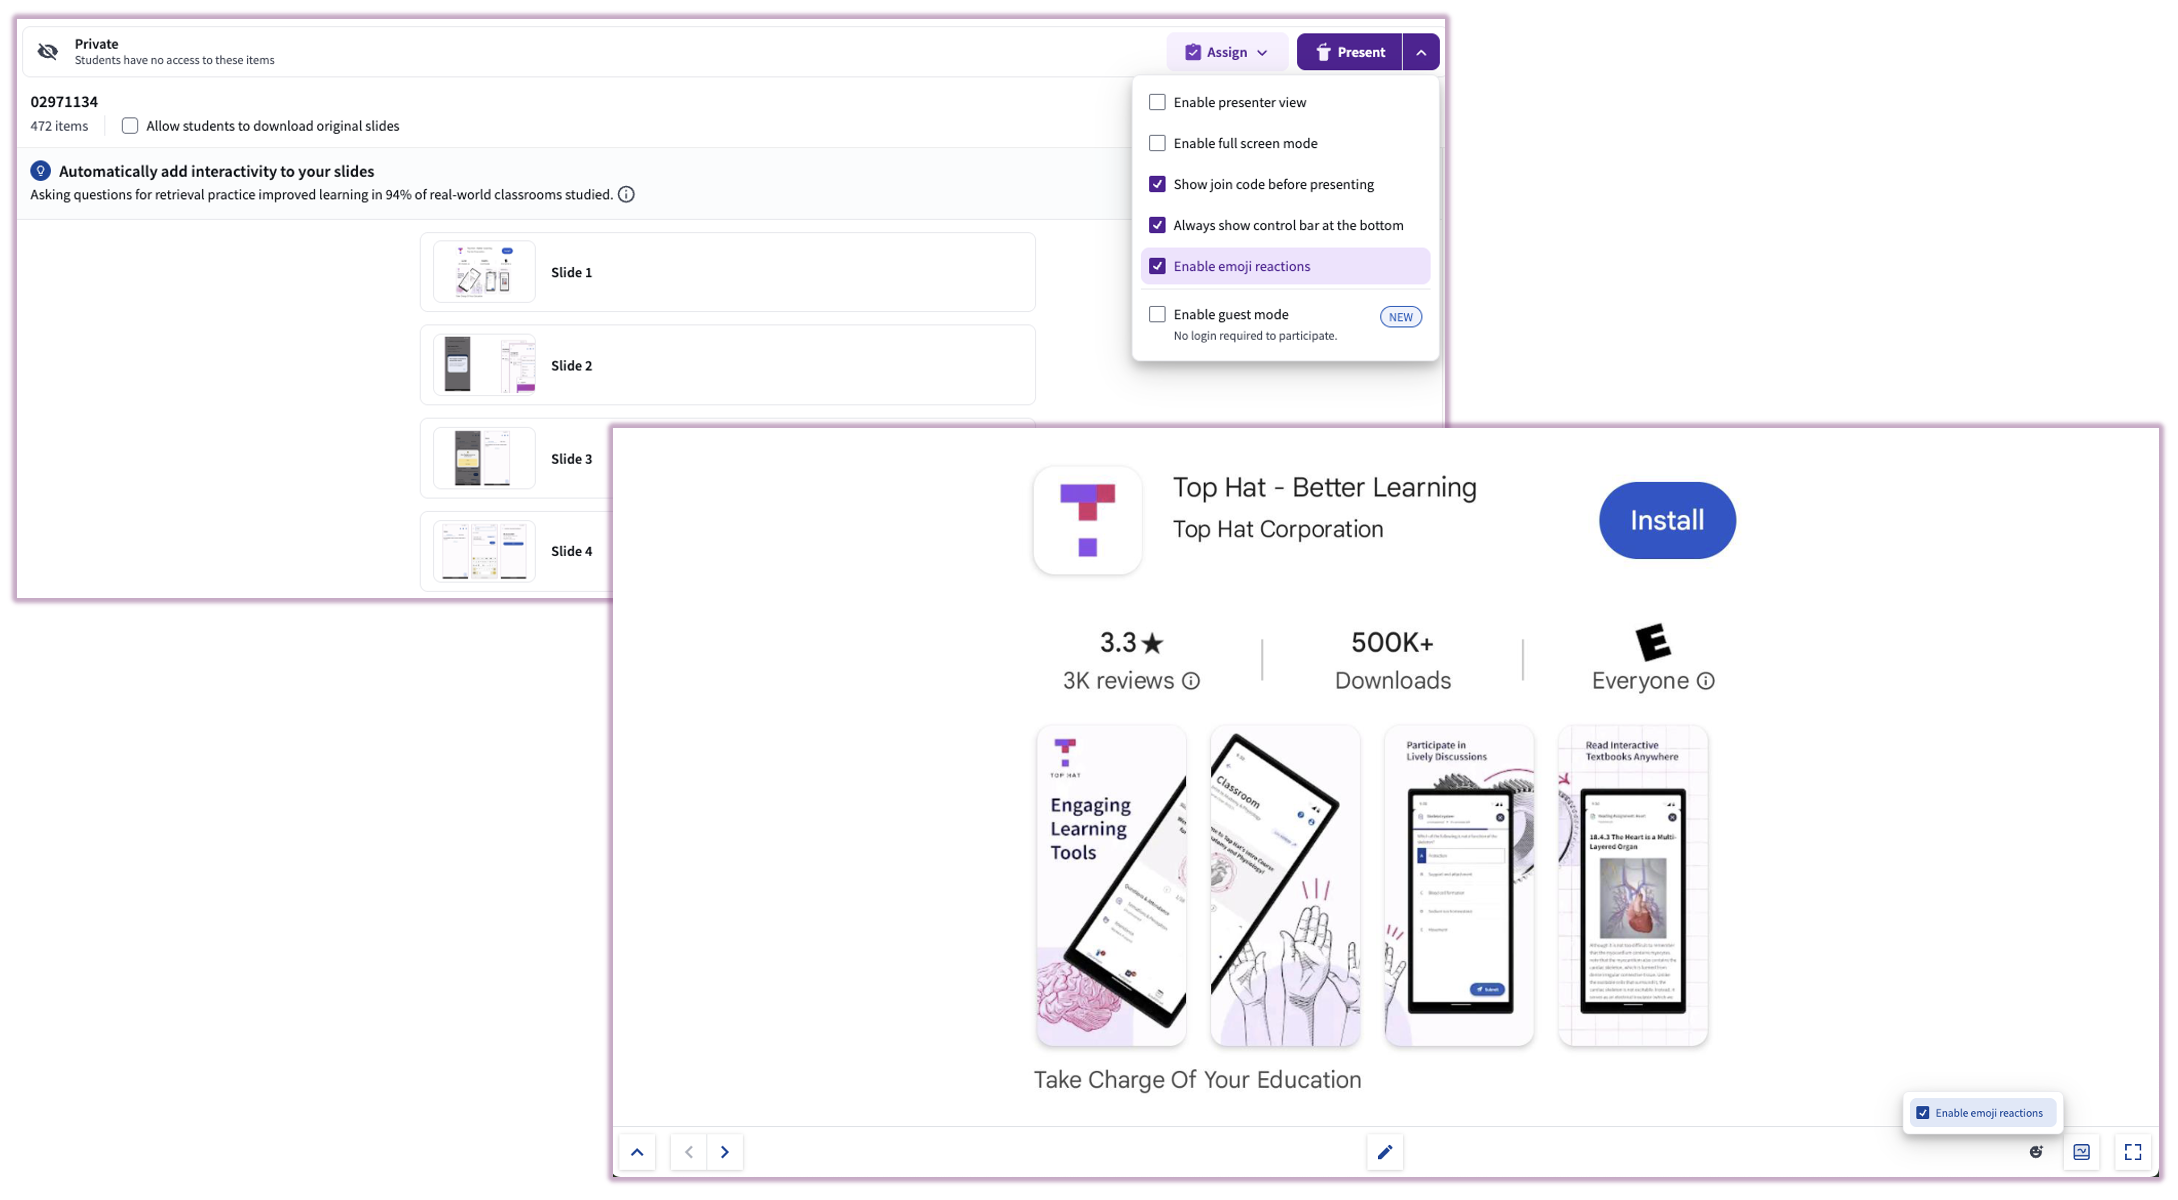 Image: Live Emoji Reactions in a presentation
Presenting Remotely
Slide Advancers
Top Hat is compatible with most remote slide advancers. The Logitech Wireless Presenter R400 is highly recommended for its reliability. Always test your advancer with the platform before your first class.
Ending the Presentation
End & Assign as Review
If you want your students to have full access to your slide deck and embedded questions, the best practice is to exit your presentation via the Slide Drawer. Once you have opened the Slide Drawer, select the downward-pointing arrow next to the red End Presentation button and select End & Assign items to Review.
From the menu that appears, select the slides and questions you want students to access. To grant access to the entire deck, select Select All and then click Assign to review. When you return to the course content page, you will see the slides and questions highlighted with an RV tag, indicating they are currently assigned as Review and visible to students.
Assigning Slides at a Later Date
If you choose not to make your slide decks available to students immediately after your presentation, you can always assign the slideshow from the course content page at a later date.
Select the slides and/or questions you would like to assign and click the Assign button on the upper-right side of the screen above the Preview Pane. From the menu that extends, select a mode of assignment—Homework or Review—and click Assign.
Limitations
- Animations: Only "Appear" is supported; others may cause upload errors or be converted.
- Annotations: Slide annotations are not available in Multi-Section Management (MSM) courses.
- Accessibility: Uploaded slides are not currently screen reader compatible.
- Formatting: Embedded .wmv video files will not play in Top Hat.