This article walks you through how to organize your Top Hat course content using folders. You'll learn how to create folders, move and rename content, and assign entire folders to students in either Homework or Review mode. Use these steps to streamline your course layout and make navigation easier for students.
Table of Contents
- Adding a New Folder
- Moving Content
- Drag & Drop
- Moving Multiple Items
- Renaming Folders
- Assigning Folders to Students
To copy or duplicate a folder, please visit: Course Creation & Duplicating Content
Adding a New Folder
To start organizing your content:
- Click the purple Add to Course button.
- Select New Folder from the pop-up menu.
- Enter a folder name and click Create Folder.
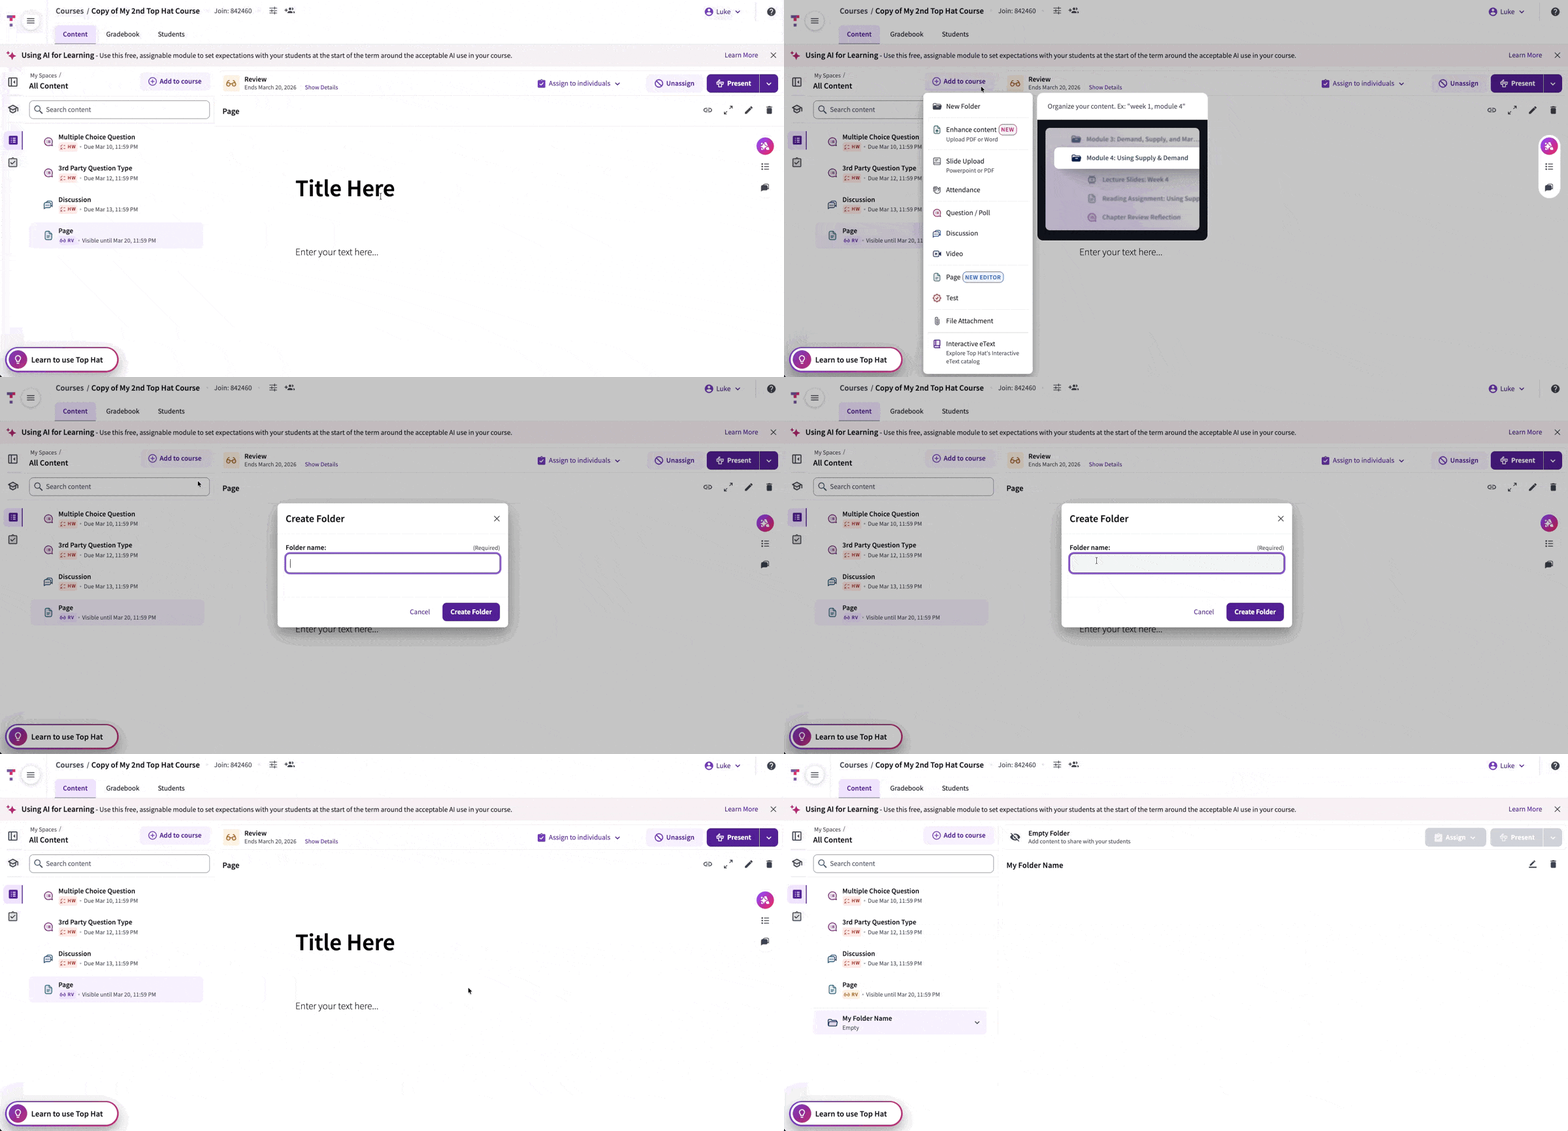 GIF: Creating a new folder
Note: You can nest folders up to two levels deep to create sub-topics or weekly modules.
Moving Content
Drag and Drop
Simply drag an item onto a folder. A dashed line will indicate the target location. Release the mouse to drop the item inside.
Moving Multiple Items
Select multiple items by checking the boxes next to their titles in the content tree, then drag the entire group into the desired folder.
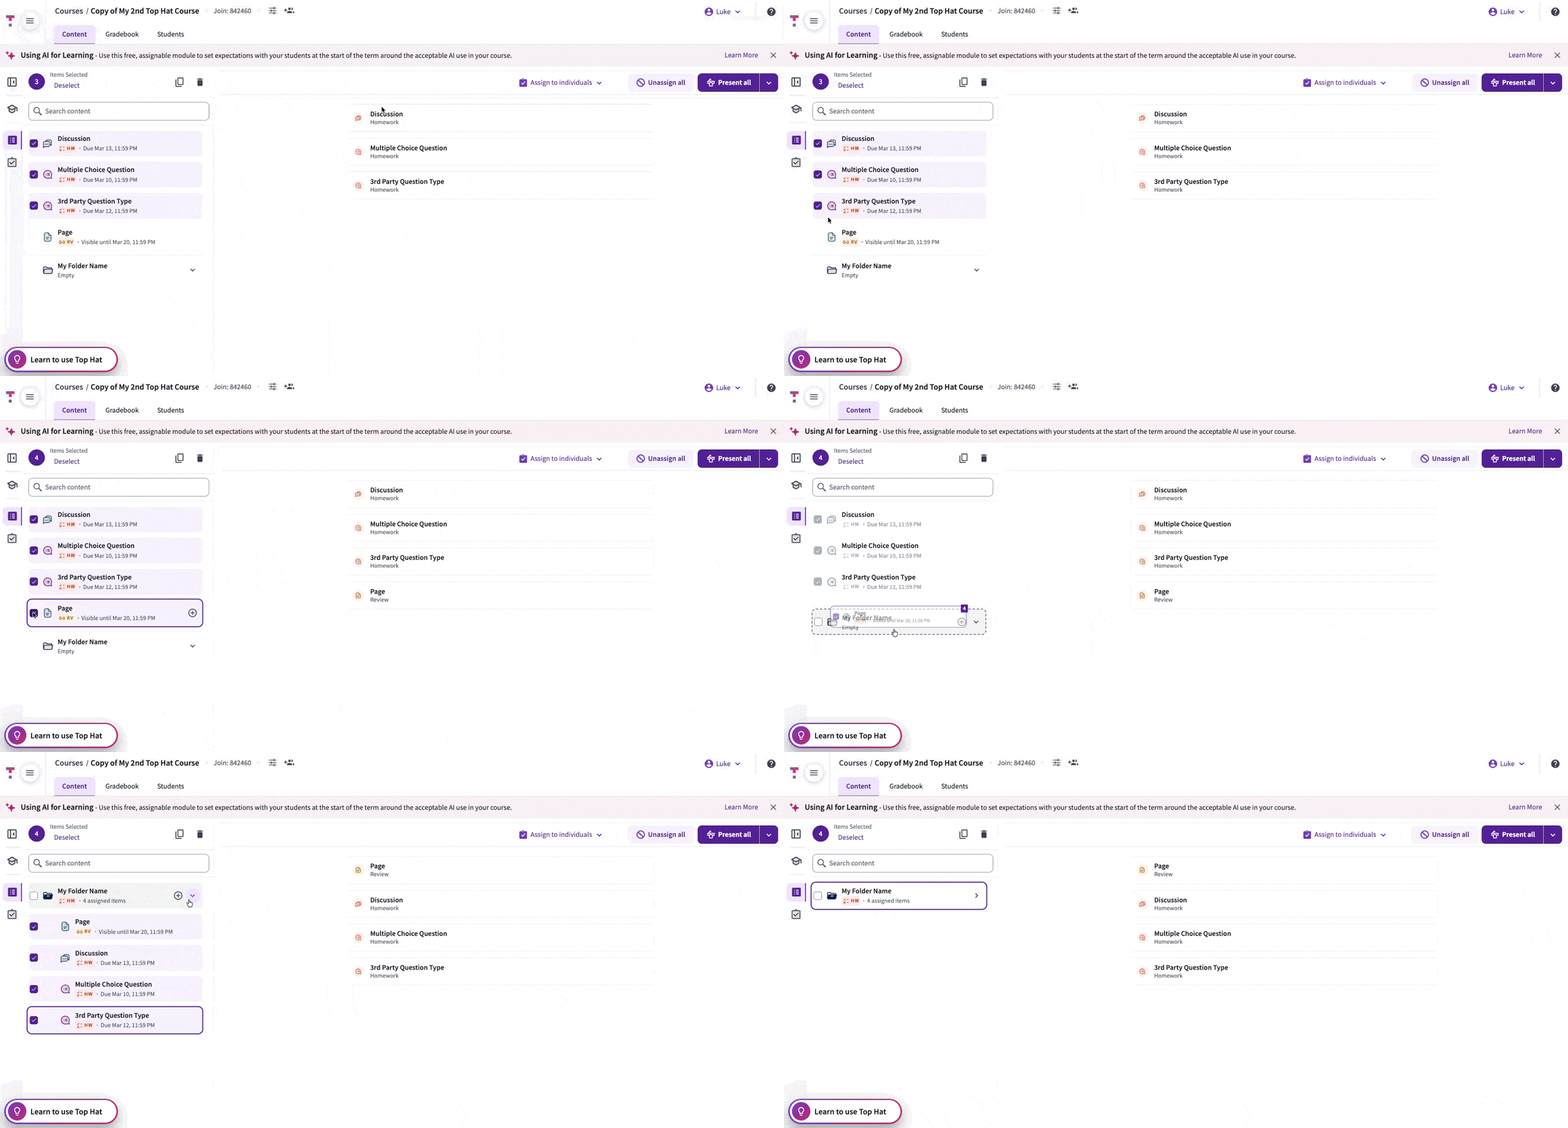 GIF: Drag and drop content into folders
Renaming Folders
Click on a folder in the content tree to view its details. Select the pencil icon in the upper-right corner to edit the title.
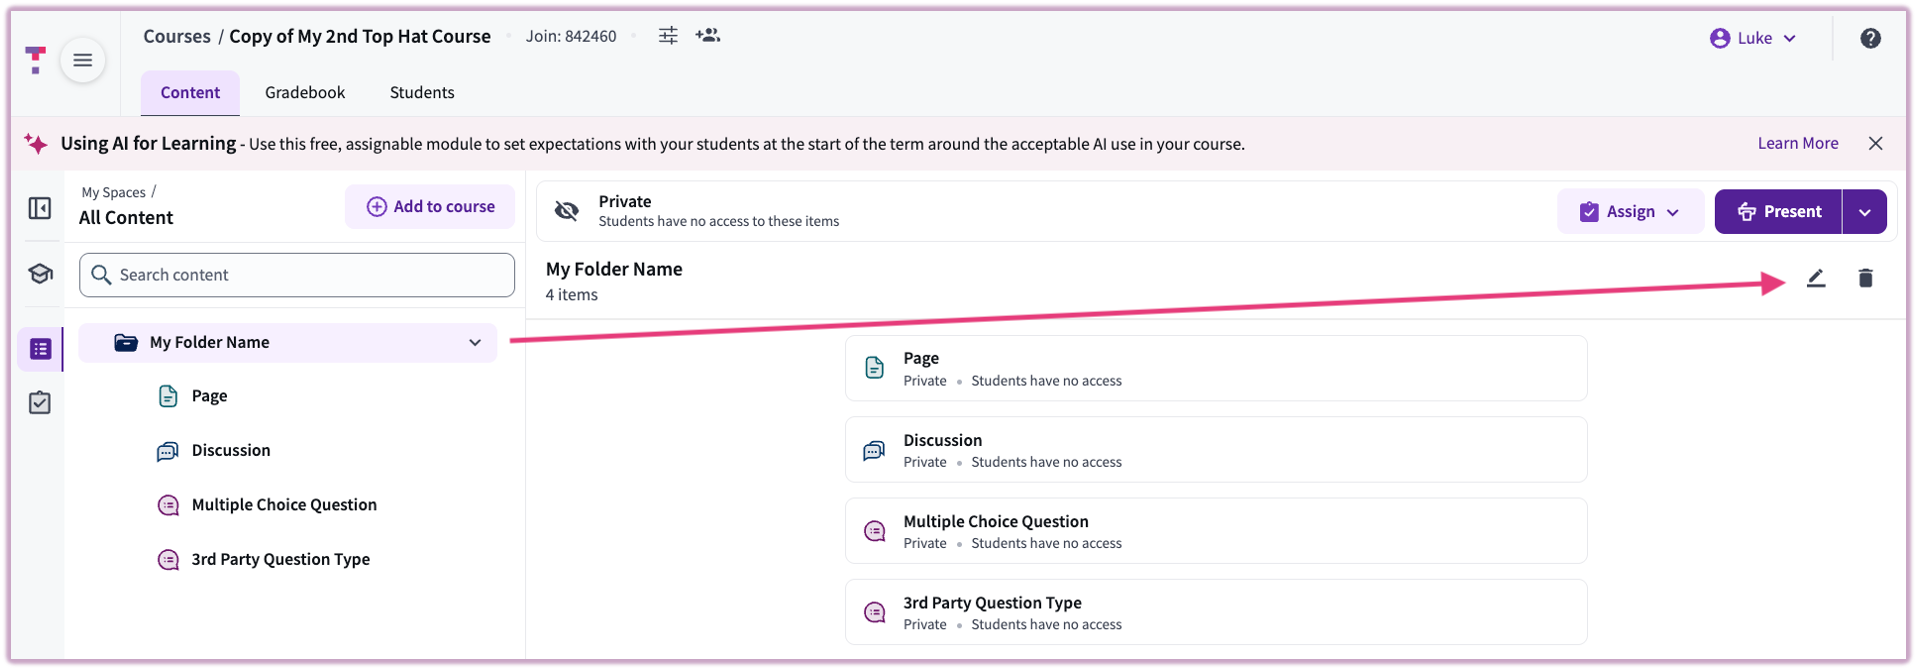 Image: Renaming a folder via the preview pane
Assigning Folders
Assigning at the folder level allows you to set the status for all items inside at once. Click the folder, then select Assign in the upper-right corner.
- Homework: Students can participate for credit and grades.
- Review: Students can view content without earning credit.
Important: Any folders containing an exam/test cannot be assigned in bulk. Tip: Deselect the exam/test after selecting the folder, then assign the remaining items.
Recommendation: If a folder only contains presentation slides, use Review status to give students access for studying.