This article covers how to manage and import student rosters in Top Hat, including manual uploads, LMS roster sync, enrollment status tracking, and student management.
Whether you're inviting students using email, uploading a .csv file, or syncing from an LMS like Canvas or Blackboard, this guide outlines each method step-by-step. You’ll also learn how to resend invites, update student info, manage temporary accounts, and troubleshoot common enrollment issues.
Table of Contents
- Roster Import (Manual Entry or File Upload)
- Manually typing / pasting email addresses
- Importing a .xlsx or .csv file
- Roster Import (via LMS Roster Sync)
- LTI 1.3 Course Connections
- Advanced Course Connections
- Enrollment Status and Reminders
- Managing Students
- Updating Student IDs
- Students Using Personal Email Addresses
- Temporary Students
- Students with Multiple Accounts
- Removing Students
Roster Import (Manual Entry or File Upload)
There are two methods to manually invite students to your Top Hat course:
- Manually typing or pasting email addresses
- Importing a .xlsx or .csv file
Manually typing / pasting email addresses
To manually invite students, navigate to the Students tab and select Add Students.
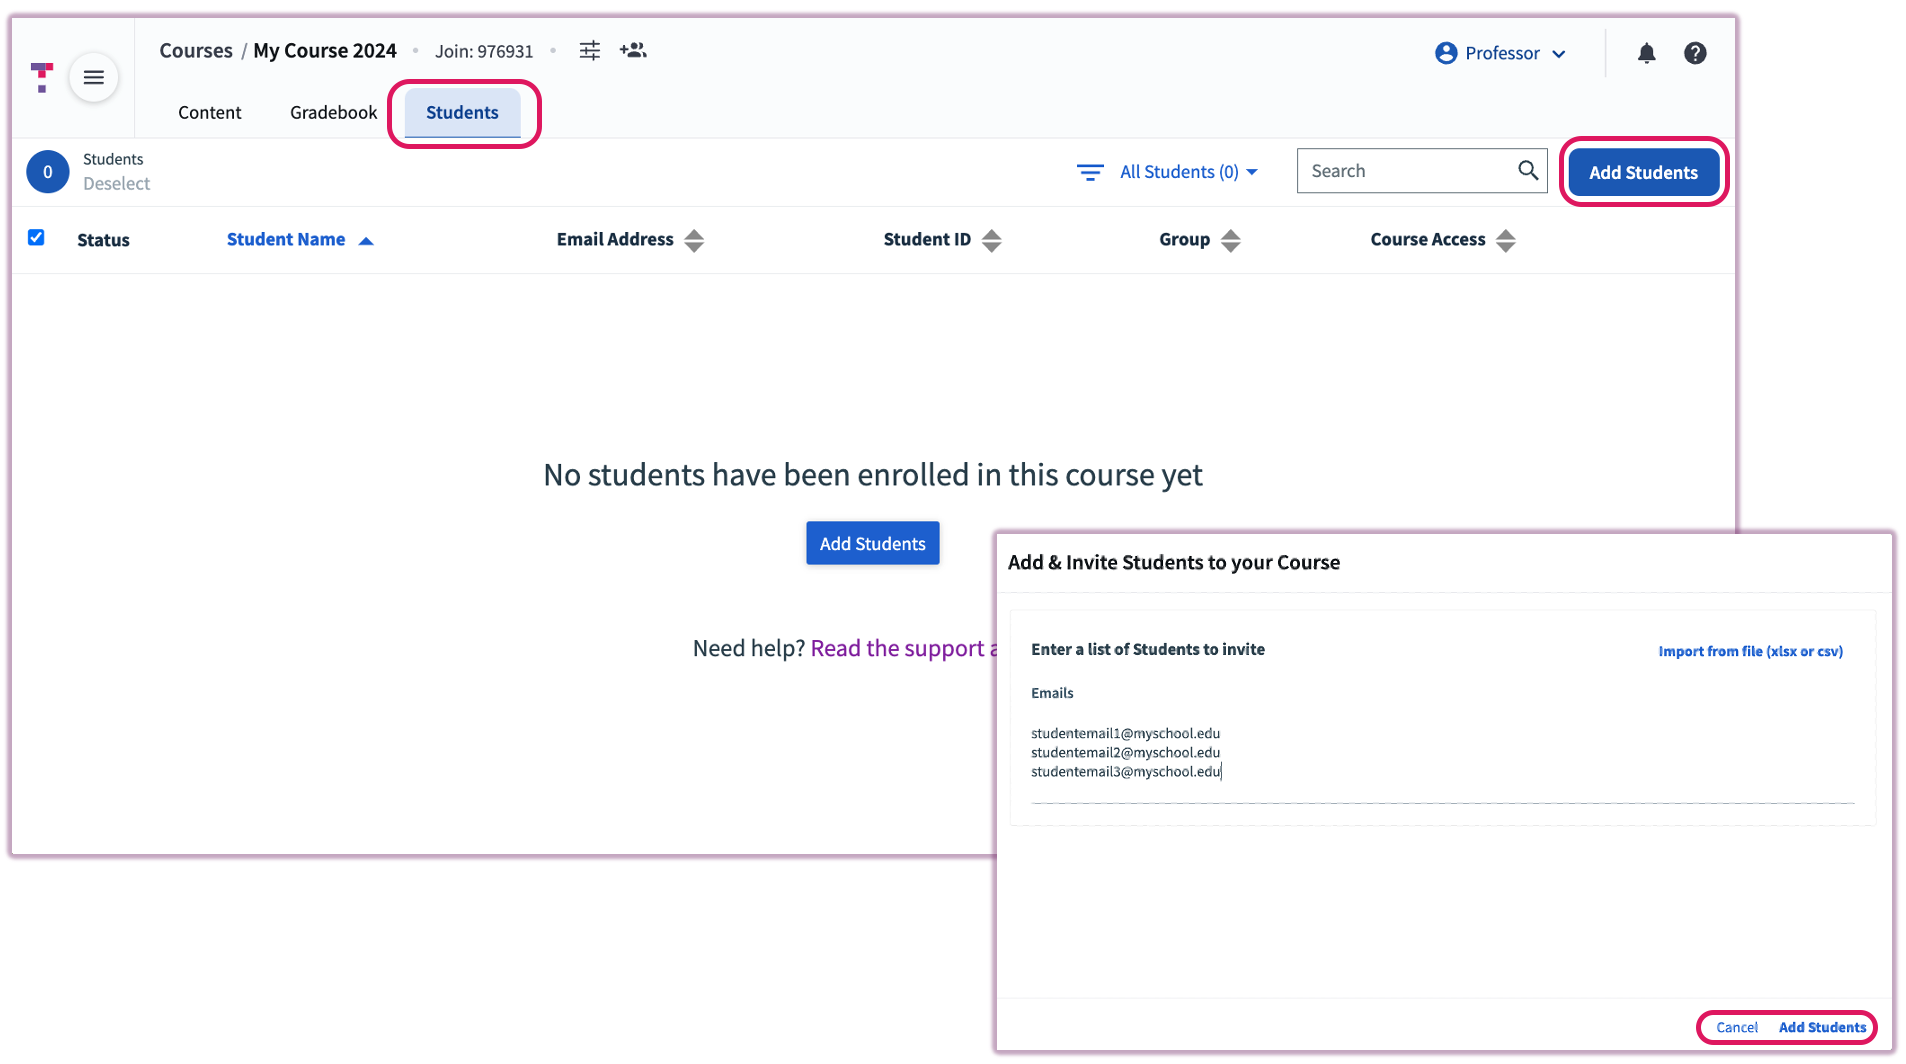 Image: Students Manager Tab in Top Hat
Either type or paste the email addresses (separated by new lines) and select Add Students. From the pop-up window, choose to either send the invites immediately or save them to send later. A confirmation will appear once the invites have been processed.
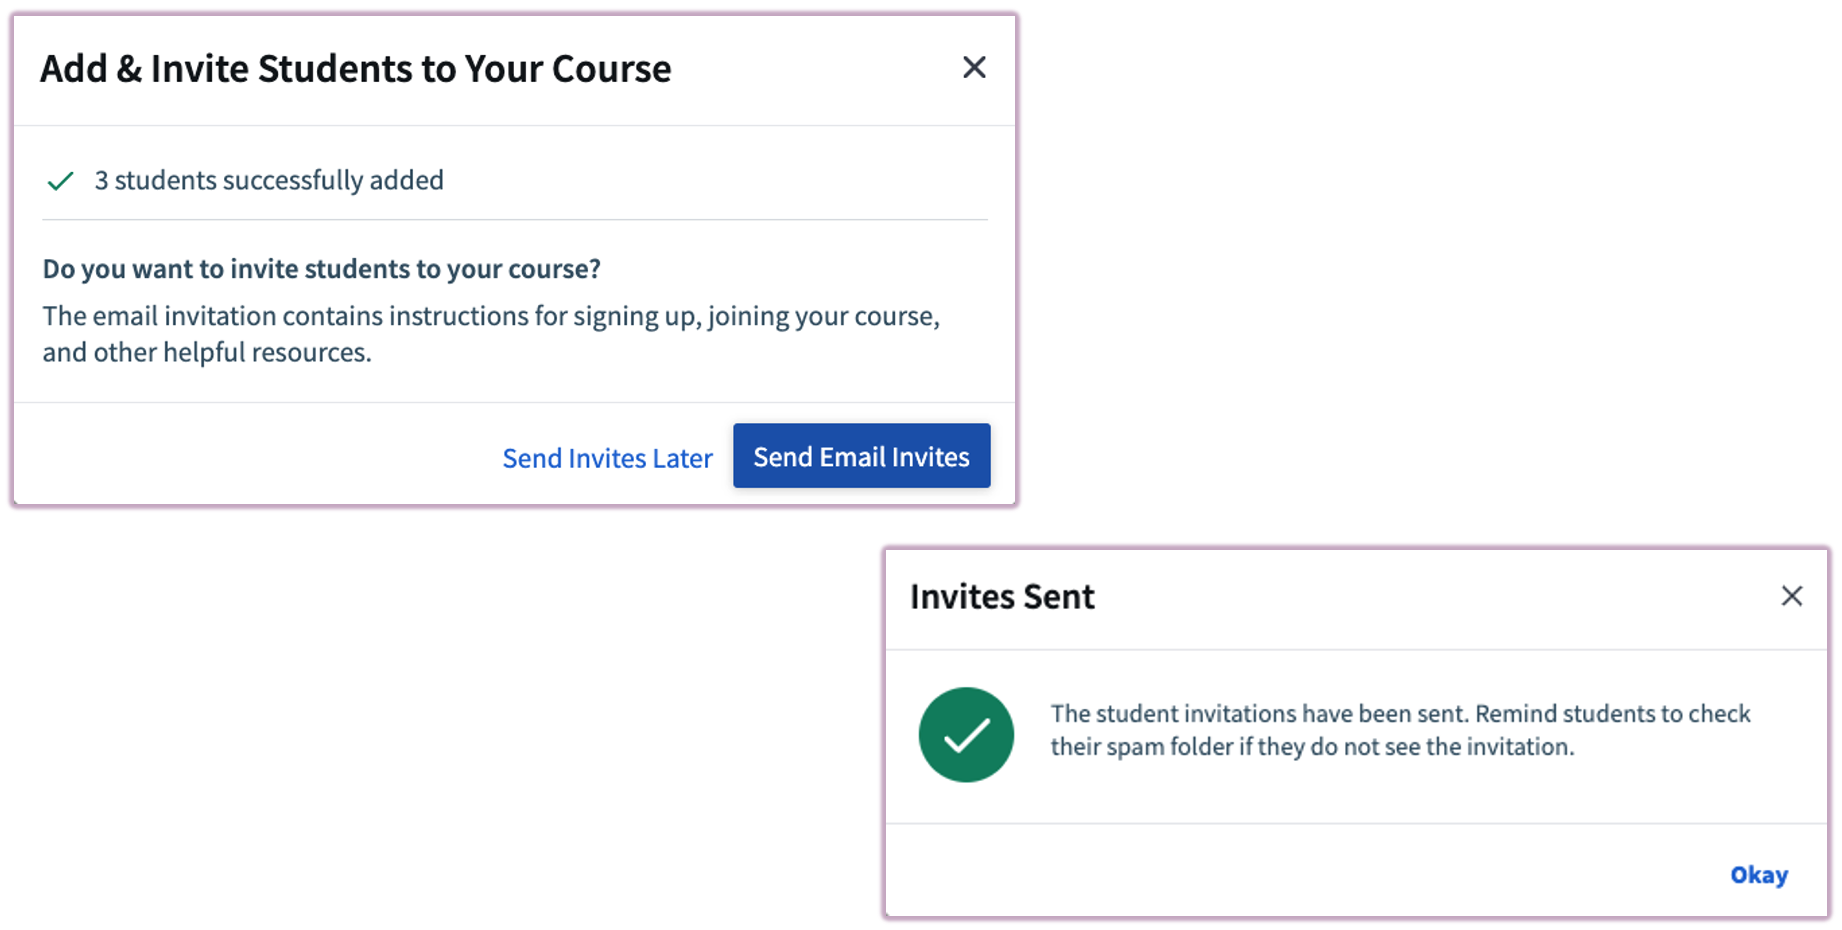 Image: Add & Invite Students Prompt
A course invite preview window will display how the email will appear to students prior to sending.
 Image: Send invite confirmation
Importing a .xlsx or .csv file
To invite students via a file upload, navigate to the Students tab, select Add Students, and then select Import from file.
Upload your roster file. If the file contains a header row, check Data contains header row. Use the drop-down menus to map your file columns to Top Hat fields (typically "Email" and "Student ID") and select Import Data.
Note: If you include a Student ID in the import, it may be overwritten if the student provides a different ID when creating their account.
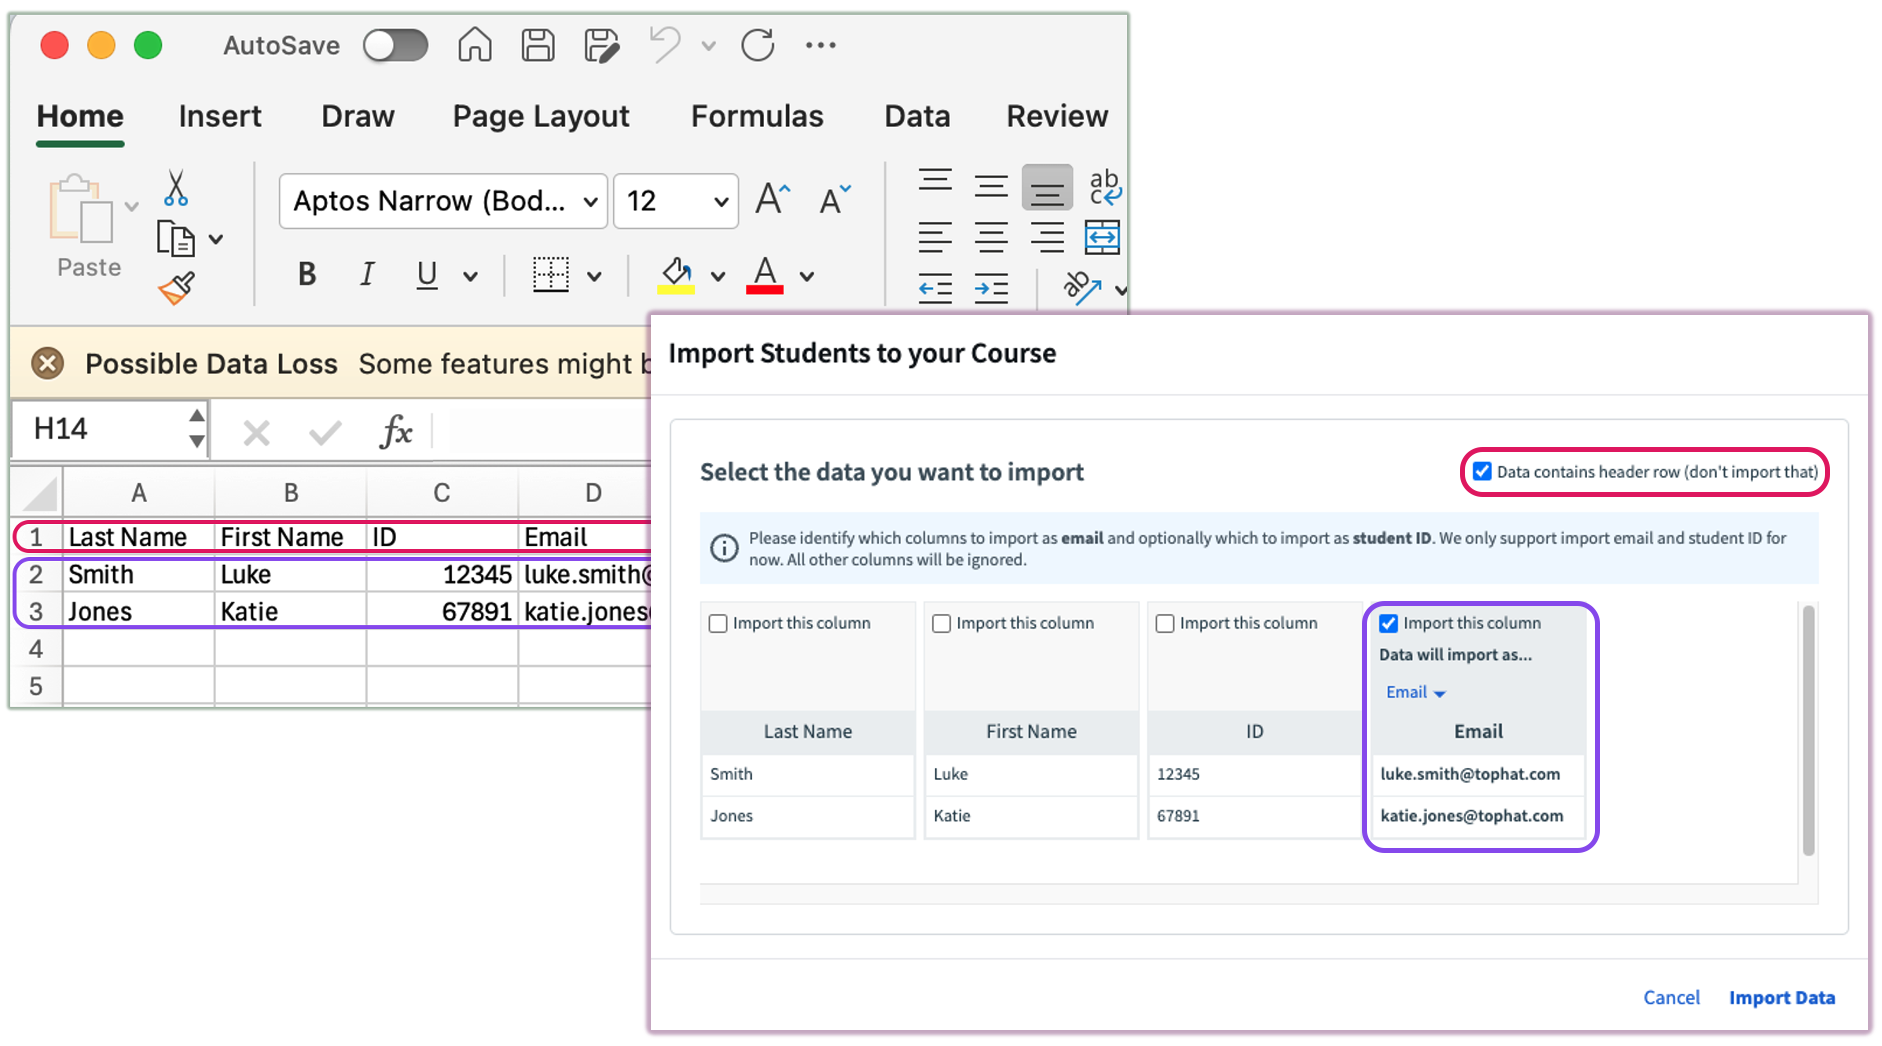 Image: Spreadsheet with roster details and Import Roster Pop-Up
Roster Import (via LMS Roster Sync)
LTI 1.3 Course Connections
For LTI 1.3 integrations, the roster syncs automatically after the initial connection and updates during a nightly sync.
Note: If a manual sync is run immediately after the initial connection, the roster may appear empty until students complete the enrollment process.
Advanced Course Connections
For Advanced connections, only the initial sync is automatic. Subsequent updates require a manual sync:
- Open Course Settings.
- Navigate to the LMS Sync tab.
- Select Roster Sync Only and click Run LMS Sync.
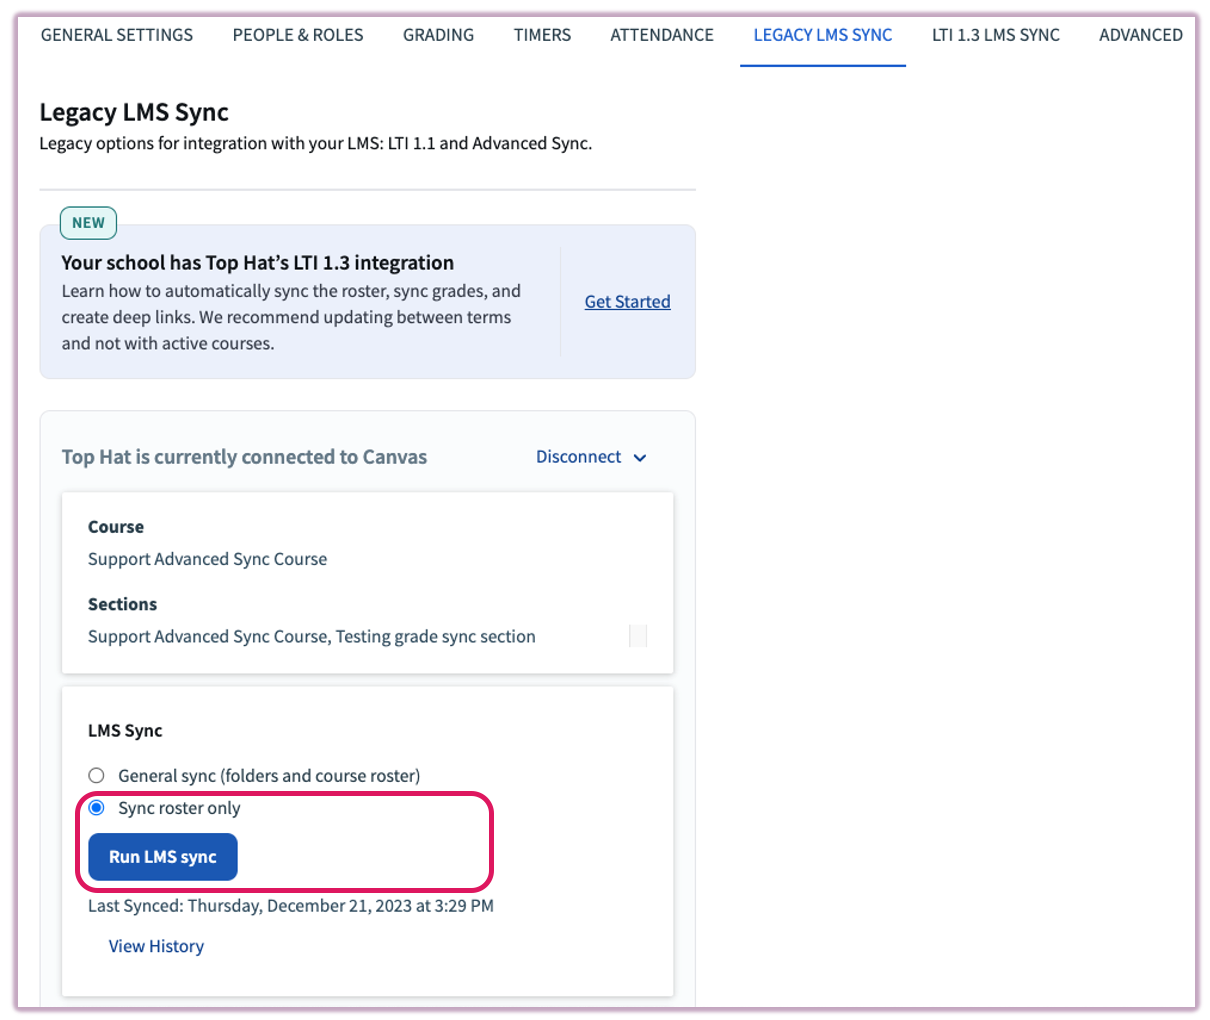 Image: Sync Roster in LMS Sync Settings Menu
Enrollment Status and Reminders
Enrollment status is displayed on the right side of the student list in the Students tab.
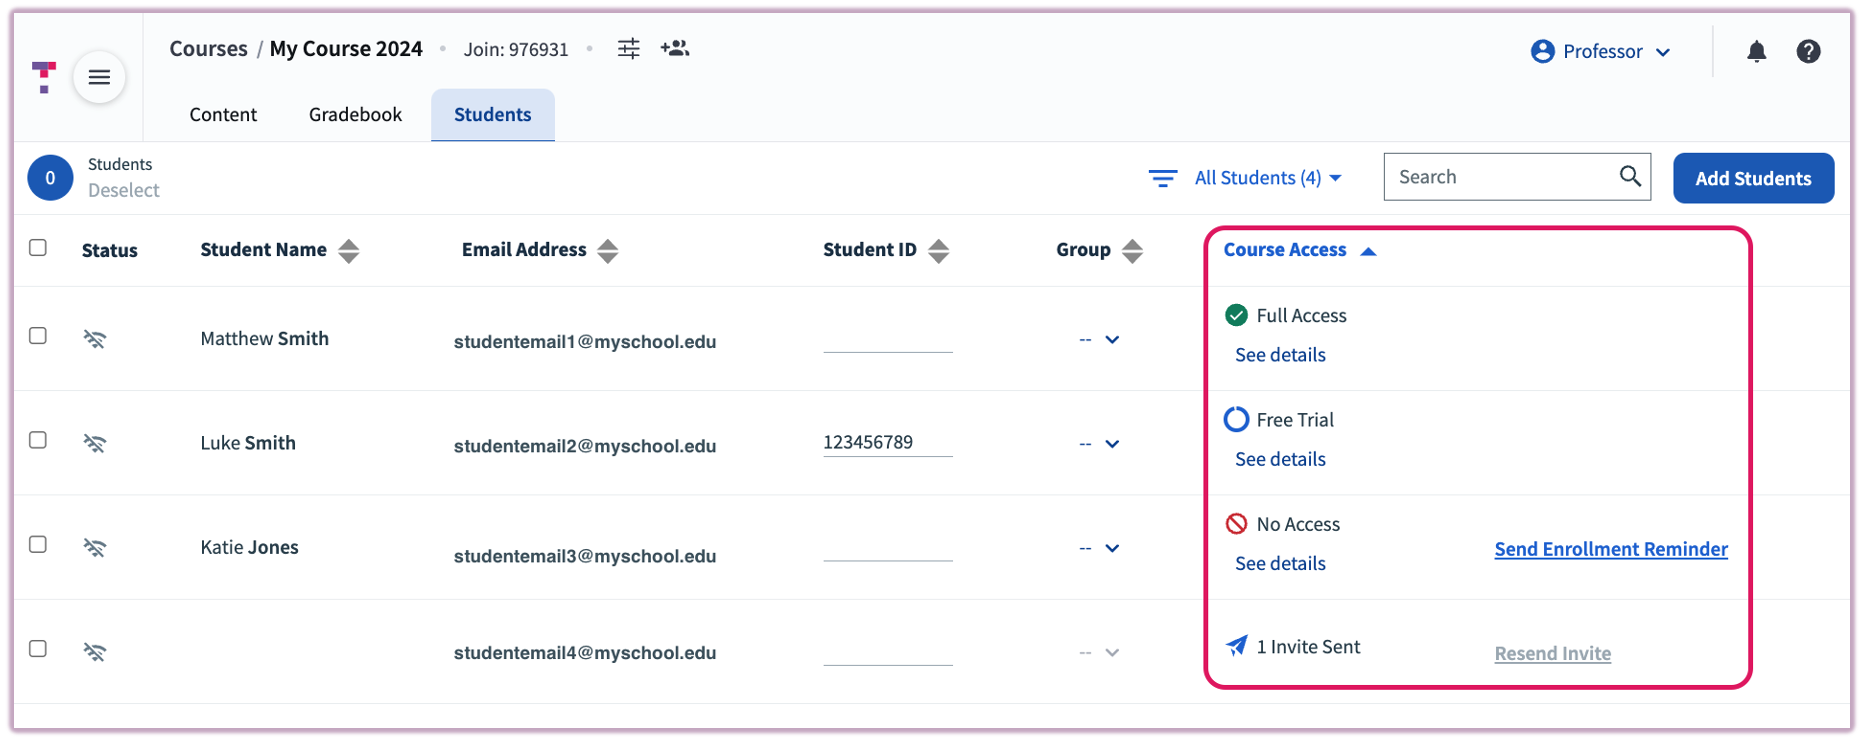 Image: Student Course Access Details
- Full Access
- The student has met all requirements and can access the course.
- No Access
- The student no longer meets requirements (e.g., an expired subscription). No grades are lost when a student reaches this status.
- Free Trial
- The student is on a 14-day trial. They cannot access "My Library" content until a full purchase is made.
- Invite Sent
- The invitation email has been sent to the student.
- Not Invited
- The student is in the manager, but the invitation email has not yet been triggered.
Use the Course Access dropdown to filter students by these statuses. To send a reminder, select one or more students and click Resend Invite.
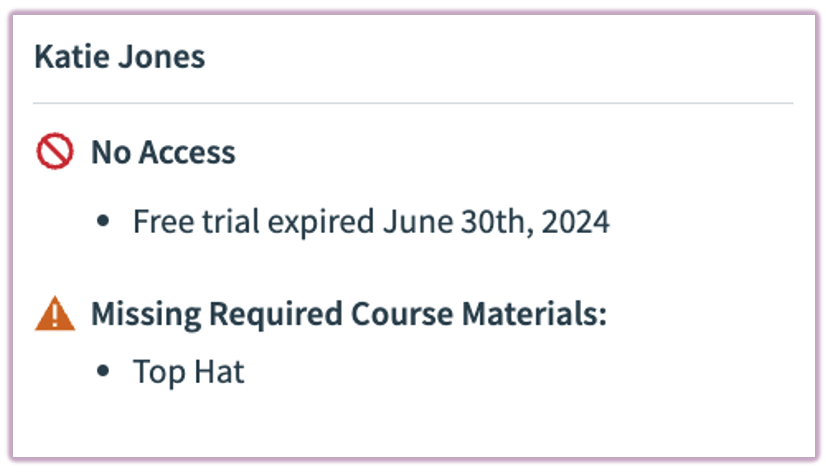 Image: Student Course Access Details
Managing Students
Updating Student IDs
Students can edit their ID in their Account Settings. If you need to fix an ID manually, click the ID field in the Student Manager. The student will be notified of any change you make.
Students Using Personal Email Addresses
Personal emails can cause LMS grade sync issues. Instruct students to update their email to their school address in their Account Settings.
Suggested Email Template
Hello [Student Name],
I've noticed you signed up for Top Hat using a personal email address. For your grades to be recorded correctly, you must update your Top Hat account to use your school email address. You can change this in your Account Settings. Please notify me once this is updated.
Temporary Students
If a student texts a response without a registered phone number, they appear as temporary. Instruct them to add their phone number to their Account Settings to merge these responses with their official account.
Students with Multiple Accounts
- No grades on personal account: Delete the personal account; student uses school email.
- Grades only on personal account: Delete the school account; student changes personal account email to school email in settings.
- Grades on both: Student must contact Top Hat Support to request an account merge.
Removing Students
To remove a student, check the box next to their name and click the Remove button in the header.
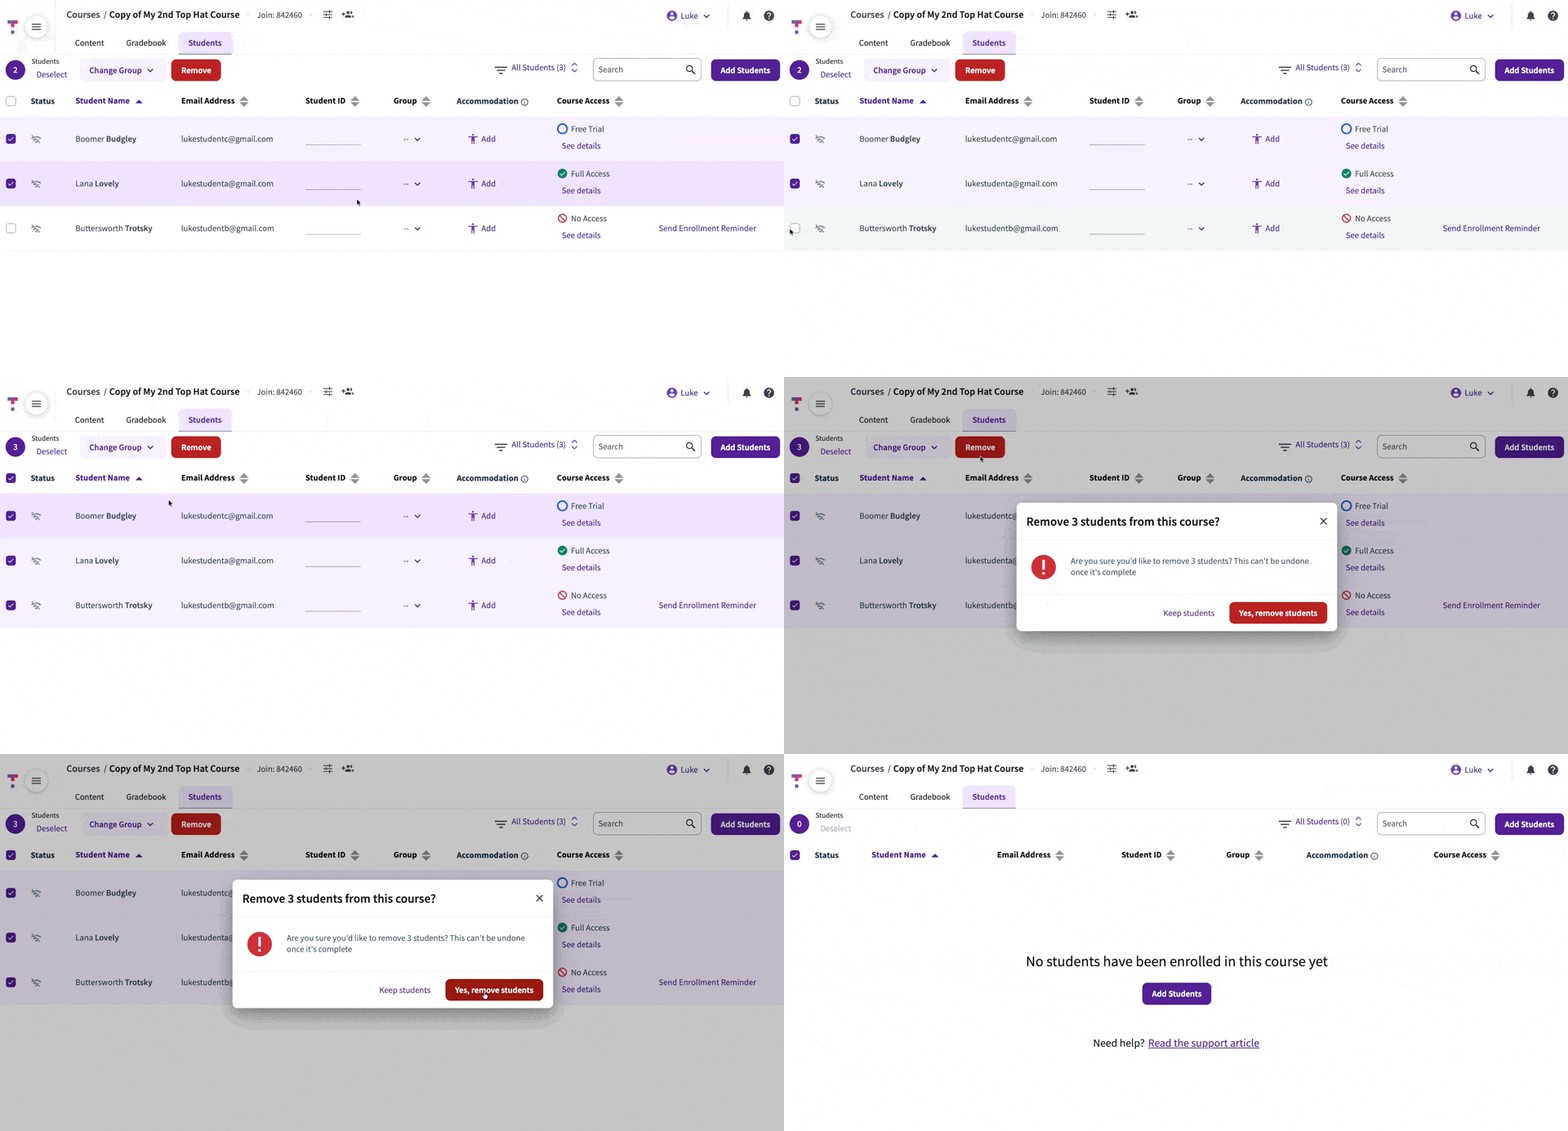 Image: Remove Student Option in the Students Manager Tab