Body
This guide shows you how to use the Visual and Interactive Elements Toolbar in Top Hat Pages to create dynamic course content. Learn how to add Top Hat questions, import existing questions, generate AI-powered questions, and embed rich media like videos, images, iFrames, and discussions.
With tools to insert tables, enable accessibility features, and integrate external content, the toolbar empowers educators to build engaging and interactive learning experiences—all directly within a Top Hat Page.
Table of Contents
- Accessing the toolbar
- Create a Question
- Import Existing Question
- AI-Powered Question
- Add a Video
- To autoplay a YouTube video from a specified time:
- Add an Image
- Resize Options
- Add a Discussion
- Add a Table
- Embed an iFrame
- Requirements for Embedding
- Embed Codes & Sizing
Accessing the toolbar
To begin, move your mouse over the space in which you wish to slot in your visual and interactive elements. A blue plus (+) button will appear; clicking it reveals the interactive toolbar.
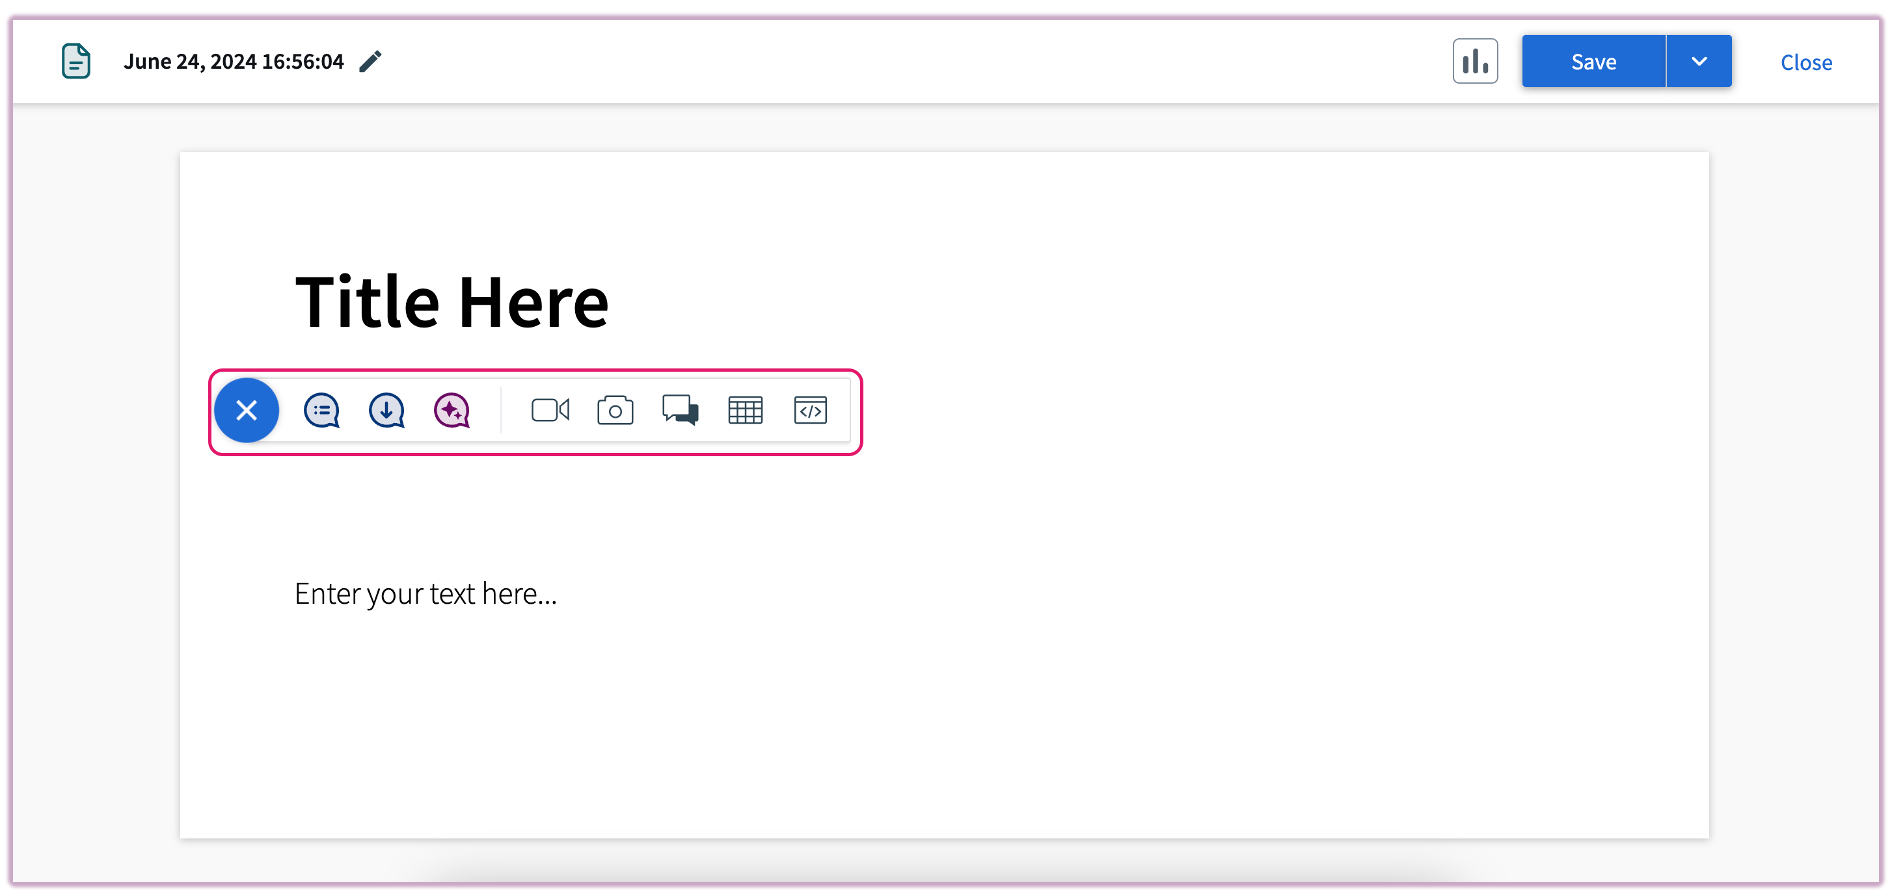 Image: The interactive elements toolbar in a Top Hat Page
Create Question
Selecting the question icon (first icon on the left) allows you to author a new Top Hat question directly within your Pages document.
 Image: The interactive elements toolbar with the question option highlighted
The standard Top Hat question creation dialog will appear. Once saved, the question is embedded in the flow of the Page.
Importing Existing Questions Into Your Page
The import function allows you to search for and embed questions already existing in your Top Hat content tree.
 Image: The interactive elements toolbar with the import option highlighted
Clicking the import icon reveals a dialog box where you can preview questions. You can rearrange their order by dragging and dropping them on the right-hand side of the menu.
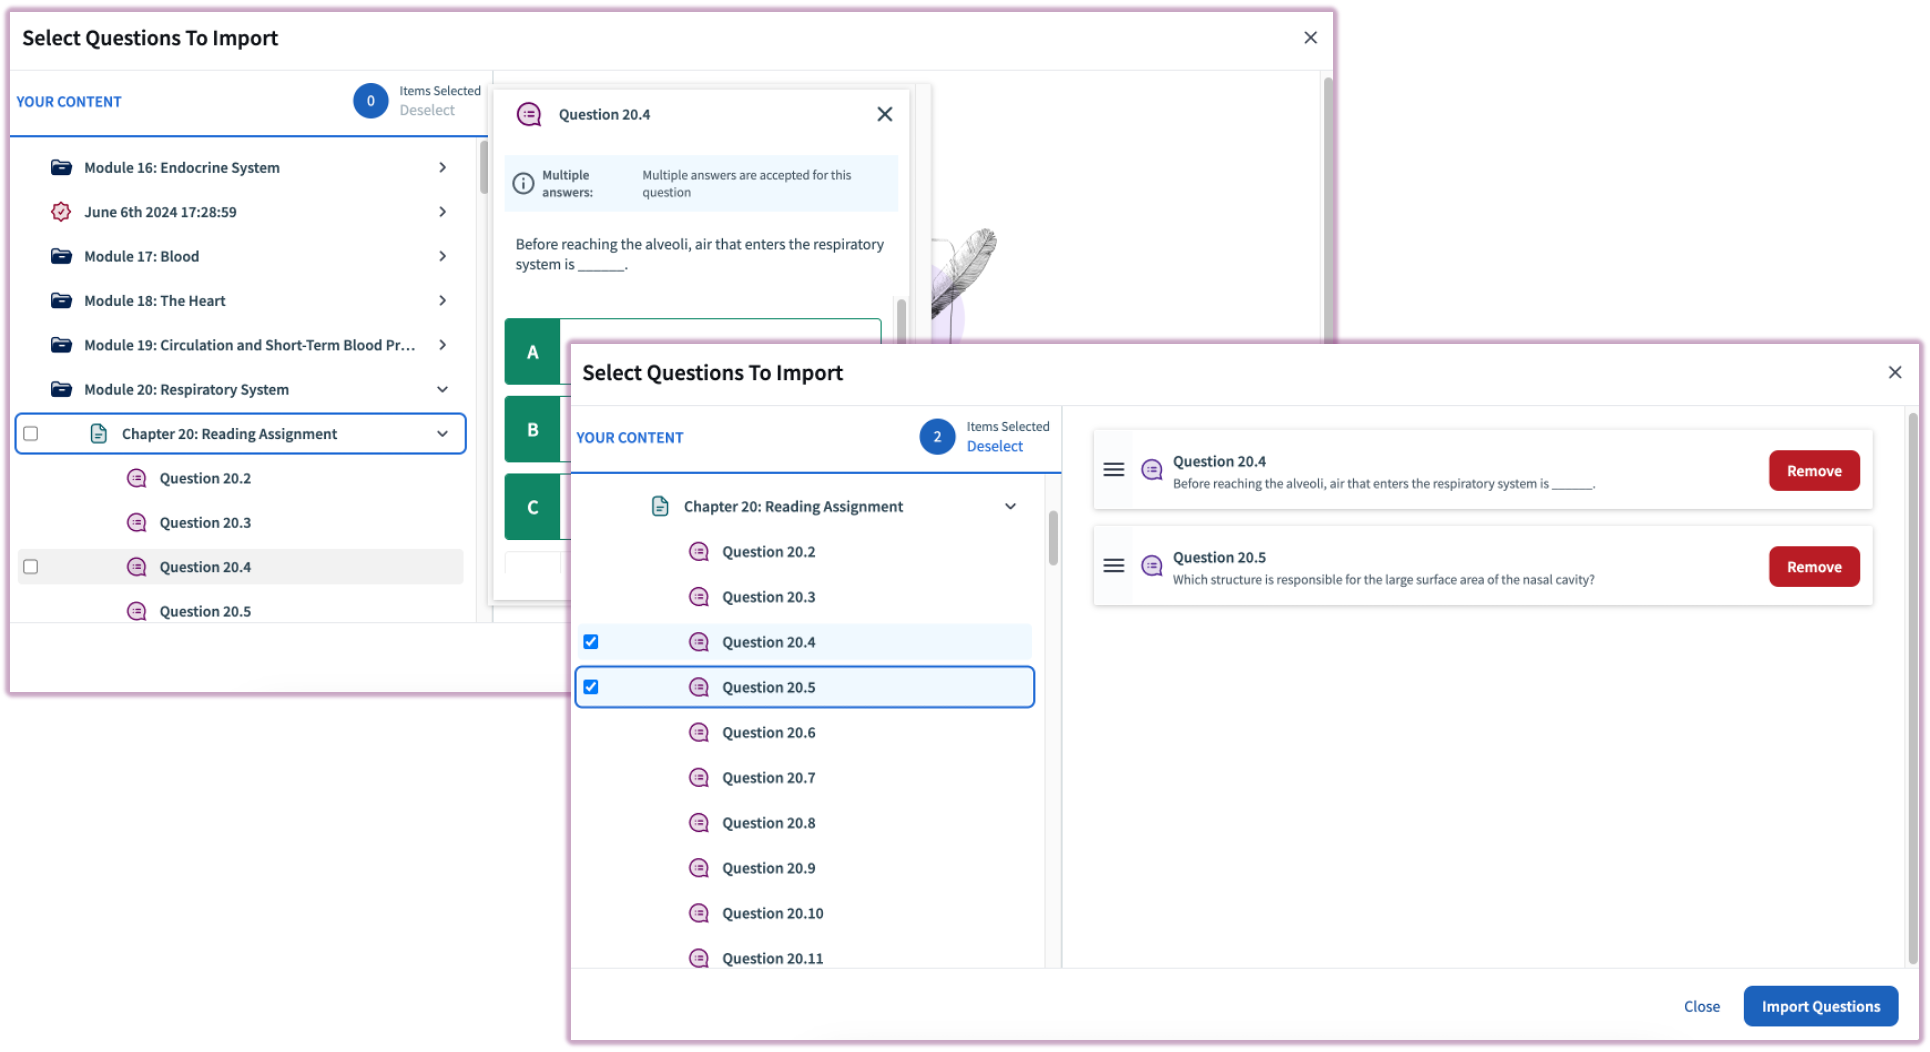 Image: Import Existing Questions Menu
Limitations: Grade weights revert to 0.5 correctness / 0.5 participation upon import. Additionally, images attached to questions are removed and must be re-added within the Page editor.
AI-Powered Question
ACE AI-Powered Questions analyze the text immediately preceding the insertion point to generate relevant assessment items automatically.
 Image: Toolbar with the Generate AI Question option highlighted
Insert Video
To embed YouTube or Vimeo videos, click the video camera icon and paste the URL. Extract the direct link from the src= attribute if using an embed code.
 Image: Toolbar with the insert video option highlighted
To autoplay a YouTube video from a specified time:
- View the video on YouTube and pause it at the desired starting point.
- Click SHARE and check the box for Start at.
- Copy the generated link and paste it into the Top Hat video field.
 Image: YouTube timestamp sharing options
Insert Image
Clicking the picture icon allows you to search your computer for an image to embed within your Pages document.
 Image: The interactive elements toolbar with the insert image icon highlighted
Once embedded, clicking on the image provides the picture positioning menu where you can customize the layout:
- Default: Centered image.
- Full Width: Expands to the full document margins.
- Align Left: Wraps text to the right of the image.
- Align Right: Wraps text to the left of the image.
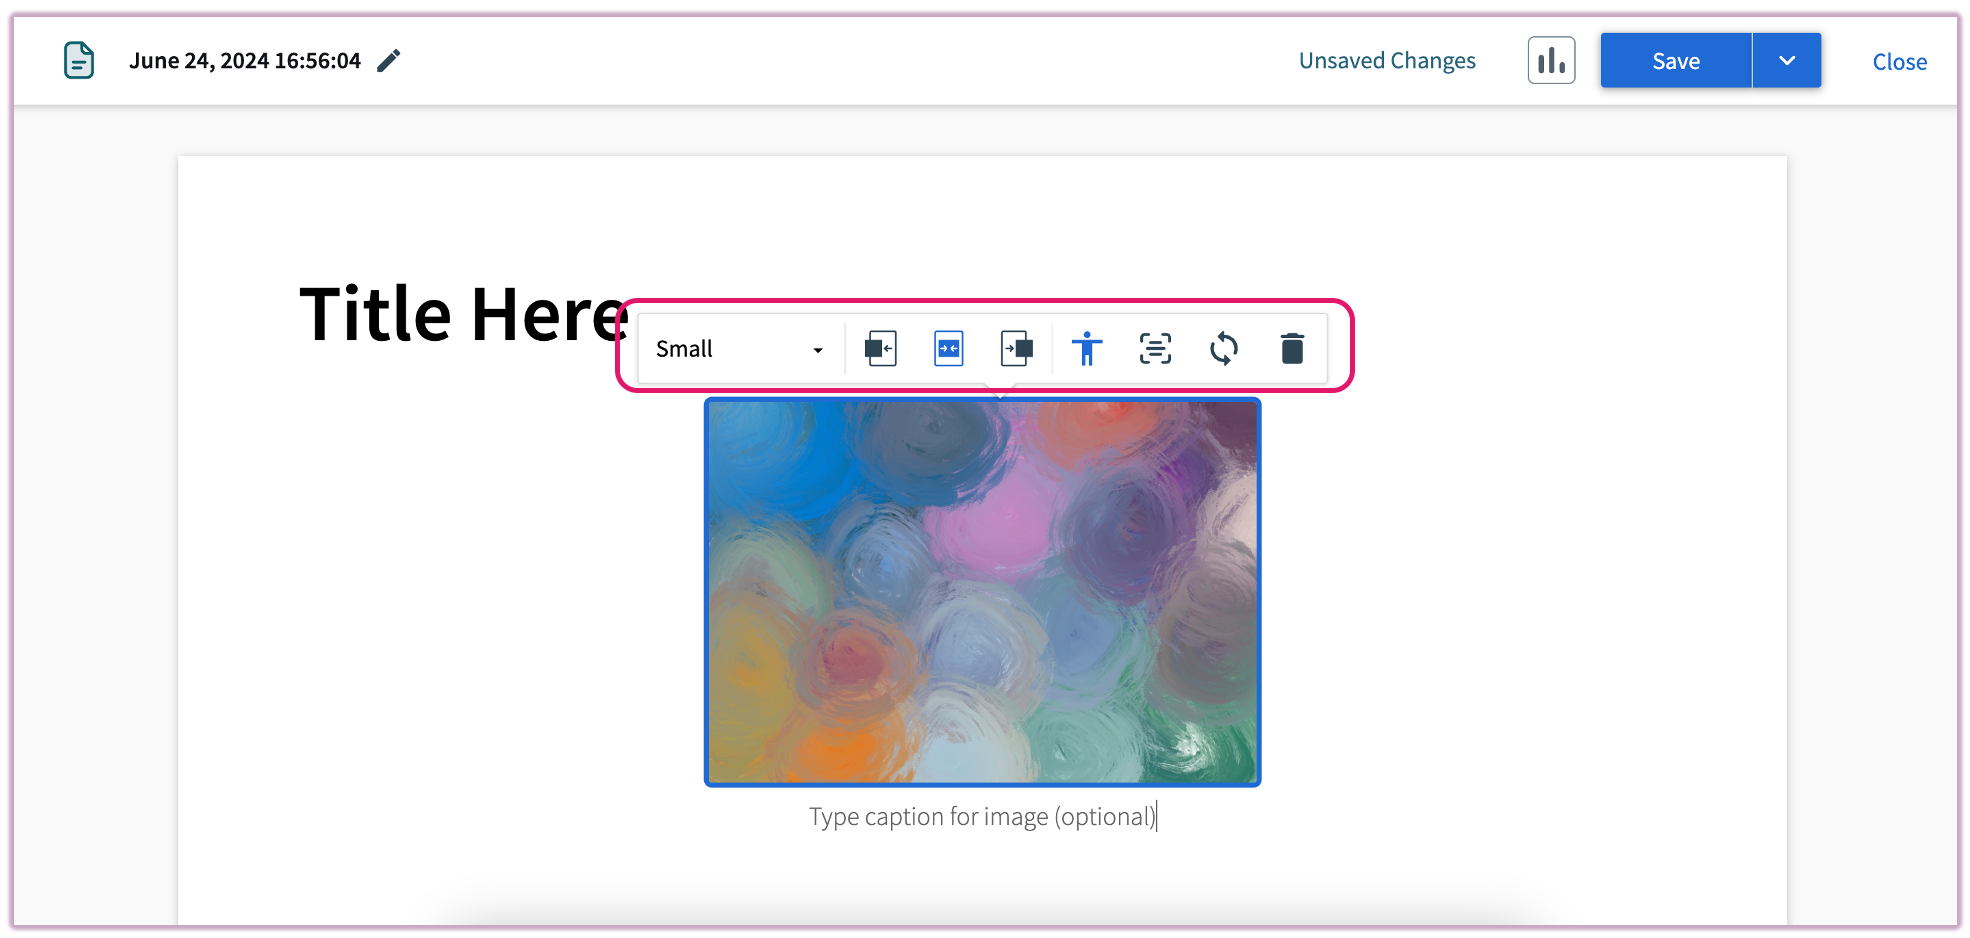 Image: Image formatting toolbar within a Top Hat Page
Accessibility: Click the Alternative Text icon (second from the right) to add a description for students using screen readers. This ensures your content is inclusive and WCAG compliant.
You can also add a caption to accompany your image, rotate the file, or delete it using the formatting toolbar.
Resize Options
From the image formatting toolbar, you can select specific width percentages relative to the Page:
- Very Small: 20% of Page width
- Small: 40% of Page width
- Medium: 60% of Page width
- Large: 80% of Page width
- Full Width: 100% of Page width
- Original Size: Restores image to its uploaded dimensions
 Live image: Example of text wrapping around a left-aligned, small image
Add a Discussion
The Discussion feature allows you to embed an asynchronous dialogue space directly within your Top Hat Pages document. This is ideal for fostering peer-to-peer interaction or providing a space for private reflections as students engage with the text.
 Image: Locating the Discussion icon on the interactive toolbar
The discussion building framework mirrors the setup for in-class discussions, but the activity is completed within the flow of the Page. You can customize the visibility settings based on your pedagogical goals:
- Private Reflection (Short Answer Style): If you want a space for students to respond to a prompt as they read without seeing peer answers, set visibility to Only by Educator. Students will only see their own submission, while you see the full class list.
- Peer Engagement: If you want to facilitate a collaborative dialogue, set visibility to By Everyone. This allows students to view and respond to their classmates' posts.
Once you finish creating your discussion, it will appear embedded in the Page, ready for students to interact with when the Page is assigned.
Insert Table
Tables in Pages default to 3x3. Click the controls to the left of rows or above columns to add, delete, or format cells.
 Image: Toolbar with the insert table icon highlighted
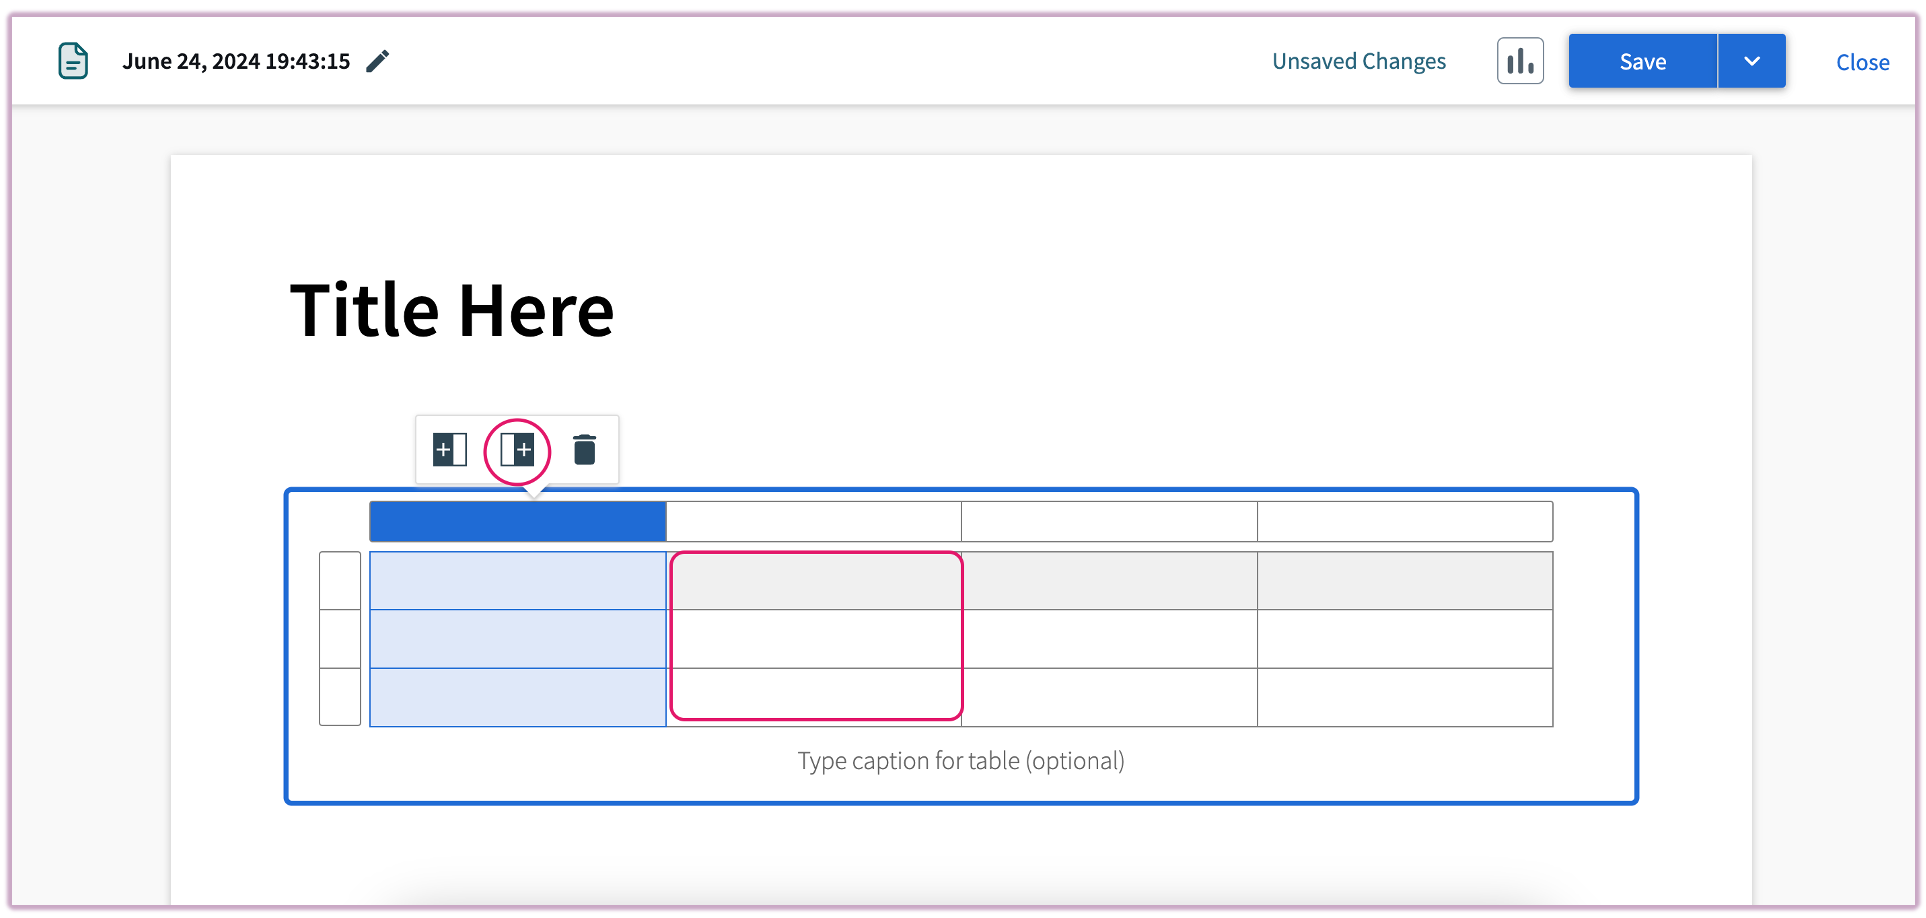 Screenshot: Table editing controls in Pages
Embed iFrame
Clicking on the iframe symbol allows you to embed external content by pasting a URL directly into the provided field. You can use iframes to integrate videos, simulations, slide presentations, websites, and podcasts directly into your Top Hat Page.
To add an iframe, click the blue plus (+) sign in the left margin of the Page editor to open the interactive toolbar. Select the iframe icon (the globe icon furthest to the right) and paste your secure link into the input field. Click Insert to embed the content.
 Image: Locating the iFrame icon on the interactive toolbar
Requirements for Embedding
- Secure server: The URL must begin with
https://. Content from non-secure http:// sites cannot be embedded due to browser security protocols.
- Iframe permissions: Some websites use "X-Frame-Options" to restrict embedding. If an error appears after inserting, the host site likely prohibits iframes. In these cases, use the Hyperlink tool to link to the content instead.
- Copyright compliance: Ensure embedded content is public domain, copyright-cleared, or falls under Educational Fair Use guidelines according to your institutional policy.
Embed Codes & Sizing
Many platforms provide an embed code containing an <iframe> tag. You must extract only the URL from the src= attribute. For example:
<iframe src="https://www.youtube.com/embed/mkP6AIjh7zg" ... ></iframe>
Important: Only paste the URL found inside the quotes of the src attribute. Do not paste the full HTML tag into the Top Hat field.
Iframes in Top Hat are fixed at 750px x 500px on desktop and automatically scale for mobile devices. If you are embedding a customizable simulation, setting its dimensions to these values will prevent internal scroll bars and provide the best student experience.
Sizing: iFrames in Top Hat are fixed at 750px x 500px on desktop. Content will scale for mobile devices.