Body
You can use the Single Profile Widget to showcase your photo, share social media details, and write other important biographical information.
 |
Important: The Single Profile Widget is a widget included with the Homepage Widget Expansion Pack. This widget is intended for instructors who may not otherwise have the permissions to modify course homepages. Editors can change the content of each field from the homepage itself; fields that are empty do not display in the widget.
|
Configure the Single Profile Widget
You can edit the Single Profile Widget to change profile information, bio, social media credentials, background colors, and more.
|
Important: To use this widget, you must ask your Administrator to assign you the Upload Files > See the File Listing and Manage Files > Upload Files permissions at the Org Unit level. Refer to Manage Files permissions for details. Also, refer to Add widgets to your homepage.
|
To configure the Single Profile Widget
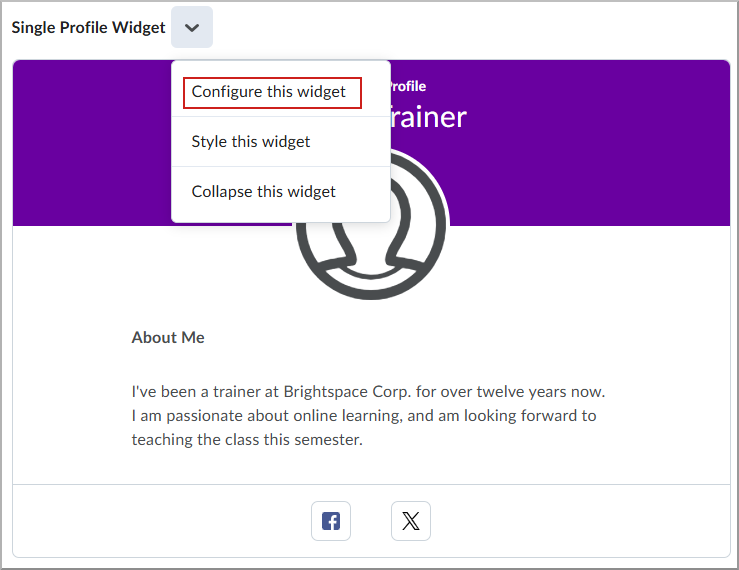
- From your course homepage, locate the Single Profile Widget.
- Open the widget Actions menu (arrow) and select Configure this widget.
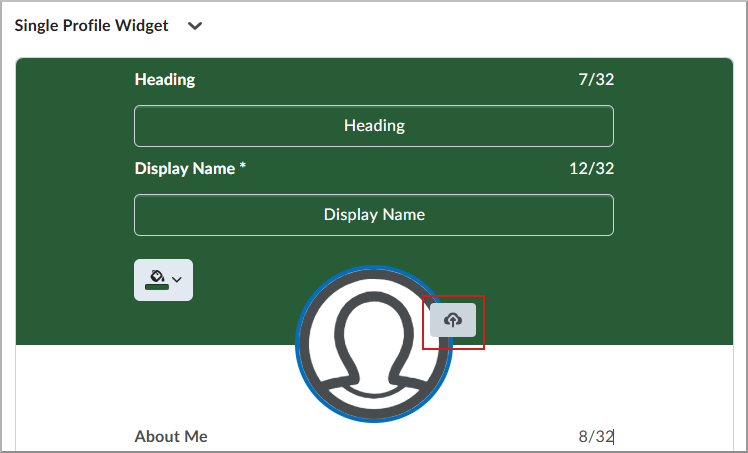
- In the configuration panel, complete the following fields:
- Heading: Title displayed at the top of the widget (for example, Instructor profile).
- Display Name: Your name as you want it to appear.
- About Me: Section heading for your bio (for example, About me).
- Biography: A short introduction you want to share with learners.
- Facebook (optional): Link to your profile page.
- X (optional): Link to your profile page.
- LinkedIn (optional): Link to your profile page.
- Instagram (optional): Link to your profile page.
- Email (optional): Link to your profile page.
Note: Character limits are indicated by the number / number over the text field (for example, 8/32) and automatically update as you type.
- To change your profile image, select the Upload image icon to add a new image, or select Delete image to remove the current image.
- To change the background color of the widget, click the Change background color icon (paint bucket) and do the following:
- From the Select a Color dialog, click to select a color.
- Click and drag the slider to adjust the brightness of the color. This is indicated by a percentage value. Alternatively, enter a HEX color code.
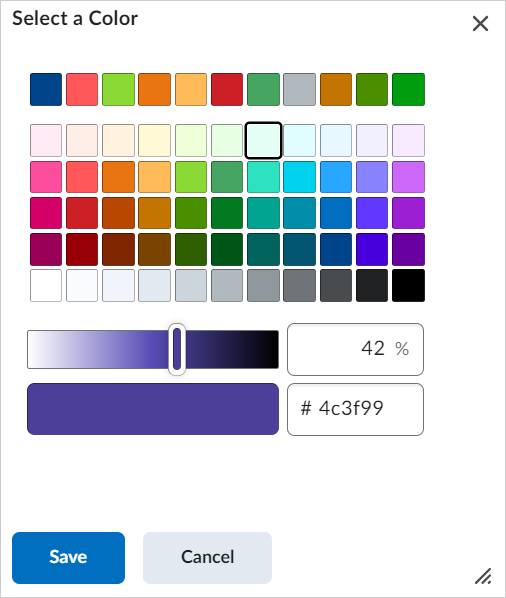
- Click Save to change the color.
-
To publish your updates, click Save at the bottom of the configuration panel.
Your Single Profile widget updates immediately on the homepage.
 |
Note: If a Single Profile widget has no available data, you see an illustration and a clear message that no data is available yet. |